From Scratch Farmstead
  • About
  • Homestead How-to’s
    • Family Milk Cow
    • Gardening
    • Chickens
    • Small Scale Farming
    • Buying A Homestead
    • Homestead Living
  • Nourishing Recipes
    • Breakfast
    • Main Course
    • Sides
    • Dessert
    • Sauces & Condiments
    • Home Dairy
  • Natural Living
Author

From Scratch Farmstead

From Scratch Farmstead

our simple cow milking process
Family Milk CowHomestead How-to's

Simple Cow Milking Process For Beginners

by From Scratch Farmstead June 26, 2022

While hand milking a cow may seem intimidating at first, after a few attempts it becomes second nature. We have found the cow milking process to be an enjoyable part of our daily routine and love the nourishment it provides to our family.

Our Milk Cow Story

We are suburban kids through and through. Until we purchased our milk cow a few years ago, neither of us had ever milked a thing in our lives. However, we had been enjoying the benefits of consuming raw milk as a staple in our diet for a number of years.

We enjoyed visiting farms, talking to farmers, learning about the process, and dreamed of one day maybe having the opportunity to do it for ourselves.

When we moved to a rural area in Wisconsin, right in the heart of dairy country, we were presented with the opportunity to purchase a jersey milk cow. She had been the family milk cow of a family we were acquainted with and they no longer had the time to keep up with milking.

family milk cow next to a big red barn

This was not something we were seeking but it fell in our lap. Looking back, we are so glad we said “yes” to that opportunity. Even though at the time we had no experience and very little knowledge with keeping a cow, let alone milking a family milk cow.

We have learned a lot in the last couple of years. Owning a family milk cow has become something we are quite passionate about. You can read more about our experiences in our Owning A Family Milk Cow Basics and Breaking Down the Cost of a Family Milk Cow posts.

Hand Milking vs. Machine Milking

When we purchased our family milk cow, Thimble, this was one of the biggest questions we had and decisions to make. 

Machine milking will make the milking process itself quicker and will ensure that she is fully milked out. However, it does require more of an upfront cost, cleaning and maintenance of the machine, and removes some of the unique relational elements that hand milking brings.

milking family milk cow by hand

Hand milking requires no special equipment to get going besides your milk bucket and there are no costs for upkeep or maintenance. But, the process itself can be a bit more arduous.

Ultimately, with only having one cow that we were milking each day, we decided to hand milk our cow. If we ever had more cows in the future, a milking machine is something we would reconsider. But for now, hand milking has been a good fit for our situation.

The Cow Milking Process

Even though we were inexperienced milkers when we began our journey, milking is thankfully a simple process and within a few weeks we were milking with confidence.

 Equipment Needed

The equipment needed when hand milking a cow is relatively basic and minimal. Following is a list of all of the equipment we use as a part of our milking routine:

milk bucket and pail for milking
  • Halter
  • Milk Pail (9 Qt.)
  • Milk Bucket with Lid (10 Qt.)
  • Bucket for soapy water/This becomes your milking stool to sit on
  • Rags for cleaning teats
  • 8 Cup Pyrex Measuring Cup
  • Mesh Strainer
  • Clean Dish Towel for straining
  • Milk Bottles (we prefer ½ gallon wide mouth jars)

Step One:

Fill bucket with hot soapy water.

Step Two:

Carry equipment to where you are planning to milk.

hand milking cow without a stanchion

Step Three:

Using a halter, bring your milk cow to where you would like to milk her. While many use a stanchion, we actually prefer to just tie her to a fence post and milk her right outside in the pasture.

leading family milk cow with a halter

Step Four:

Clean her teats. We do this by putting a clean rag into our bucket with hot soapy water and cleaning each of her teats of any dirt or debris. Thankfully, when cows are on pasture this is normally pretty easy. But, from time to time (especially in the winter), she’ll lay right in a pile of fresh manure and require extra cleaning.

cleaning cows teats before milking

Step Five:

Stripping. This means stripping the cow or squirting out the first few squirts of milk from each teat. This allows you to observe the color of the milk to make sure everything looks good. Discolored milk can be a sign of potential infection. Also, stripping eliminates the extra bacteria present in the first few squirts of milk.

Step Six:

Milking. Once she is cleaned and stripped, she is ready to be milked. We dump out the bucket we had the soapy water in and use that as a stool. Then, we place the milk pail underneath her and begin milking. It normally takes me around 20 minutes to milk out all 4 teats.

milking cow by hand into bucket

I do like to have two milks pails for the milking process. One that I milk into and the other with a lid that I pour the milk into 3-4 times throughout milking. The second bucket is helpful for two reasons.

  1. If she happens to kick the bucket, by pouring the milk every so often into the other milk pail with the lid, not all of the milk would be lost.
  2. Pouring the milk into a pail with a lid helps if it is raining or snowing to protect the milk.

Step Seven:

Straining. After you have collected all that milk, it’s time to strain. Sometimes a bit of dirt, debris or a fly or two can find their way into your milk during milking. While there are fancy strainers for this process, we just use a basic dish cloth and strainer method.

strainer for fresh cows milk
towel in strainer for straining milk

Place a clean dishcloth laid out over a mesh strainer. Put the mesh strainer in an 8 cup pyrex measuring cup or something similar. Pour the milk into the strainer. The towel will strain out any unwanted particles and the milk will flow through.

straining raw milk from cow

Step Eight:

Pour the milk into jars for storage and refrigerate immediately. You want to make sure the milk is properly chilled right away. We normally just put the milk into the back, most cold part of our fridge. Alternatively, you could chill in the freezer for an hour or two and then transfer to the fridge. Set a timer so you don’t forget to remove milk from freezer (speaking from experience!).

fresh cows milk in jars in fridge

Some of the above links are affiliate links. This means we earn a small commission on qualifying purchases at no cost to you. We are so appreciative of your support!

So that’s it. While milking a cow may sound intimidating, don’t let it scare you. We have found our family milk cow to be one of the most gentle, sweet creatures we have encountered and milking has really become a highlight to our days.

Want to learn more about having a family milk cow? Check out our posts: 

  • Owning A Family Milk Cow Basics
  • Breaking Down the Cost of a Family Milk Cow
  • What To Know About Rotational Grazing on a Small Scale
  • How Many Cows Per Acre on a Small Farm
June 26, 2022 0 comment
0 FacebookTwitterPinterestEmail
freezing fresh picked strawberries
Natural Living

7 Tips to Save Money on Organic Groceries

by From Scratch Farmstead June 23, 2022

Given our modern systems, cheap organic food sounds like an oxymoron. With prices skyrocketing, this notion seems near impossible. But I beg to differ. We have been purchasing high quality, locally grown, organic food for a number of years while sticking to a very meager budget. I will share all of our tips and tricks on how you can save money on healthy, organic groceries.

Our Background on Saving Money for Groceries

When we were newly married, we were both working as missionaries for our church and made a bare bones salary. This small income, forced us to learn the art of making a budget and sticking to it. We became passionate about this idea of spending less while still feeling like we were living richly. In fact, we’ve lived off of around $30,000 for the last several years and write about how in our post – Setting Up A Homestead Budget For One Small Income.

In the first few years of our marriage, I learned the art of couponing and became an expert. I could fill a whole grocery cart for pennies. It was exhilarating. But, most of the food I was purchasing (or really being handed for next to nothing) was processed and packaged junk food. 

When we began to experience health challenges, we decided to remove processed food from our diet and my couponing days were done. However, I learned a lot of principles in that season on how to stretch our dollars, and especially our food dollars, that were applicable when we began our journey into eating high quality, locally grown, organic food.

slow cooking whole chicken

7 Strategies to Save Money on Organic Groceries

1. Clean out your pantry and fridge before shopping

Wasted food means wasted dollars. My philosophy is to clean out our fridge/freezer/pantry as much as possible before stocking up again. It really is amazing how many delicious, creative meals you can come up with when you are forced to use the few items left in your fridge or pantry. Some of our favorite meals have been created that way. The best part is, no food is wasted.

I’ve found that as soon as you stock up on new groceries, all of the sudden anything that had been there is pushed to the back, forgotten, and left to mold or expire in the back of your fridge. By eating everything you already have first you are saving money, not wasting food. And you get to partake in your own Chopped challenge! Win, win, win!

cheesy potato soup

Clearing out your fridge and pantry also allows you to minimize trips to the store. Sales ads want to bring you to the store for a reason. They know many purchases happen by impulse and all they need are customers in the aisles. Reducing those opportunities is a great way to save on organic groceries. Chances are, you will purchase around the same number of essential items whether you go to the store more or less often. So, going less will limit the non-essential purchases.

2. Shop for what’s the best price instead of an exact item

This is what I like to refer to as a flexible meal plan or grocery list. When I go to the store, I never have an exact list. Instead I will simply write “fruits and vegetables.” Then, I shop based on what items look the best and are the best price. From there, I make my meal plan after I’ve purchased the items at the best prices.

If you are trying to make a certain recipe, you can still implement this strategy. Maybe a recipe calls for sweet potatoes but sweet potatoes are super expensive. But you notice organic carrots or butternut squash are on sale. Instead of purchasing sweet potatoes for the recipe, I’d swap it for carrots to create a similar recipe while saving money. 

3. Eat nose to tail

While eating “nose to tail” is becoming more and more trendy, it’s also the most economical, healthful, and delicious way to eat. By only consuming the same 5-6 cuts of meat (i.e. chicken breasts, ground beef, steaks, ham and bacon) you are missing out on so many valuable nutrients that were the prized cuts of meat for our ancestors.

One of my favorite ways to do this is to purchase a whole chicken instead of the individual parts. Every week I slow cook a whole chicken with water and am left with shredded chicken for quick and easy meals and a few quarts of delicious, gelatinous broth. 

Organ meats are another great way to stock up on meat that is  inexpensive and the most nutritious. If you are not a fan of cooking up the organ meats as is, there are easy ways to sneak them in without anyone knowing. In our posts, beef heart burgers and How Eating Liver Changed My Life, we go into detail about how we do this.

closeup beef heart burger with condiments

4. Shop seasonally

Whether or not you are growing the food yourself, I like to think about how people would have eaten prior to the convenience of grocery stores. For example, in the summer when berries are abundant, they would stock up on berries, preserving them any way that could.

Adopt a similar mentality. When berries are abundant, they will be less expensive, taste better, and be at their peak nutrition. This is when we like to stock up by purchasing several flats of strawberries or blueberries locally and freeze them to have all year round. 

picking locally grown strawberries to freeze

When butternut squash and potatoes are in their prime, stock up. The beauty of these is that they are wonderful storage crops. I just cooked up a winter squash in June that we harvested in October of last year. 

Stocking up when things are in season can, 1) greatly reduce your overall grocery bill all year, 2) give you the most nutrient dense food, and 3) support local farms.

5. Avoid prepackaged convenience food

While the allure of ready to go bars, snack packs, and pre-sliced veggies is real, purchasing these items will greatly increase your grocery bill. Prepackaged convenience items are often significantly over priced compared to their single ingredient or unprocessed counterparts.

Instead of purchasing individual cheese slices or single serving yogurt cups, opt for a block of cheese or a quart size container of yogurt. You will not only save money, there is also less waste. Items are processed even more to get them into this convenient, single-use state. This results in a greater likelihood of extra ingredients and processes that you really don’t want to be consuming. Buying items as close to their natural state as possible will save you money and often be more nutritious.

wheel of homemade cheddar cheese

6. Keep it simple

I get it. While all this advice WILL save you money, it will require more time for cooking and preparation on your end. But it is possible to cook real, from scratch meals without them taking a ton of time. 

With every meal, I prioritize having a solid protein and a solid carbohydrate. While this could be a more time-consuming soup or casserole, sometimes it just looks like scrambled eggs and an apple or leftover chicken and some rice. Simple meals make eating real food on a budget way more doable for busy families.

7. Prioritize where your dollars go

When you learn about the realities of the food system – chemicals sprayed, franken ingredients abounding, factory farmed meats – it’s tempting to want to get the crème de la crème of everything. But sometimes, your budget won’t allow for that and you have to do the best you can.

fresh organic lettuce from a farm

While I’d love to buy only organic fruits and veggies, we prioritize buying items listed on the dirty dozen organically. Sometimes, doing the best with what you have and giving yourself grace is the most healthful thing you can do.

How We Save Money Shopping for Organic Groceries

We now grow the majority of food we consume – This post on how we feed our family year round from our homestead shares more. But, it hasn’t always been this way and we used to rely a lot more heavily on farms and grocery stores. 

Even now there are some things we purchase from the grocery store. My favorite grocery stores are the non-chain ethnic grocery stores. I generally find that they have a great produce selection usually with organic options. The costs are often significantly less than the higher end more natural grocery stores. 

We do have a Costco membership that we were gifted and there are a few items that I like to purchase from there – primarily baking and dry goods.

What about you? How do you save money on organic groceries? We would love to hear in the comments below. While making this choice to shop and eat this way certainly isn’t the easiest option, we believe it is completely worth it.

If you’d like to learn more about our budget saving tips, check out our family’s budget philosophy and system and tips for frugal living.

homestead budget on one small income

Setting Up A Homestead Budget For One Small Income

May 22, 2022

julie anns car date

14 Frugal Homestead Ideas

March 27, 2022

June 23, 2022 0 comment
0 FacebookTwitterPinterestEmail
bowl of cornmeal porridge with cinnamon
BreakfastHome DairyNourishing RecipesSides

Simple Cornmeal Porridge

by From Scratch Farmstead June 19, 2022

I am always looking to add quick, easy, and nourishing meals to our family’s breakfast repertoire. This cornmeal porridge has been a recent addition. It is creamy and delicious while being chalked with nutrients to keep bellies satisfied.

Jump To Recipe

On our homestead, we have been growing a field of dent corn alongside a three sister’s garden of corn, beans, and squash, for the last few years. The corn is left to dry for a few weeks. Then we stone grind it in a counter top hand mill. It’s an old-fashioned process that makes us feel strongly connected with Ma Ingalls.

oaxacan green dent corn

Last season we majorly upped our garden game and were left with a solid ten years supply of dent corn. We are big fans of the staple cornbread that we love to make with our cornmeal. But we knew we had to branch out. We’ve been busy exploring all sorts of ways to enjoy this cornmeal. 

This sweetened cornmeal porridge paired with the creamy milk we get from Thimble, our milk cow, and drizzled with maple syrup make the perfect breakfast.

What is Cornmeal Porridge?

Cornmeal porridge is a common breakfast dish in Jamaica and Caribbean countries. Traditionally made by combining finely ground cornmeal with freshly made coconut milk or cow’s milk. Then the porridge is mixed with warming spices like cinnamon and nutmeg, sweetened, and topped with whatever fresh fruit was available.

There are so many delicious variations that can be made of this traditional dish. From making it sweet or savory, cooking it in various liquids, and selecting a variety of toppings. But whatever way it comes, cornmeal porridge is comforting and a definite favorite in our house.

cornmeal porridge with cinnamon and banana

What’s the difference between cornmeal porridge, grits, and polenta?

After growing a dent or flint corn ourselves for the last several years, all of the sudden this was a question that seemed very relevant. I had heard these terms thrown around but honestly had no idea the difference between grits, polenta, or cornmeal porridge. 

While grits, polenta, and porridge are all made from cornmeal, the main difference is in how coarsely ground the cornmeal is. The coarseness of the cornmeal will then determine what the texture of the final product will be when cooked.

Grits: Grits are made from the most coarsely ground cornmeal and will therefore have a “grittier” texture as the name implies.

Polenta: Polenta is made from medium coarse cornmeal. This medium ground cornmeal has so many possibilities. From corn cakes, to baking in a casserole, to serving as a side dish alongside your favorite meat.

Cornmeal Porridge: Cornmeal porridge is made from a finely ground cornmeal. This gives this porridge the smoothest and creamiest texture of the three.

hand milling cornmeal

Cornmeal vs. Corn Flour

If the differences in how coarse or finely ground of cornmeal you have isn’t enough, another question we often get is: is cornmeal the same a corn flour? The answer to this is, No. The difference is that corn flour is actually ground to make a powder versus cornmeal making a more coarsely ground meal.

The Ingredients and Substitutions

Cornmeal – As we talked about above, in order to get the creamiest and smoothest porridge, a finely ground cornmeal is the best option. A more coarsely ground cornmeal with alter the texture. You can use whatever color cornmeal you like, from white, to yellow, or we even use our green tinted cornmeal from our Oaxacan Green Dent Corn. They all work well.

Milk – Any kind of milk will work for this. Because we have fresh cow’s milk readily available, that’s what we prefer. But coconut milk is often how it is prepared in Jamaica or Caribbean countries. For a less creamy porridge, water would work in a pinch.

simple cornmeal porridge ingredients

Sweetener – We prefer drizzling our porridge with maple syrup but any sweetener will work: honey, granulated sugar, or even sweetened condensed milk.

Spices – For this sweetened porridge we like to use cinnamon and nutmeg but adding other warming spices like cloves or cardamom would be delicious.

Toppings – This porridge is great with whatever fruit you have on hand – bananas, pineapples, mangos, berries – you can’t go wrong!

Other Cornmeal porridge variations

While this creamy, sweetened porridge topped with fresh fruit makes a perfect breakfast (or really any meal or snack), you can change it up to make other variation as well.

breakfast cornmeal porridge

To make a savory version, one of our favorite variations is to cook the cornmeal in broth and top it with whatever leftover meat we have (shredded chicken, ground beef, chopped ham, etc.) and sprinkle with shredded cheese. You can swap out whatever protein you have, and spice it up with different spices or sauces to make tons of different combination of cornmeal porridge for any and every occasion.

This is one of our favorite ways to repurpose leftovers to make a really quick and easy meal that everyone loves.

Can You Reheat Porridge?

While we generally eat this porridge up in one sitting for our family, it can be reheated. I’d suggest adding some extra liquid to when reheating because the porridge continues to thicken and will likely congeal in your fridge. Adding some liquid when you reheat will help to thin it to its original texture.

How to Serve Cornmeal Porridge?

We usually serve this cornmeal porridge as a complete meal in itself. However, it would also make a great side dish for breakfast alongside eggs or some bacon.

Cornmeal Porridge Recipe

Serves 4

Ingredients:

1 Cup Finely Ground Cornmeal
4 Cups Milk
½ tsp Salt
2 tsp Cinnamon
½ tsp Nutmeg
2 Tbsp Maple Syrup
Fruit for Topping

adding ingredients to porridge

Directions:

  1. In a saucepan, stir cornmeal and milk together. A whisk is really helpful here to get rid of clumps in your cornmeal and give it a really smooth texture.
  2. Heat on medium heat until porridge begins to thicken.
  3. Once it’s reached your desired thickness, remove from heat. This generally takes around 10 minutes for us.
  4. Stir in salt, cinnamon, nutmeg, and maple syrup.
  5. Serve in bowls and top with fruit as desired.

For more of our favorite nourishing breakfast recipes, check out our soaked and baked oatmeal, potato crusted quiche, and sourdough scones.

breakfast cornmeal porridge

Simple Cornmeal Porridge

Yield: Serves 4
Prep Time: 5 minutes
Cook Time: 10 minutes
Total Time: 15 minutes

I am always looking to add quick, easy, and nourishing meals to our family’s breakfast repertoire. This cornmeal porridge has been a recent addition. It is creamy and delicious while being chalked with nutrients to keep bellies satisfied.

Ingredients

  • 1 Cup Finely Ground Cornmeal
  • 
4 Cups Milk

  • ½ tsp Salt
  • 
2 tsp Cinnamon

  • ½ tsp Nutmeg
  • 
2 Tbsp Maple Syrup

  • Fruit for Topping

Instructions

    1. In a saucepan, stir cornmeal and milk together. A whisk is really helpful here to get rid of clumps in your cornmeal and give it a really smooth texture.
    2. Heat on medium heat until porridge begins to thicken.
    3. Once it’s reached your desired thickness, remove from heat. This generally takes around 10 minutes for us.
    4. Stir in salt, cinnamon, nutmeg, and maple syrup.
    5. Serve in bowls and top with fruit as desired.
© From Scratch Farmstead
June 19, 2022 0 comment
0 FacebookTwitterPinterestEmail
chocolate chip orange sourdough scones
BreakfastDessertNourishing Recipes

The Best Sourdough Scones

by From Scratch Farmstead June 16, 2022

If you are looking for a quick and easy sourdough recipe suitable for anything from an everyday breakfast to a fancy brunch, this recipe for sourdough scones fits the bill. It comes together in just a few minutes and is a definite crowd pleaser. 

Jump To Recipe

For the Love of Scones

When I was in college, the dorm food was typical. Nothing to write home about. But, on Sunday mornings they had a brunch. And at that brunch were scones. These were the first scones that I had ever tasted, and they were amazing! I would stuff my purse with as many as I could get away with to take back to my room for the rest of the week.

Cranberry white chocolate, orange chocolate chip, or good old blueberry, they were delicious every way they came.

discard sourdough scones

After those decadent dorm scones, I was bound and determined to learn how to make scones for myself. There have been many recipes tested, some better than others. But in the end, I was having a hard time landing on something with the exact taste and texture I was after. 

Until, I tried sourdough scones and that’s been our go to ever since. In fact, we just enjoyed these for our anniversary breakfast alongside a plate of crispy bacon. Yum!

Sourdough Scone Frequently Asked Questions

Should I Use Fed vs Active Sourdough Starter?

The beauty of this recipe is that you can use either fed or discarded sourdough starter. 

Fed starter is starter that has been “fed” by adding flour and water to the starter making it nice and active and bubbly.

Discarded sourdough starter is starter that is not actively fed. Usually leftover from your last batch of fed sourdough starter that went unused. While this extra, unfed starter can be discarded, there are lots of recipes out there to put this discard sourdough starter to use.

sourdough starter and wheat

Some of our favorite ways to use discarded sourdough include these sourdough scones, pancakes, crackers, cookies, and flatbread.

What Type of Flour is Best?

Our favorite type of flour for making these scones is einkorn flour. Einkorn flour is an ancient wheat that has been used for thousands of years and has not been hybridized like other wheat flours have. We love einkorn flour because it is higher in minerals and nutrients while being easier for the body to digest. And not only is it better for you, it tastes great! We have found that it is less dense than most whole wheat flours. It has a very mild flavor and substitutes very well for all-purpose flour

If you don’t have einkorn, you can substitute any all-purpose flour or a blend of wheat and all-purpose flour in these sourdough scones.

What Mix-in’s Should I Use in Sourdough Scones?

In our recipe for sourdough scones below, I will be using our current favorite, chocolate chip orange scones. We use orange peel powder (or orange zest) to make these sweet and deliciously flavorful scones.

However, the sky is the limit in terms of mix in’s that can be used. Some great possibilities to consider are fresh or dried fruit, nuts, chocolate chips (white or dark), or coconut.

the best sourdough scones

What should the Consistency of the Dough Be?

As opposed to typical bread doughs, this is not a dough we will knead. The dough will be more wet and less workable than your standard bread dough. It should be firm enough to hold together on a baking pan but too wet to knead. If you have questions about the texture of your dough, check out our video on making these scone to see exactly what the dough looks like.

Is it Necessary to Freeze the Dough Before Slicing?

In order to make wedges that can be easily sliced, I would say YES, freezing the dough before slicing makes a big difference. You can certainly try to slice and separate your scones without freezing if you are in a pinch and need to save time. But, in our experience, attempting this is extremely frustrating. The dough is quite wet and sticky and the wedges do not separate easily. That leads to a less pretty, misshapen scone.

Putting the dough in the freezer for a quick 15-30 minutes firms up the dough. This makes it such a better experience to slice and separate them and results in a more lovely end product.

orange choclate chip sourdough scones

Can I Use a Food Processor Instead of By Hand?

Yes. While I prefer to mix my dough by hand, I know a lot of people prefer using a food processor. To mix in the butter a few pulses in a food processor works great.

If you run into any more questions while you are making these sourdough scones, let us know in the comments below. Now, on with the recipe…

Chocolate Orange Sourdough Scones Recipe

Ingredients:

2 Cups AP Flour (Our favorite is Einkorn Flour)
3 Tbsp Granulated Sugar
1 Tbsp Baking Powder (aluminum free)
½ Tsp Salt
5 Tbsp COLD Butter
1 Cup Sourdough Starter (Fed or Discard)
½ Cup Cream
1.5 Tbsp Orange Peel Powder (or orange zest)
½ Cup Chocolate Chips (or mix-ins of choice)

ingredients for sourdough scones

Directions:

  • Mix flour, sugar, baking powder, and salt together in mixing bowl.
  • With a fork, work in butter, mixing in until crumbly and the butter is in small pebble sized pieces.
  • Add starter and cream until a wet dough comes together.
  • Mix in orange peel powder (or zest) and chocolate chips (or other mix-ins).
  • Transfer dough to baking sheet lined with a silicone liner or parchment paper.
  • Shape dough into a circle.
  • Preheat oven to 400 degrees.
  • Freeze for 15-20 minutes until the dough is firm but still easily sliceable.
  • Remove from freezer and cut into 8 wedges. Separate the wedges on the pan.
  • Bake at 400 degrees for 18-20 minutes.

Serve and enjoy!

Some of the above links are affiliate links. This means we earn a small commission on qualifying purchases at no cost to you. We are so appreciative of your support!

For another one of our all time sourdough favorites, check out our recipe for Chicago style Deep Dish Sourdough Pizza. 

best deep dish cast iron pizza

Deep Dish Sourdough Cast Iron Pizza

April 21, 2022

chocolate chip orange sourdough scones

The Best Sourdough Scones

Yield: 8 Scones
Prep Time: 10 minutes
Cook Time: 18 minutes
Total Time: 28 minutes

If you are looking for a quick and easy sourdough recipe suitable for anything from an everyday breakfast to a fancy brunch, this recipe for sourdough scones fits the bill. It comes together in just a few minutes and is a definite crowd pleaser.

Ingredients

  • 2 Cups AP Flour (Our favorite is Einkorn Flour)

  • 3 Tbsp Granulated Sugar
  • 
1 Tbsp Baking Powder (aluminum free)
  • 
½ Tsp Salt

  • 5 Tbsp COLD Butter

  • 1 Cup Sourdough Starter (Fed or Discard)

  • ½ Cup Cream
  • 
1.5 Tbsp Orange Peel Powder (or orange zest)
  • 
½ Cup Chocolate Chips (or mix-ins of choice)

Instructions

    1. Mix flour, sugar, baking powder, and salt together in mixing bowl.
    2. With a fork, work in butter, mixing in until crumbly and the butter is in small pebble sized pieces.
    3. Add starter and cream until a wet dough comes together.
    4. Mix in orange peel powder (or zest) and chocolate chips (or other mix-ins).
    5. Transfer dough to baking sheet lined with a silicone liner or parchment paper.
    6. Shape dough into a circle.
    7. Preheat oven to 400 degrees.
    8. Freeze for 15-20 minutes until the dough is firm but still easily sliceable.
    9. Remove from freezer and cut into 8 wedges. Separate the wedges on the pan.
    10. Bake at 400 degrees for 18-20 minutes.
© From Scratch Farmstead
June 16, 2022 0 comment
0 FacebookTwitterPinterestEmail
milking cow by hand in a field
Family Milk CowHomestead How-to's

Breaking Down The Cost Of A Family Milk Cow

by From Scratch Farmstead June 12, 2022

Having a family milk cow looks dreamy on social media. But what costs are involved – both in dollars and time – and is it worth it? We will break down the answer the question, how much does a milk cow cost?

We were asking these questions about 3 years ago as we considered a family milk cow. This post breaks down the time and cost investments you need to consider before bringing a milk cow home to your homestead or farm.

Our Family Milk Cow Story

Raw dairy stood out when our real food journey began over a decade ago. A well-rounded source of protein, healthy fats, vitamins and minerals, plus all the good-for-your-gut bacteria that is killed off in pasteurization.

We sought out farms selling raw milk far and wide, paid premium prices, and enjoyed every drop of the creamy, white goodness.

With our suburban roots, the thought of owning a milk cow, or any milking animal, seemed far-fetched. But, when we moved to a rural town, a situation presented itself that changed our lives forever!

We were getting fresh milk from a family with a milk cow. Their situation changed and they let us know they’d be selling their milk cow.

Us – “I’ve always wanted a family milk cow!” (dreamy eyed, hands clasped)

Them – “You should buy her!”

family milk cow next to a big red barn

To make a long story short, we read up, researched, asked questions, and ultimately brought home Thimble, our Jersey milk cow. She is like a member of our family now and we couldn’t imagine life without her. But what does that all look like in our lives practically?

What Will A Milk Cow Cost Me In Time?

The cost you need to consider above all else in owning a family milk cow is time. Breaking even with the initial and ongoing cost of having a milk cow versus what you get back is very doable, which we’ll explain more below. But your time is your biggest asset.

On average our milk cow takes up about one hour of our time per day. Milking and straining is between 30-60 minutes. We milk once a day by hand, but you can double that for milking twice a day. Other chores – separating mama & calf for calf sharing, filling water, moving fencing, feeding hay – are around 15 minutes per day.

leading family milk cow with a halter

We can’t assign a value for your time, but let’s say it’s $30/hr. At one hour a day for 365 days, that would come out to just shy of $11,000/yr. It would be very difficult to recoup that cost with a milk cow.

If you view your cow as a money maker – especially from a time perspective – you’ll likely be disappointed. We’ve found it most helpful to put it in the category of a hobby or something we GET to do. That mindset frees you up to enjoy the sweet rhythms and relationship you have with your cow plus the bountiful dairy you receive, which makes it all totally worth it!

What Is The Cost of A Family Milk Cow?

A family milk cow can range between $800-$3,000. Why the wide range? There are many factors that affect the cost you will pay for your milk cow. Asking questions and finding out the history of the cow you are considering is REALLY important to, 1) make sure she’s the right fit for your family, farm, and situation, and 2) make sure you’re paying a fair price. 

Here’s a breakdown of what you need to consider:

Breed

Gurnsey, Holstein, Jersey, Brown Swiss, Ayrshire, and Dexter are common milk cow breeds. The price will not always vary significantly between breeds, but it will likely have some impact. It’s more important you get the right breed for your specific scale, terrain, and needs.

Are They Lactating?

Milk cows are clearly more valuable if they are lactating. A heifer who has not been bred or calved will sell for less. If lactating, it’s important to ask when they calved to know where they’re at in their lactation cycle. If it was within a few months, they should still have a strong supply.

milking family milk cow

Where They Are Coming From

The environment a cow was raised in matters. Cows coming from a commercial dairy might not transition well to a small family farm or homestead. Proven family milk cows from other small farms are your best bet, but you can also expect to pay a premium. 

Traits & Temperament

Cows have personality! Sassy, calm, kicky, bossy, motherly and anywhere in between. Certain breeds are known for different traits, but it can really vary cow by cow. Any cow you show love and respect to can soften over time. But they definitely come with their own unique personality. If you find one that is calm and well mannered, go for it!

Training

Milk cows don’t just start out being perfectly accustomed to stand in one place for long stretches of time and let a human milk them. This takes training, investment, and patience. Some cows are trained to be halter led. Others won’t budge. Some are used to being machine milked vs. by hand. You’ll want to consider their prior training both in terms of the cost you pay upfront and the cost you might pay in time to train her yourself.

hand milking family milk cow

Production

Two cows of the same breed and size does not mean they will produce the same amount of milk. Learn about their history of production and how much milk you can expect to get per milking. Generally, the more the merrier. However, our milk cow is not a huge producer and that is fine for us. We are a small scale homestead just looking to provide enough for our family.

Age

Commercial dairies will typically retire a cow after 6-7 years. A family milk cow will generally lactate for 11-12 years, or even longer. You’ll want to consider how many years of lactation they have left in them and make sure the price you’re paying is worth it.

Basic Supplies & Equipment

There are hundreds of ways to raise a milk cow. It will depend on your setup, your cow, and your lifestyle. In our post, Owning a Family Milk Cow Basics, we share what our setup and milking routine looks like, along with the basic equipment we use.

family milk cow being milked by hand

You can certainly spend a decent chunk of change on milking equipment and necessities for your cow. But you don’t NEED to! Our goal was to keep things simple and low cost. We don’t have a stanchion, milk machine, professional straining equipment, or anything like that. We milk by hand, tie her up to a fence post, strain with equipment you likely already have on hand, and try to spend as little as possible.

Here is a breakdown of the bare bones equipment we purchased to get going with our milk cow, which has served us well for almost 3 years now:

ItemCostNotes
Milk Bucket$459 Quart
Milk Pail w/ Lid$7510 Quart
Halter$15
(12) 1/2 Gallon Jars$25
Water Trough$12044 Gallon galvanized
Iodine–we use soap and warm water
Strainer–something you likely have on hand
8 Cup Pyrex Measuring Cup–or any bowl or container you have on hand
Used Hand Towels–something you likely have on hand
Salt Block$10/ea.2/yr
Mineral Block$15/ea.4/yr
Basic Costs to Get Going$305

This chart does assume you already have fencing in place. But if you are interested in an affordable fencing solution, our post, Rotational Grazing on a Small Scale, talks about our low-cost fencing setup. We purchased used, electro-netting fencing which has worked great.

What Are Feed Costs For A Family Milk Cow?

Our Jersey milk cow is on an all-grass diet and we have seen her thrive on that. We don’t feed her any grains. Grains are often supplemented to increase production. Since production is not a major concern for us, we are able to let her graze on our pasture about half the year to avoid additional feed costs.

Over winter, you will need to provide hay for feed. We’ve found a milk cow and her calf to consume about 1.5 small square bales of hay per day. We pay $5 per small square bale. How long your cows are on hay will vary by location and climate. Figuring our cows are on hay for around 6 months, we’d expect to pay $1300-$1400 in hay for the year.


Some of the above links are affiliate links. This means we earn a small commission on qualifying purchases at no cost to you. We are so appreciative of your support!

cows eating hay on 5 acre homestead

What Do I Get From My Family Milk Cow?

If you’re considering a family milk cow, no doubt you and your family are planning to consume a fair amount of the dairy yourselves. The best way to understand the monetary value of what you consume is to look at prices of comparable products you would otherwise be purchasing.

We drink the milk, but also turn it into other value-added dairy products like ice cream, yogurt, cheese, butter, and cream. The table below shows our best guess as to the dairy we consume each year as a family and what we would spend if we purchased it from other local farms or sources.

chart explaining cost of raw dairy products

It’s worth noting here that we don’t consider this chart to be an apples-to-apples comparison. We’ve rarely found products comparable to the quality we are able to produce at home. The grocery store simply has no match for the freshly churned butter from our cream rich, pastured Jersey milk. Our Raw Milk Vanilla Ice Cream recipe contains so much nutrition and goodness which just doesn’t have a competitor out there we could even purchase. Those things you can’t put a price to!

Selling And Bartering Extra Milk

One cow will likely produce more than any one family can keep up with. So, in addition to considering what you will save by consuming the dairy you produce, you need to consider what you could gain from the extra milk.

Production will vary based on the cow and what you feed them. We get 1.5-2 gallons of milk per day from our cow. Figuring about 12 gallons per week, we consume about half leaving 6 gallons available to exchange with others. The going rate for raw milk in our area is $12. So, we have the potential for earning around $4,000 in extra milk from our cow.

fresh cow milk

You will want to research what the laws are in your state around selling raw milk. Some states allow it, some are very restrictive. If your state has requirements that restrict you from selling raw milk, we’ve found bartering to be a great alternative to selling.

We have bartered for hay, meat, a family photo shoot, work done on our house or car, and other goods or services. Once people find out you have a milk cow, they are often happy to trade whatever goods or services they have available for a share of that fresh, creamy goodness!

What You Can’t Put A Cost To

We’ve often likened getting our milk cow to be nearly in same category as adding another member to our family. It’s a commitment. It requires investment. There is hard work and even sacrifices involved.

For instance, last year we missed a family vacation because of our milk cow. Our calf weaned the month leading up to the trip, we didn’t have anyone to milk her, and so we stayed home. Not ideal, but that’s how the timing worked out.

BUT, we have found so many joys and benefits of having a family milk cow that you simply can’t assign a value to. Here’s a taste:

1. We eat A LOT of Dairy! I am still blown away by how much food we are able to produce from a family milk cow and the percentage of our diet that dairy is able to make up. If I had to guess, close to 1/3 of our diet is dairy related. I can’t think of any other food source that is able to provide so diversely and abundantly. 

2. Don’t underestimate the pure enjoyment of milking. We find it to be a therapeutic and meditative process. Being that close to and intimate with an animal can do marvelous things for your soul. We love the daily rhythms of milking and then producing all sorts of delicious dairy creations in the kitchen.

3. It’s an educational experience for all. Our 3-year-old recently said, “Mommy, do Grammy and Papa have a milk cow?” He was totally serious. He simply couldn’t understand where the milk in their fridge came from if they didn’t have a milk cow. It teaches all of us where our food comes from on the most real of levels.

calf nursing off jersey mama

Is Having A Family Milk Cow Worth It?

In our opinion, the answer is a clear, “Yes!”

You can break down the dollars and cents of it until the cows come home 😊. But in the end, having a family milk cow is really a decision of your time, your values, and what’s best for your family. 

For us, it has been totally worth it and we would highly recommend having a family milk cow to anyone who has weighed out the costs and commitment.

We’d love to hear from you! Where are you at in considering a family milk cow? What’s been your experience purchasing and raising a dairy cow? 

June 12, 2022 0 comment
0 FacebookTwitterPinterestEmail
homemade sunscreen safe for babies
Natural Living

Simple Homemade Sunscreen With Tallow

by From Scratch Farmstead June 9, 2022

If you are looking for a safe and effective sunscreen option to keep your family safe this summer, including the smallest of babies, this simple homemade sunscreen has been just the ticket for our family for the last several years.

Our Sunscreen Story

Six years ago, when our first child was an infant, I started to look into what sunscreen would be the best option for her. I learned that there were basically no sunscreens on the market that were recommended for babies under the age of one. 

I was shocked. 

What was in these products that weren’t deemed safe for babies but then by age 18 months they were just fine slather all over their skin?

homemade sunscreen that is safe for children

I started digging deeper and came to the conclusion that for us, the best option would be making our own sunscreen that could be used at all ages. We’ve been making our own homemade sunscreen for the past 6 years. Between using this sunscreen and keeping up other sun safe practices, we have had no issues with sunburn since.

How Effective Is Sunscreen?

According to the Environmental Working Group, from a peer reviewed sunscreen study done in the fall of 2021, it was determined that most sunscreens in the US do not provide the adequate UVA protection for what the spf on the bottle states. The UVB protection has been on par with the spf rating but the inadequate protection of UVA rays is what causes most long-term skin damage and cancer (source).

Furthermore, there are several ingredients (like benzene and oxybenzone) in many sunscreens that are known to have adverse effects in many individuals, especially children. And, aerosol or spray on sun screens have been found to be particularly problematic in both the ingredients as well as not providing effective sun protection.

All that to say, sunscreen is definitely something you want to do your research on before just believing the claims on the bottle.

What about SPF?

The SPF, or Sun Protection Factor, is the main factor consumers use when choosing a sunscreen. There has been a trend in recent years for people to purchase sunscreens with increasingly higher spf value. In 2007 there were 38 products available with an SPF higher than 50. Fast forward to 2022 and there are 97. 

simple homemade sunscreen with tallow

According to research performed by the FDA, there was no evidence showing that a higher SPF would be beneficial to consumers. In fact, as demonstrated in the study cited above, research has found the SPF to be an inaccurate measure of the effectiveness of a sunscreen. The biggest problem with sunscreens marketed with spf ratings above 50 are that it gives consumers a false sense of security in the effectiveness of the product. For more information on SPF check out this article.

Chemical vs. Mineral Sunscreen

There are two types of sunscreens, chemical and mineral. There is a lot of evidence showing mineral sunscreens to be a safer choice than the chemical options. Chemical sunscreens have ingredients like oxybenzone as their main active ingredient. Oxybenzone is a known hormone disrupter in people and is causing damage to the reefs when it is rubbed off of skin damaging ocean life.

The two active ingredients in mineral sunscreens are zinc oxide and titanium dioxide. Of these two, zinc oxide has been found to be effective in combating both UVA and UVB rays while titanium dioxide is strong against UVB rays but less effective against UVA rays. Because of this, we prefer mineral sunscreens with zinc oxide as the active ingredient.

Homemade Sunscreen Ingredients

Homemade sunscreen cannot be lab tested and regulated in the same way that commercial products are. However, by using ingredients that are known to be sun protective AND are safe and even beneficial for the skin, we feel much more confident in the safe and effective use of this homemade sunscreen.

Non-nano zinc oxide is our main active ingredient known for its full spectrum effect of protecting the skin from the sun’s rays. In addition to non-nano zinc oxide, I like using a combination of fats and oils that  each uniquely provide their own nourishing skin benefits.

simple homemade sunscreen ingredients

Non-nano Zinc Oxide

As mentioned above, zinc oxide has been found to be the most effective mineral ingredient to combat both the sun’s UVA and UVB rays. 

But why is non-nano zinc oxide important? This has to do with particle size. Standard zinc oxide has particles that are extremely small, nanoparticles. The problem with this is that they are so small they can more easily penetrate the skin to get into the bloodstream.

Non-nano zinc oxide means that the particles are bigger making them unable to penetrate through the skin. This keeps the zinc oxide where you want it, on your skin, protecting it from the full spectrum of the sun’s rays. This is the specific non-nano zinc oxide that we used for our homemade sunscreen.

Tallow

On its own tallow has an spf of 4 but apart from what it offers in sun protection, it also adds numerous benefits to overall skin health. Tallow is our go-to ingredient when it comes to all things skin care. This is a short list of the skin benefits that tallow offers:

  • High in vitamins A, D, E, K, and B12
  • Rich in minerals
  • Contains conjugated linoleic acid (CLA) with natural anti-inflammatory properties
  • Palmitoleic acid is a powerful antimicrobial agent that is also a basic building block of our skin
  • Palmitic acid helps to improve the function of the skin’s protective barrier
  • Stearic acid helps to repair damaged skin and improves the skins flexibility and suppleness

We highly recommend sourcing tallow from cows that were fed only grass at a local farm. To find a local farm in your area, check out local harvest.

cow on pasture with pretty sunrise

When rendering tallow, you will want to use a wet method to eliminate the beefy smell from your tallow. This video is a great resource.

Coconut Oil

While the exact spf of coconut oil wasn’t clear (likely around an spf 5), there is definitely evidence that coconut oil does provide benefits against the sun’s rays. Coconut oil provides a host of other skin benefits including: 

  • Being moisturizing
  • Providing antioxidants
  • Containing antifungal, antiviral, and antibacterial properties
  • Reducing inflammation

Olive Oil

Similarly, to coconut oil, the spf protection olive oil provides is up for debate. But it is likely around an spf of 5 along with providing many other benefits for skin health. The powerful combination of healthy fats, vitamins, and antioxidants in olive oil lend it to resulting in more youthful and vibrant skin.

homemade sunscreen with tallow

Beeswax

Beeswax is an all natural and important ingredient in giving the sun screen the perfect creamy texture and the wax helps to keep this homemade sunscreen water proof.

Alright, enough background, let’s make some homemade sunscreen!

Simple Homemade Sunscreen

Yield: 1.25 cups

Ingredients:

1/4 cup beeswax
1/2 cup non-nano zinc oxide
1/4 cup tallow
1/3 cup olive oil
1/4 cup coconut oil

Directions:

1. Add all ingredients to a glass, heat safe mason jar or 2 cup glass measuring cup.
2. Create a double boiler by filling a sauce pan 1/3 to half full and placing your jar with ingredients inside.
3. Heat saucepan over medium to high heat, stirring contents of jar until everything is melted.
4. Once melted pour into desired containers.

How to store sunscreen?

We’ve used different methods for storage. A glass jar works fine but I prefer to store it in these small 2 oz. containers or squeezy silicone tubes to easily throw in my bag and bring to the pool or beach.

containers of homemade sunscreen

For more of our favorite natural homemade skin care to keep your family safe and healthy, check out or magnesium lotion or drawing salve.


Some of the above links are affiliate links. This means we earn a small commission on qualifying purchases at no cost to you. We are so appreciative of your support!

magnesium and tallow in a lotion

DIY Tallow Magnesium Lotion

April 7, 2022

homemade drawing salve recipe

DIY Drawing Salve

May 5, 2022

homemade sunscreen safe for babies

Simple Homemade Sunscreen With Tallow

Yield: 1.25 cups
Prep Time: 5 minutes
Stove Time: 10 minutes
Total Time: 15 minutes

If you are looking for a safe and effective sunscreen option to keep your family safe this summer, including the smallest of babies, this simple homemade sunscreen has been just the ticket for our family for the last several years.

Ingredients

  • 1/4 cup beeswax
  • 1/2 cup non-nano zinc oxide
  • 1/4 cup tallow
  • 1/3 cup olive oil
  • 1/4 cup coconut oil

Instructions

    1. Add all ingredients to a glass, heat safe mason jar or 2 cup glass measuring cup.

    2. Create a double boiler by filling a sauce pan 1/3 to half full and placing your jar with ingredients inside.

    3. Heat saucepan over medium to high heat, stirring contents of jar until everything is melted.

    4. Once melted pour into desired containers.
© From Scratch Farmstead
June 9, 2022 0 comment
0 FacebookTwitterPinterestEmail
rhubarb barbecue ribs
Nourishing RecipesSauces & Condiments

Quick and Easy Rhubarb BBQ Sauce Without Ketchup

by From Scratch Farmstead June 5, 2022

Rhubarb season coincides perfectly with grilling season. Turning that extra rhubarb from your garden or the farmer’s market into this delicious rhubarb bbq sauce is one of our family’s favorite ways to use this tangy springtime treat.

Jump To Recipe

When we purchased our homestead in the spring, I was delighted to find a thriving patch of rhubarb. I set to work immediately trying different ways to add it to our meals and desserts as well as freezing it to have on hand all year.

What is Rhubarb?

Botanically, rhubarb is technically a vegetable with its stalks and leaves. However, in 1947 a New York court officially declared rhubarb to legally be considered a fruit. That being said, it is generally used culinarily as a fruit cooked up in pies, jams, cakes, crisps, and cobblers.

Rhubarb is generally easy to grow in sunny areas and is a perennial meaning that it will continue to grow year after year. It is very tart and is usually paired with fruit and sugar in cooking to lessen its distinct sour flavor. This tartness of the rhubarb pairs perfectly in this sweet bbq sauce giving it an addicting sweet yet tangy flavor.

cutting fresh rhubarb for freezing

How to Store Rhubarb and For How Long?

Rhubarb should be stored in the fridge for short term use. Typically, rhubarb lasts a few days in the fridge but after that it becomes dried out and almost spongy in texture. Its important to use it pretty quickly after harvesting or purchasing. Otherwise, a great option is to freeze for long term use.

How to Freeze Rhubarb and Why You Would Want To

The beauty of rhubarb is that it freezes very well and most recipes work beautifully with either fresh or frozen rhubarb. Freezing it keeps its flavor, nutrients, and allows you to have the goodness that rhubarb offers all year round.

To Freeze rhubarb simply chop in small chunks (roughly 1/2”). Place them in a single layer on a baking sheet. I like to line my baking sheet with a silicone baking mat or parchment paper to avoid the rhubarb becoming frozen and stuck to the baking sheet.

how to freeze rhubarb

Then place the baking sheet in the freezer for 3-4 hours until the small pieces are all individually frozen. Place rhubarb in a Ziploc bag in the freezer for long term storage. 

If you skip this step and place the chopped rhubarb directly in a bag in the freezer, you will end up with a frozen clump of rhubarb. While this will still work fine, a clump of frozen rhubarb is much more difficult to work with when the time comes to pull it out of the freezer.

How to use Frozen Rhubarb

Frozen rhubarb can be substituted for fresh rhubarb in most recipes. Our favorite ways to use frozen rhubarb are in this bbq sauce, baked oatmeal, or to make a simple stovetop rhubarb sauce or jam (see below). 

frozen rhubarb on cookie sheet

You may need to experiment with adding frozen rhubarb to baked goods, like cake. This is because the added moisture from freezing can interfere with the more precise nature needed in baking to achieve the perfect texture.

Simple Stovetop Rhubarb Sauce or Jam

You can make this simple stovetop sauce or jam by using fresh or frozen rhubarb either by itself or adding any other fresh or frozen fruit. We like to add frozen berries of any variety. Then all you need is something to thicken your sauce. Arrowroot or tapioca starch are our favorite thickeners. If you want a thicker sauce for a jam or pie filling add more thickener. Less thickener will make it runnier and the perfect topping for an ice cream sundae. 

strawberry rhubarb sauce on ice cream

Once the rhubarb is softened and your sauce has reached the desired consistency, remove from heat and add a sweetener to get your desired taste. Honey, maple syrup, or granulated sugar all work. We typically add a couple of tablespoons of honey to our rhubarb sauce.

Quick and Easy Rhubarb BBQ Sauce

Alright, back to the main event – rhubarb bbq sauce! While rhubarb makes the perfect compliment to so many delicious fruit-based summer desserts, sometimes it is nice to have a savory option as well! This sweet and tangy rhubarb bbq has been a mainstay at all of our summer cookouts with stellar reviews.

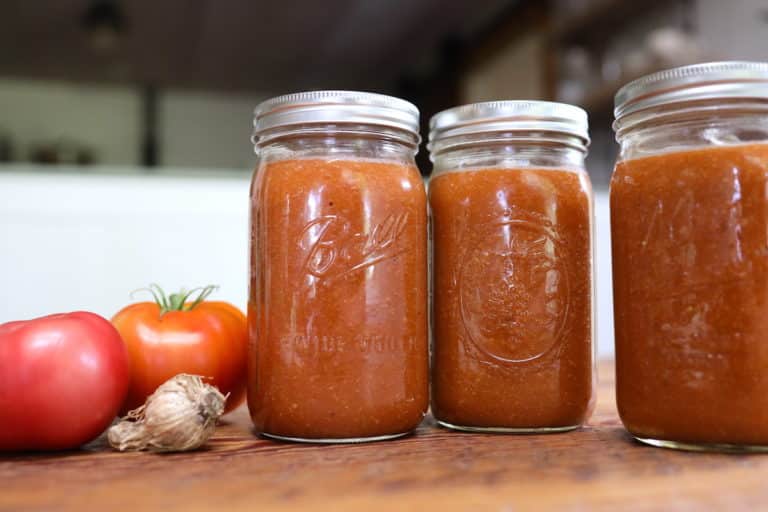
When I first began experimenting with making a rhubarb bbq sauce, most of the recipes I found included ketchup. After we canned over 80 quarts of tomato sauce last year, I knew I wanted to create a bbq sauce that was tomato sauce based without ketchup. With some taste testing and experimentation, we landed on this bbq sauce that everyone loves.

homemade rhubarb bbq sauce

How To Store Rhubarb BBQ Sauce and How long will it last?

This rhubarb bbq sauce should be stored in the fridge. It will last in the fridge for 1-2 weeks. You could also can this sauce for long term use.

How Spicy Is it?

This is a sweeter bbq sauce with a mild taste. However, if you prefer a bbq sauce with more of a kick, feel free to play with the spices. Adding some cayenne or upping the paprika would turn up the heat.

What do you use Rhubarb BBQ Sauce on?

Anything! It pairs perfectly with any meat that we have tried – chicken, pork, beef, and fish. We’ve also used it as a sauce for pizza. Or for something a little more out of the box, I love to add a scoop with my morning eggs and vegetables.

rhubarb bbq ribs

On with the recipe…

Rhubarb BBQ Sauce Recipe

Yields 1 Quart

Ingredients:

2 Cups Tomato Sauce*
1 Onion, diced
4 Stalks Rhubarb, chopped
¼ cup Apple Cider Vinegar
3 tbsp Maple Syrup
2 Tbsp Worcestershire Sauce
3 Tbsp Molasses
1 tsp Mustard
2 tsp Garlic Powder
1 tsp Paprika
Salt and Pepper to Taste

rhubarb barbecue sauce ingredients

Directions:

1. Combine all ingredients in a sauce pan.
2. Cook over medium heat until onions and rhubarb are softened and sauce thickens (approximately 10 minutes), stirring regularly.
3. Remove from heat and blend.**

Notes:

*I find that 2 cups of tomato sauce makes a nice thick bbq sauce but if you prefer your sauce really thick, you can add 1 can of tomato paste to your sauce.
**An immersion blender is what I like to use but a regular blender or food processor would work as well.

For more ways to use that fresh or frozen rhubarb, check out this Baked Oatmeal. A breakfast staple in our house.

soaked baked oatmeal ready to serve with milk

The Best Soaked and Baked Oatmeal

January 9, 2022

rhubarb barbecue ribs

Quick and Easy Rhubarb BBQ Sauce Without Ketchup

Yield: 1 Quart
Prep Time: 10 minutes
Cook Time: 10 minutes
Total Time: 20 minutes

Rhubarb season coincides perfectly with grilling season. Turning that extra rhubarb from your garden or the farmer’s market into this delicious rhubarb bbq sauce is one of our family’s favorite ways to use this tangy springtime treat.

Ingredients

  • 2 Cups Tomato Sauce*
  • 
1 Onion, diced

  • 4 Stalks Rhubarb, chopped
  • 
¼ cup Apple Cider Vinegar
  • 
3 tbsp Maple Syrup

  • 2 Tbsp Worcestershire Sauce

  • 3 Tbsp Molasses

  • 1 tsp Mustard

  • 2 tsp Garlic Powder
  • 
1 tsp Paprika

  • Salt and Pepper to Taste

Instructions

    1. Combine all ingredients in a sauce pan.

    2. Cook over medium heat until onions and rhubarb are softened and sauce thickens (approximately 10 minutes), stirring regularly.
    3. Remove from heat and blend.**

Notes

*I find that 2 cups of tomato sauce makes a nice thick bbq sauce but if you prefer your sauce really thick, you can add 1 can of tomato paste to your sauce.


**An immersion blender is what I like to use but a regular blender or food processor would work as well.

© From Scratch Farmstead
June 5, 2022 0 comment
0 FacebookTwitterPinterestEmail
ice cream made with dandelions
DessertNourishing Recipes

Simple Homemade Dandelion Ice Cream

by From Scratch Farmstead May 31, 2022

When life gives you dandelions, make dandelion ice cream! If you are looking for the perfect spring recipe to wow your friends and family, this simple, homemade dandelion ice cream recipe is just the thing!

Jump To Recipe

When life gives you dandelions…

Last spring, when the dandelions began blooming in full force, one of our kids’ favorite activities was to pick bouquets full of these yellow flowers and then present them to me proudly. That sparked an idea. Why not turn those yellow flowers into something delicious? I knew that dandelion flowers were naturally sweet and almost honey like in taste. So I thought, why not add them into our homemade ice cream?

pulling apart dandelion flowers for baking

This dandelion ice cream experiment quickly became a family favorite. Not only did it taste great, it was a fun activity that everyone could be a part of. I simply tweaked our well-loved vanilla ice cream and turned it into this arguably superior creamy, yellow treat.

How to Make Ice Cream

Growing up, I had a daily ritual of eating a bowl of ice cream every night before bed. The idea that you could actually make homemade ice cream never crossed my mind. My love for ice cream continues and was well known by my family and friends. When Jim and I got married, one of my good friends gifted us our very own ice cream maker. 

My curiosity was piqued and our adventure into the world of homemade ice cream making began.

Making ice cream from scratch is actually very easy and only requires a few basic ingredients. Namely cream/milk, a sweetener, egg yolks, salt, and any flavoring. You will find that everyone has their own unique twists to make the perfect ice cream. But simply by blending these basic ingredients up and pouring them into the frozen bowl of an ice cream maker will result in creamy, delicious ice cream.

Do You Need to Temper the Egg Yolks?

One common step in most homemade ice cream recipes is to temper the egg yolks. This is a process of cooking egg yolks in heated up milk or cream so they are cooked yet remain creamy and don’t turn into an unpleasant scrambled egg mess. No one wants that in their ice cream. 

Personally, I skip this step when we make ice cream and prefer to just mix in the egg yolks raw. Because we raise our own chickens, I feel very comfortable with the source of our eggs and trust them to be healthy. Plus, there are additional benefits that you get in raw yolks that are lost in the cooking process. 

However, if you feel more comfortable tempering your egg yolks, just add this step in and chill your tempered mixture before blending it with the rest of your ingredients and pouring into the ice cream maker.

How to Harvest and Prepare Dandelions

Our preferred method for doing this is to grab a bucket and fill it with the plucked off flowers from the dandelion stems. After you have filled your bucket to your liking, you have to pull off the bottom green casing from the flower. This green part will be quite bitter and not something you want in your ice cream. You may notice some white milky or fuzz like part of the flower. If that gets mixed in with the flowers, that’s totally fine.

pulling dandelion petals off of flowers

This process does take some time so it is a great one to invite your kids or a friend into, turn on the music, and have a dandelion flower separating party.

The Best Sweetener for Dandelion Ice Cream

You have options here. My preference and what I have included in the recipe is to sweeten the ice cream with honey. Dandelion flowers have a natural honey like taste and honey compliments them perfectly. Alternatively, you could use maple syrup or a combination of maple syrup and honey. Or plain old white granulated sugar works fine too.

Cream vs Half and Half vs Milk

My favorite proportion is to use 2 cups of cream with 1 cup of whole milk. However, there is room for some flexibility here. Mainly, you want to make sure you have enough cream to give your ice cream its signature creamy texture. If you want it even creamier you could use all cream or a mixture of half and half and cream.

dandelion flower ice cream

Can Dandelion Ice Cream Be Made Dairy Free?

While I haven’t personally tried making this specific ice cream dairy free, I have had great success making my vanilla ice cream dairy free by substituting the milk and cream for one can of full fat coconut milk.

Do I need to Have an Ice Cream Maker?

While I have heard of alternative options for making ice cream that may work very well, I only have experience making it with this ice cream maker. In our opinion, a basic ice cream maker is worth the cost and makes the process extremely easy. But, if you have had success using another method, I’d love to hear about it!

fresh picked dandelions

Keep Everything Cold

Before adding your ingredients to your ice cream maker, you want to make sure they are fully chilled. Especially if you choose to heat your cream/milk and temper the egg yolks, you want to cool everything thoroughly before using it. Adding cold ingredients verses warm or even room temperature will produce a better end result.

Dandelion Ice Cream Recipe

simple dandelion isce cream recipe

Ingredients

2 cups cream
1 cup whole milk
4 egg yolks
1 cup dandelion flowers (just the yellow part! The green is quite bitter)
1/2 cup honey
1/2 tsp salt
1 tbsp vanilla
1 tbsp arrowroot powder or tapioca starch (optional but I think it helps with the texture)

Directions

1. Add all ingredients to the container of a blender.
2. Blend until well mixed.
3. Pour into the frozen container of an ice cream maker.
4. Let churn in ice cream maker for 25-30 minutes until creamy ice cream is formed.
5. Store in freezer for a couple of hours before serving.

Looking for other ways to use those dandelion flowers? Try serving this dandelion ice cream alongside our dandelion cake – another family favorite!

Some of the above links are affiliate links. This means we earn a small commission on qualifying purchases at no cost to you. We are so appreciative of your support!

gluten free dandelion cake

Gluten Free Dandelion Cake

May 15, 2022

simple dandelion isce cream recipe

Simple Homemade Dandelion Ice Cream

Yield: 8 servings
Prep Time: 20 minutes
Maker Time: 40 minutes
Total Time: 1 hour

When life gives you dandelions, make dandelion ice cream! If you are looking for the perfect spring recipe to wow your friends and family, this simple, homemade dandelion ice cream recipe is just the thing!

Ingredients

  • 2 cups cream

  • 1 cup whole milk

  • 4 egg yolks
  • 
1 cup dandelion flowers (just the yellow part! The green is quite bitter)

  • 1/2 cup honey

  • 1/2 tsp salt
1 tbsp vanilla

  • 1 tbsp arrowroot powder or tapioca starch (optional but I think it helps with the texture)

Instructions

    1. Add all ingredients to the container of a blender.

    2. Blend until well mixed.

    3. Pour into the frozen container of an ice cream maker.

    4. Let churn in ice cream maker for 25-30 minutes until creamy ice cream is formed.

    5. Store in freezer for a couple of hours before serving.
© From Scratch Farmstead
May 31, 2022 0 comment
0 FacebookTwitterPinterestEmail
Newer Posts
Older Posts

About Us

About Us

So Glad You're Here!

Hi! We are Jim and Joelle. We love sharing homestead how-to’s, from scratch recipes, and natural do-it-yourself projects to help you nourish your family. To learn about our story, click the image above!

Stay Up-To-Date

Popular Posts

  • How Eating Liver Changed My Life

    March 31, 2022
  • Chicken Tractor Plans for 25 Chickens

    May 1, 2022
  • Deep Dish Sourdough Cast Iron Pizza

    April 21, 2022
  • Cornish Cross vs. Freedom Ranger Chickens

    February 27, 2022
  • Why a 5 Acre Homestead is the Perfect Size for a Beginner

    March 20, 2022

Follow Along!

  • Email
  • Facebook
  • Instagram
  • YouTube

Instagram

  • Facebook
  • Instagram
  • Youtube
  • Email

As an Amazon Associate we earn from qualifying purchases.


Back To Top
From Scratch Farmstead
  • About
  • Homestead How-to’s
    • Family Milk Cow
    • Gardening
    • Chickens
    • Small Scale Farming
    • Buying A Homestead
    • Homestead Living
  • Nourishing Recipes
    • Breakfast
    • Main Course
    • Sides
    • Dessert
    • Sauces & Condiments
    • Home Dairy
  • Natural Living