DIY Seed Starting Mix with Compost
This DIY Seed Starting Mix with Compost tutorial will walk you through the simple steps we use to make our own seed starting mix on our farmstead.
Why should I make my seed starting mix?
If you care about what ingredients are in your seed starting mix, chances are you care about what ingredients are in your food too. You go to great lengths to nourish your body; checking ingredient labels, and cooking food from scratch. But those store-bought bags of seed starting mix often leave you wondering exactly what you’re buying a bag of. Plus, they are expensive.
Good news. Making your own DIY seed starting mix with compost is really simple and cost-effective!
You are in control. Use your own compost or source it from someone trusted locally. Mix in all-natural ingredients that don’t look like little pieces of styrofoam floating around in your soil (seriously, is that what’s actually in the store-bought stuff??). And add nutrients to your soil from sources you actually know and can pronounce, like alfalfa meal and fish bone meal.
Plus, you can buy all the ingredients in bulk and have everything you need to make your own seed starting mix for years to come.
Source your own ingredients. Save money. And the process takes only a few minutes! With this DIY seed starting mix with compost tutorial, you’ll never go back to the mystery bag you picked up from the store again.
What’s the best compost for seed starting mix?
You will want to start with compost as your base. The best compost to use for your seed starting mix is the compost you produce right from your home. Grass clippings, leaves, food scraps, animal manure, and the like will all make a wonderful composted planting medium if given enough time.
The primary concern for your seed starting mix is that the components have composted down long enough to make a very fine particulate substrate for seed starting. You’ll want to avoid anything that is too coarse.
We used our own compost made up of cow and chicken manure, along with some yard waste and food scraps. It breaks down beautifully and is packed with nutrients.
If you don’t have your own compost supply, here are two options to consider: 1) You can ask around your local farming community, or even check places like Facebook Marketplace or Craigslist, to see if anyone is trying to get rid of compost. For example, horse farms often have piles of composted manure they are looking to get rid of for free or low cost. 2) There are good brands of compost you can buy from the store or online. Two that we know of are Cowsmo and Vermont Compost.
We also got to know a local mushroom grower this past year, and they swore by mushroom compost for both seed starting and adding to your garden beds. So, we picked up a bag of mushroom compost that made up roughly 1/4 – 1/3 of our seed starting mix. Adding mushroom compost is optional.
Mushroom compost is the byproduct of mushroom production, which is essentially the decomposition of wood. This creates a substrate very high in nitrogen.

Do you need to add extra nutrients to your seed starting mix?
The primary or macronutrients plants need to thrive are Nitrogen (N), Phosphorus (P), and Potassium (K). Your compost will likely have some amount of N-P-K to begin with, but we’ve found it helpful to add some extra soil amendments to give your seedlings the strongest start possible. Here’s a really simplified summary of what each of these macronutrients do:
Nitrogen (N) – supports the growth of the plant above ground. Leaves, stems, and the plant’s overall green color need Nitrogen.
Phosphorus (P) – helps develop the root system of plants and also aids in flowering and fruiting.
Potassium (K) – keeps the root system healthy and adds additional support to flowers and fruits.
You want all three to be present in your seed starting mix. Amendments that you purchase will often label the N-P-K ratio they provide. The three amendments we added were Fish Bone Meal (3-16-0), Alfalfa Meal (2.5-0.5-2.5), and an all-purpose organic fertilizer made from chicken manure (N-P-K not specified).
To keep things simple on our farmstead, we don’t fuss much about getting these ratios exact. There is no magic formula. Often the packaging for a particular amendment will give ratios to mix in, which we use loosely and add whatever amount seems appropriate.
Bottom line, pick up a couple of amendments that you feel good about, can pronounce the name of, and offer a good balance of N-P-K.
How do I get the right seed starting mix texture?
You will want your seed starting mix to have a nice light, airy texture to it. Anything too compacted might keep your seeds from germinating properly or developing strong root systems.
Relying on your compost alone to achieve this fluffy texture will likely not be enough. The two ingredients we like to add for improved texture are peat moss and vermiculite.
Peat moss is created through the decomposition of sphagnum moss and other organic materials. Its biggest contribution in gardening is its high absorbency. Adding peat moss will help retain moisture for your delicate baby seedlings and also help prevent soil compaction.
Vermiculite is a naturally occurring mineral that is often added to growing mediums in gardening for improved soil aeration and water retention. It is lightweight, almost like popcorn, and helps add that fluffy texture you want in a seed starting mix. Perlite is a common substitute that offers greater aeration but less water retention than vermiculite.
What equipment do you need?
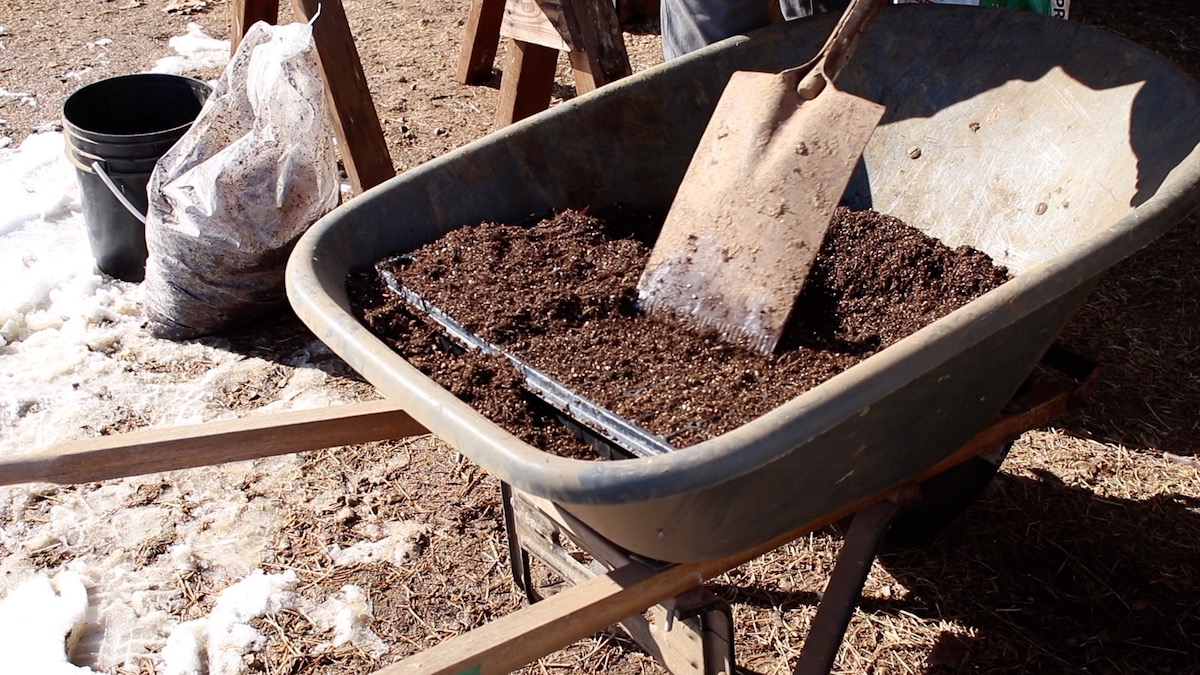
Wheelbarrow – We use a deep wheelbarrow to mix the seed starting mix in. If you’re only mixing a small amount, a 5-gallon bucket will work just fine. But if you’re mixing enough for a few seed trays or more, you’ll want a deep wheelbarrow where you won’t spill over the edge. I also place my seed trays directly in the wheelbarrow to fill them to avoid spilling and losing the seed starting mix.
Shovel – To mix the seed starting mix and scoop it into trays, I use an edging spade. This particular type of shovel has a flat end to it, which I’ve found the right size and shape to both scoop out of the wheelbarrow and skim the top of your seed trays flat when finished scooping. A small garden trowel is also handy to have on hand.
Seed Trays – We start seeds primarily in 72-cell seed trays. Our favorites are the ones from Johnny’s Seeds, but you can also buy them at most garden stores. As an alternative to seed trays, you can use other common household options like paper/pulp egg cartons, paper or plastic cups, or simply use a pot.
Watering Can – It’s easiest to add water while making the mix, so have a watering can on hand.
Complete list of what you need for DIY seed starting mix with compost
- Compost
- Mushroom compost (optional)
- Peat moss
- Vermiculite
- Soil amendments
- Wheelbarrow
- Shovel (edging spade with flat top preferred)
- Seed trays (or other vessel for starting seeds)
- Garden trowel
- Watering can
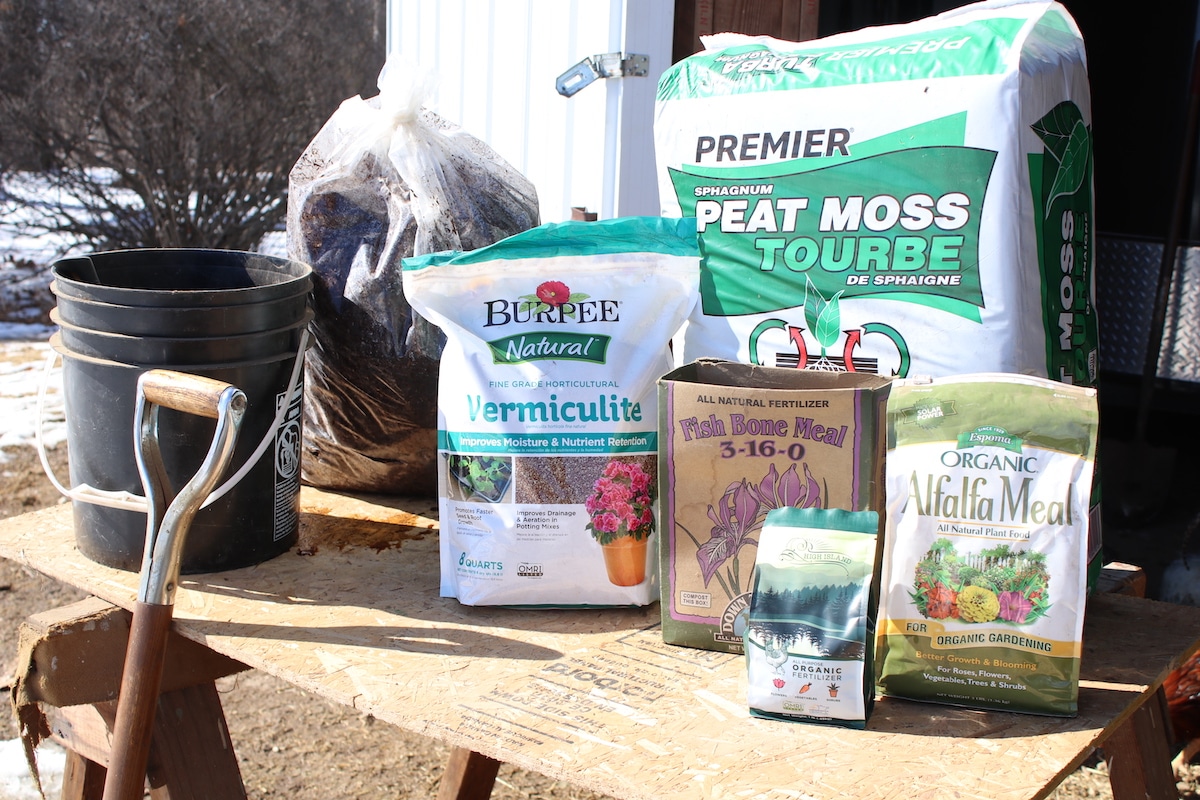
How to make your own seed starting mix step by step
1. Pour compost into a wheelbarrow. If mushroom compost is being added, add 1/4 mushroom compost to start. Mix thoroughly with a shovel. If more mushroom compost is desired, add a bit more and mix in. I would not recommend going above a 1/3 mushroom compost to 2/3 regular compost ratio.
2. Add peat moss and vermiculite. Start with a standard amount of each and mix in thoroughly. You can always add more, so don’t just pour the whole bag in. This is your chance to really dial in the texture. Add more and incorporate thoroughly until you feel it’s the right seed starting mix texture.
3. Add your soil amendments. Remember, there is no magic formula and your ratios will depend both on how much seed starting mix you are making and on your selection of amendments. Use the information on the packaging and use your best judgment. Don’t overthink it!
4. Add water as needed. Depending on how much moisture is present in your materials to start, it’s easiest to add water to the mix while still in the wheelbarrow. You want the mixture to be moist but not saturated.
5. Place your seed tray (or whatever you’re using to start seeds in) in the wheelbarrow and fill it with your shovel. Distribute the seed starting mix so each cell is evenly filled. Break up larger clumps you find or remove any larger twigs or other debris. Be sure to not compact the soil. You can finish the tray by scraping the top evenly with your shovel, or simply use your hand.
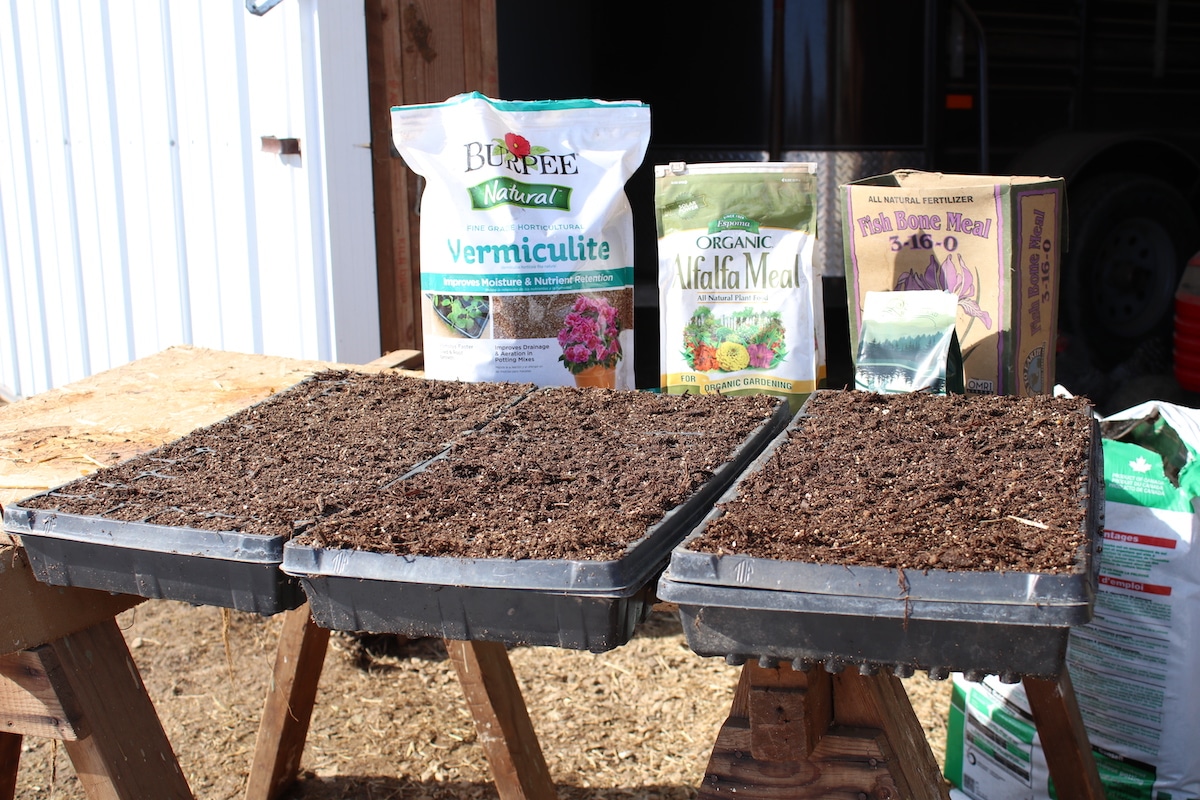
It’s time to plant your seeds!
That was a fair amount of explaining for really a very simple process. All in all, once you have the ingredients on hand, your seed starting mix will only take minutes to make. Plus, you will likely have enough left over to continue making your own diy seed starting mix with compost for years!
So go get those seeds planted! They will love the robust mix you have made for them and reward you with healthy and nutritious produce in your garden.
If you are at that point and looking for a simple way to start seeds indoors without using expensive equipment like grow lights and heat pads, check out our post on our basic method for starting seeds indoors.
If making your own seed starting mix is new and you have questions, we’d love to hear from you in the comments! And if you’ve made your own mix before and have your own recipe for success, we’d love it if you shared your tips!
Get more gardening inspiration:
- Homestead Garden Plan – Year Round Food on 1/4 Acre
- How to Store Potatoes from the Garden Long Term
- 10 Essential Storage Crops You Need to Grow
- Drip Depot Review + How to Build a Drip System
- T-Post Tomato Trellis – Easy and Foolproof Trellising Method
Pin it for later!


