Planting Potatoes With Long Sprouts – Everything You Need To Know
Your potato’s sprouts are out of control! 1 foot, 2 foot, even 3 feet long! Don’t toss them. Plant them! We’ll share everything you need to know about planting potatoes with long sprouts!
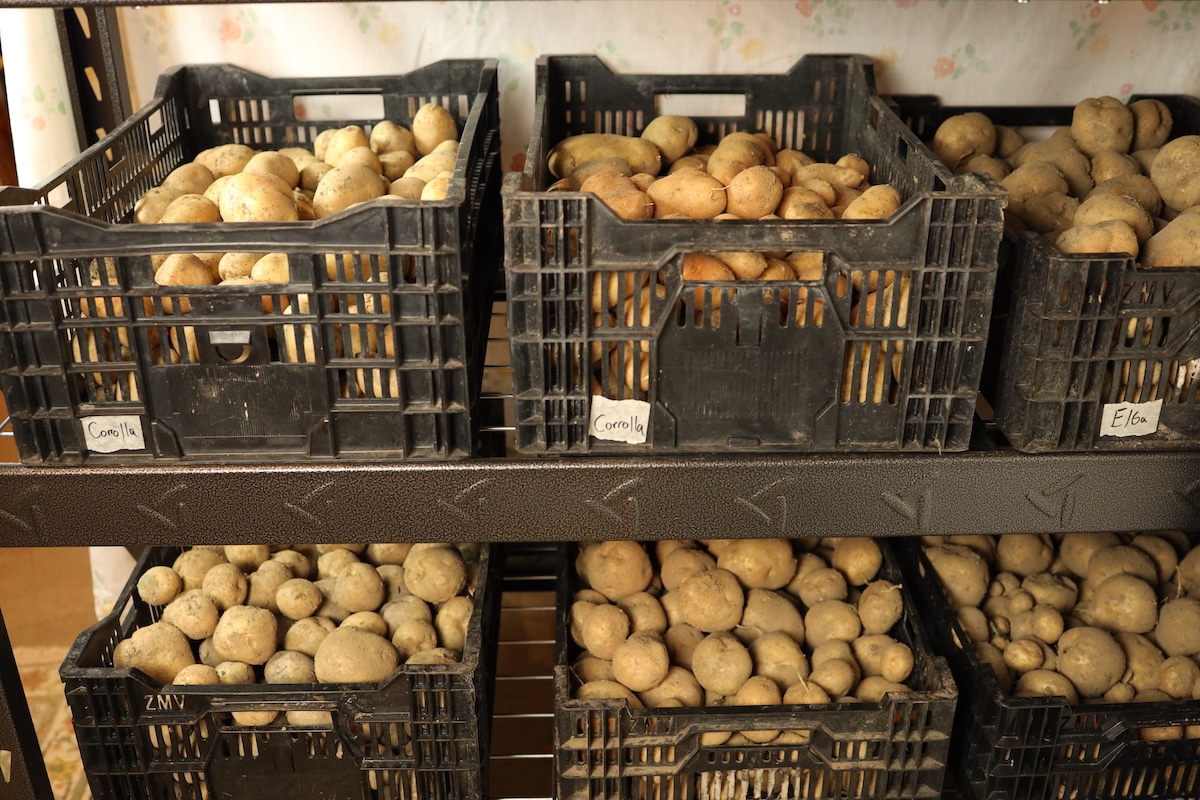
When we decided to start saving and planting out own seed potato on our homestead, we were feeling a bit discouraged come April. The potatoes had started sprouting months before and our bins of potatoes now more closely resembled some sort of alien life form than they did seed potatoes.
But, we planted them anyways. As is. And have still had a great potato harvest every time!
Don’t Remove Those Sprouts!
Before we dig in, here’s the first thing you need to know:
DON’T REMOVE THE SPROUTS!
I like to think of a potato as a battery. Inside every potato are starches and nutrients that store energy within your spud.
While a potato is in storage, that energy store remains intact—fully charged if you will. By sprouting, a potato is telling you it’s ready to be planted. This starts the process of depleting its energy store to grow sprouts.
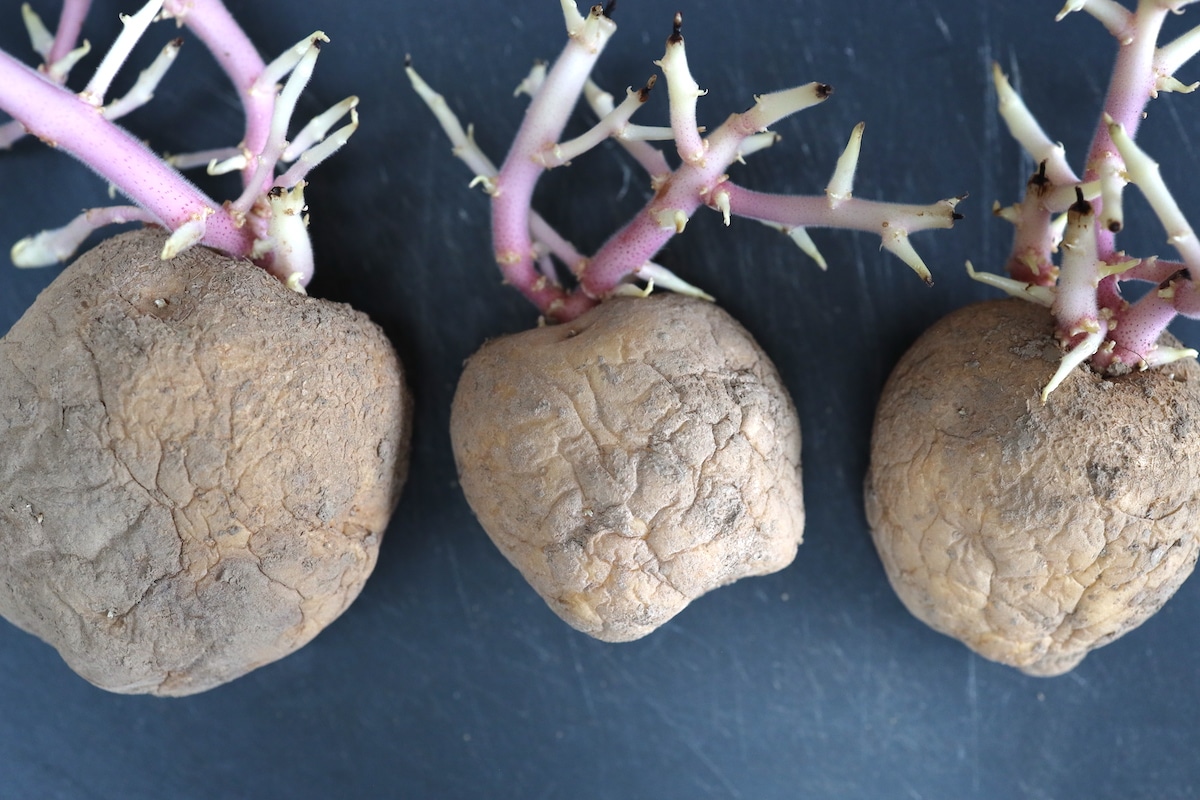
If you plan to eat the potato, then removing the sprouts can help preserve the nutrients and firmness of the potato. You can read more about eating potatoes from the garden that are a bit past their peak in our post – How To Use Soft Potatoes From the Garden + Recipes!
But if you want to plant them, leaving those sprouts connected to your tubers is important! Removing them would set that potato back and ruin the hard work it’s already put into growth. And sprouts can be delicate, so handle with care!
So what exactly are sprouts?
Why Does a Potato Sprout?
Like any plant, a potato’s goal is to propagate, or reproduce. But different from most plants, potatoes don’t grow a separate seed. The tuber itself is the seed.
Potatoes stay dormant for months when properly stored. Our post—How To Store Potatoes From The Garden Long Term—shares more helpful tips on storing potatoes and how we store them in our basement.
After their dormancy period is up, or when their storage environment reaches a warm enough temperature, sprouts begin to grow out of the eyes—the natural bumps or dents on the outside skin of potatoes.
As much as sprouts may look like a root, they are not. They are stems. These stems desire to be growing above ground and eventually leaf out and flower.
Once potatoes are planted, those sprouts need to reach above the surface of the soil and grow leaves in order to begin harnessing energy from the sun. This kickstarts the process of growing its network or roots and future tubers underground.
Can Potato Sprouts Be Too Long To Plant?
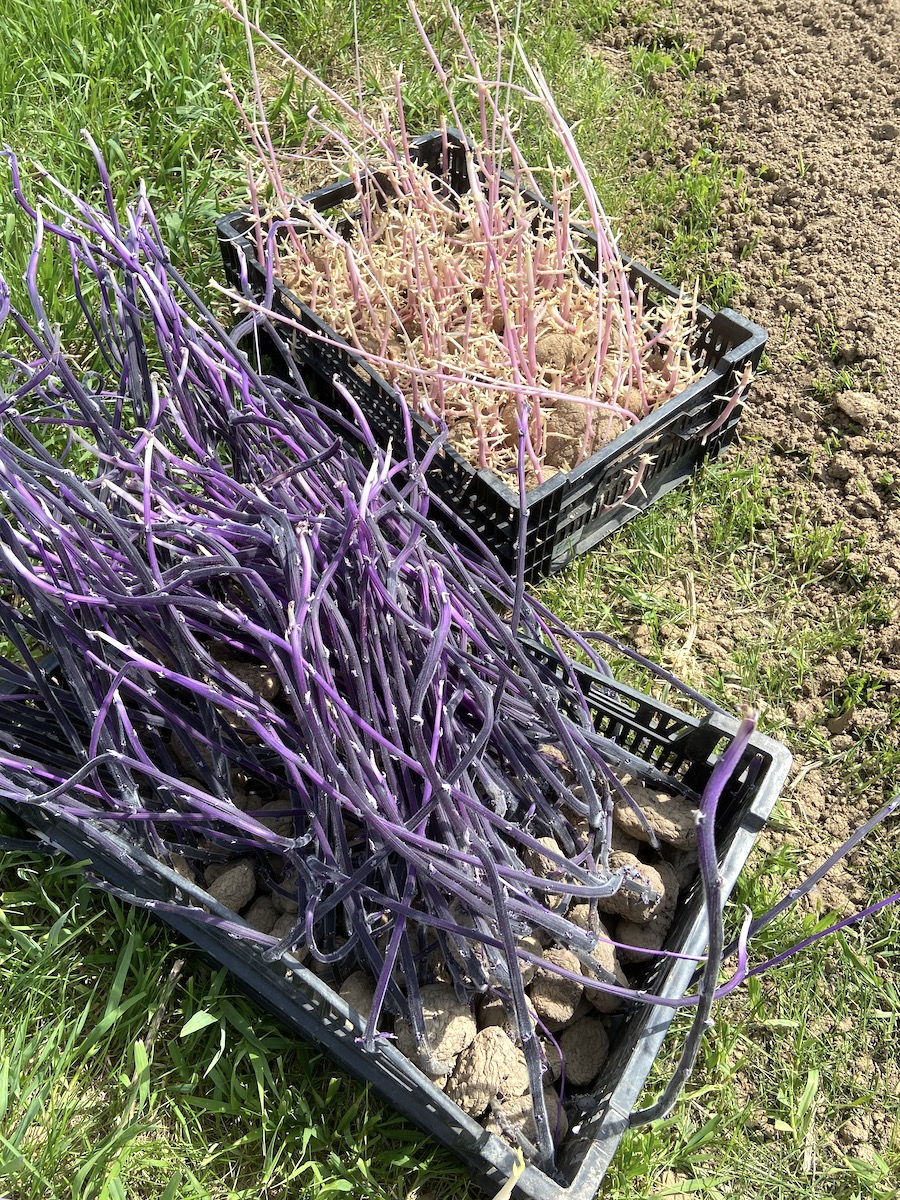
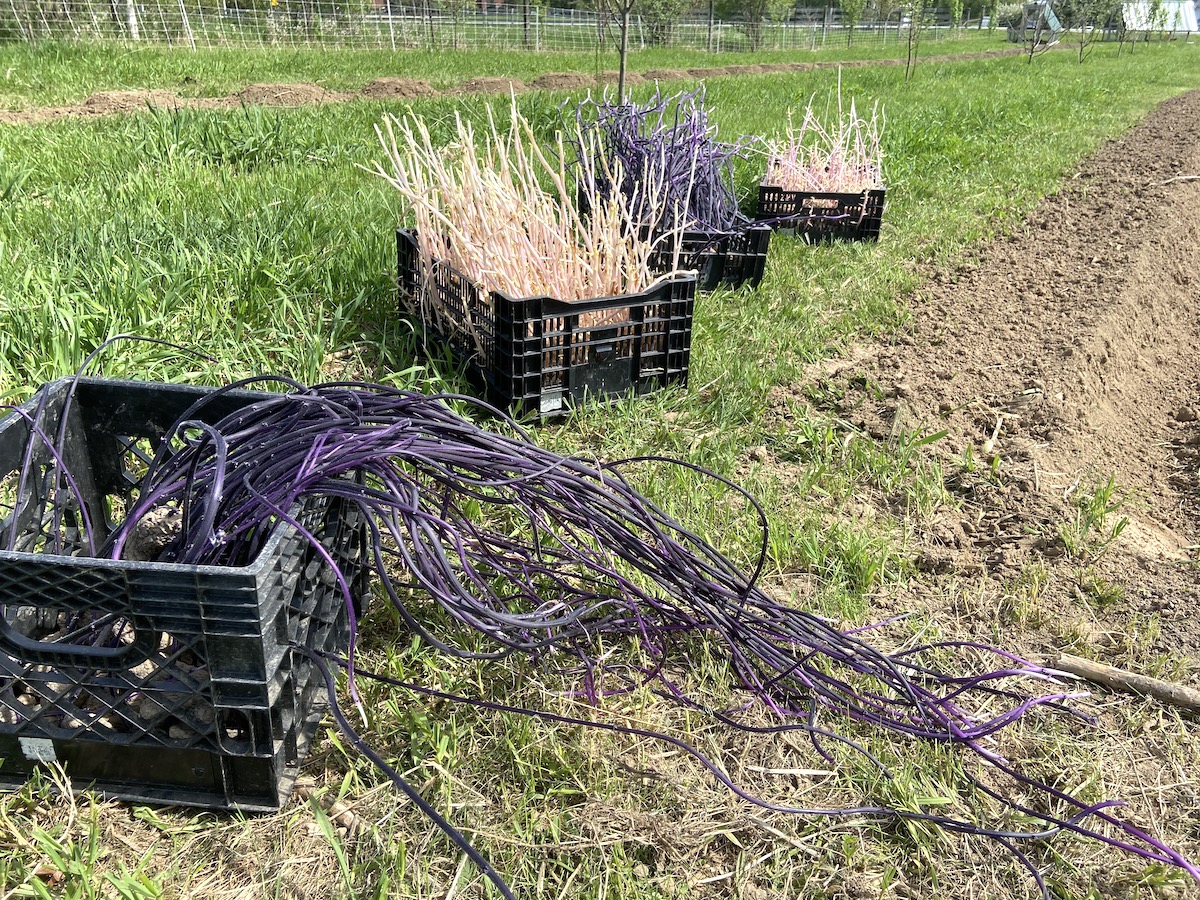
Potato sprouts can get long. We’ve planted potatoes with sprouts over 3 feet long! So how long is too long?
From our experience, it’s more about the condition of the potato than the length of the sprout.
Even with massively long sprouts, we’ve had a few potatoes fail to grow and take root. They almost always go on to produce new tubers. So when is a sprouted potato not fit to plant?
Don’t plant sprouted potatoes that are:
- Rotten
- Moldy
- Overly mushy (beyond just shriveled or soft)
- Hard (like rock hard)
- Off-colored (some green is ok for planting, just not eating)
If you notice any of these conditions in your seed potato stash, immediately remove them from the others and send them to the compost heap.
Long sprouts aside, your overly sprouted potato should still resemble a potato—just shriveled and shrunken. These are fine to plant.
When To Plant Sprouted Potatoes
Potatoes have a wide window of time in which they can be planted.
Early season planting can happen once the ground thaws as early as a few weeks prior to the frost date in your area.
Late season planting be pushed late into the summer or fall. The key is making sure you have enough time to dig them up before the ground freezes over.
Potato harvesting can begin as early as 3 months after planting. You can go beyond this. But leaving your tubers in the ground too long can leave them susceptible to rodent or pest damage.
The real question is what do you plan to do with your potatoes? If you just plan to have them for fresh eating throughout the season, then plant them as early as you like and harvest and eat as needed.
If your goal is storage, for food or next year’s seed potato, then planting and harvesting a bit later is likely your best strategy. The sooner you harvest, the sooner they are likely to sprout.
Getting the timing of when to plant and harvest potatoes down can take some trial and error. It all varies based on your climate, potato varieties, and storage methods/conditions.
In our Zone 5 growing climate, we’ve typically planted our potatoes between mid-May and early June. This gives plenty of time for the tubers to fully mature underground. We then typically harvest in October to avoid the potential for early winter conditions setting in.
How To Plant Sprouted Potatoes
Planting potatoes with long sprouts is easy! In reality, it’s not that different than planting any seed potato with average sprouts. But there are some things you’ll want to keep in mind that are unique about planting potatoes with long sprouts.
1. Protect The Sprouts!
Remember, those sprouts can be delicate! And they may be in a tangled mess depending on how they’re stored. Take your time untangling them and handle them with care to not damage or remove them.
2. Cut Your Potatoes (or don’t)
There are two ways to plant potatoes; whole or cut into sections.
Cutting your seed potatoes into smaller sections is very common. This gives you more ‘seed’ overall allowing you to cover more ground.

Just keep in mind, by cutting your potato in half you are also cutting its energy store in half. This is not as much of a concern with a freshly sprouted potato. However, a potato that has sprouts over a foot long has already dispensed a lot of energy into those sprouts.
Therefore, if you can avoid it, we recommend you plant your potatoes with long sprouts whole.
If you do cut them, here are some guidelines:
- Leave two sprouts per cut section. It doesn’t matter how long the sprouts are, just try to have two sprouts on each section you’re planting. If the whole potato only has one or two sprouts, then leave it and plant it whole.
- Cut them a couple days in advance. Cutting your seed potatoes a couple days in advance will let the cut end dry out and scab over to prevent potential rot after planting.
- Don’t cut them too small. One potato can be divided up into many sections. Unless you really need to stretch your seed potato supply, try not to cut your potatoes smaller than halves or thirds.
Because potatoes with long eyes are already a little past their peak, we’ve moved toward not cutting them and just planting them whole. It saves you a step and gives your potato more energy to start growing.
So, if planting whole potatoes is your plan, then you can move right onto the next step!

3. Choose A Planting Area
Potatoes prefer to grow in full sun. But partial shade can also work.
Loose, loamy soil is the soil type potatoes grow best in. Heavy clay soils are dense and may prohibit the roots and tubers from developing optimally. Clay can also hold too much moisture. Opposite of clay, sandy soils can be a fine potato growing medium. Just keep in mind water drains quickly through sand so more frequent watering or irrigation will be necessary.
4. Prepare Your Planting Area
There are lots of ways to plant potatoes; pots, planters, bags, holes, or trenches are all common. For planting potatoes with long sprouts, we’ll focus on trenches since this is the easiest way to fully cover the planted potato plus the long sprouts.
To form your trench, start with tilling a row about 12” deep to loosen the soil. Any garden tiller works great, or a broad fork is an excellent way to manually loosen the soil.
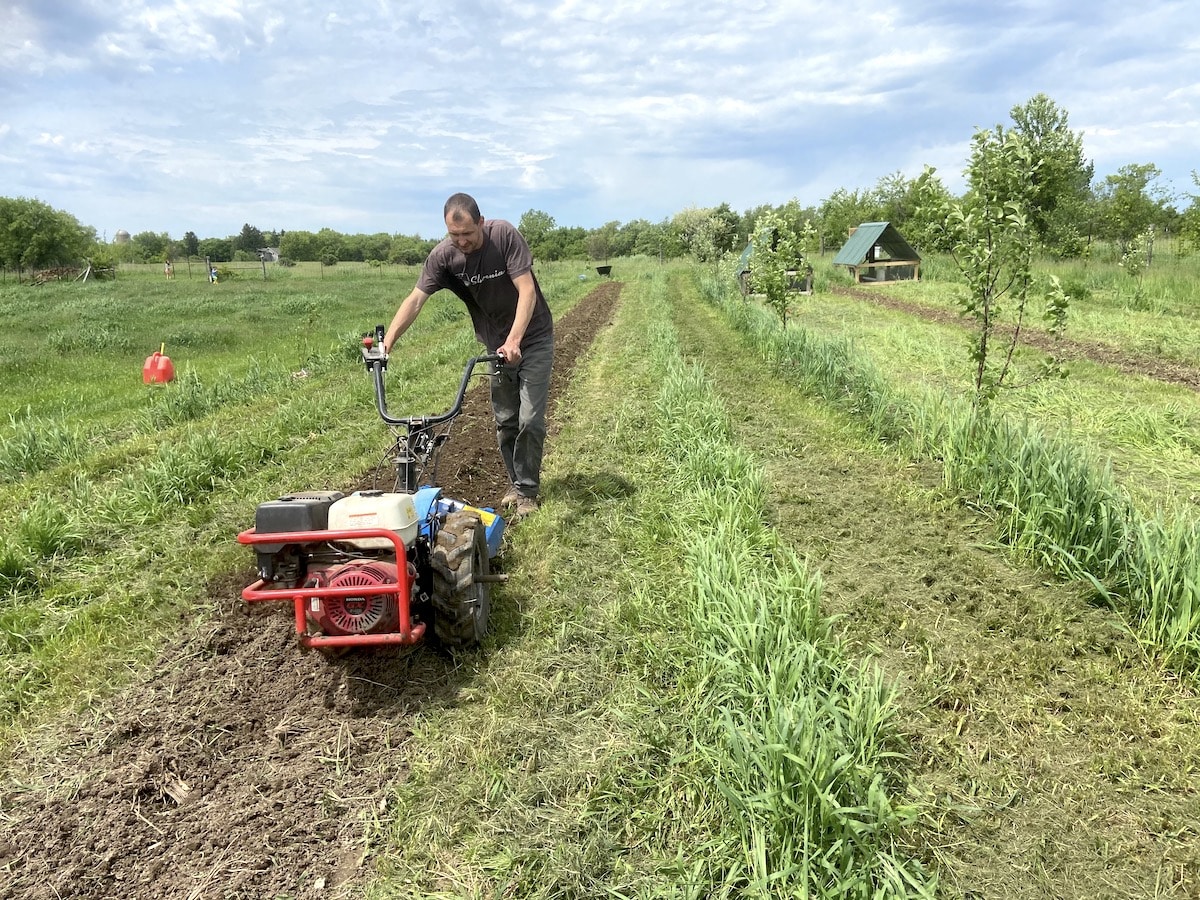
Next dig a trench 6-8” deep to plant your potatoes into. This can be done manually with a shovel. Or we use a rotary plow attachment for our BCS tractor which makes the job a breeze.
Potatoes are typically planted 12” apart. So count how many potatoes you have to plant, and make your trench that many feet long.
5. Plant Your Potatoes
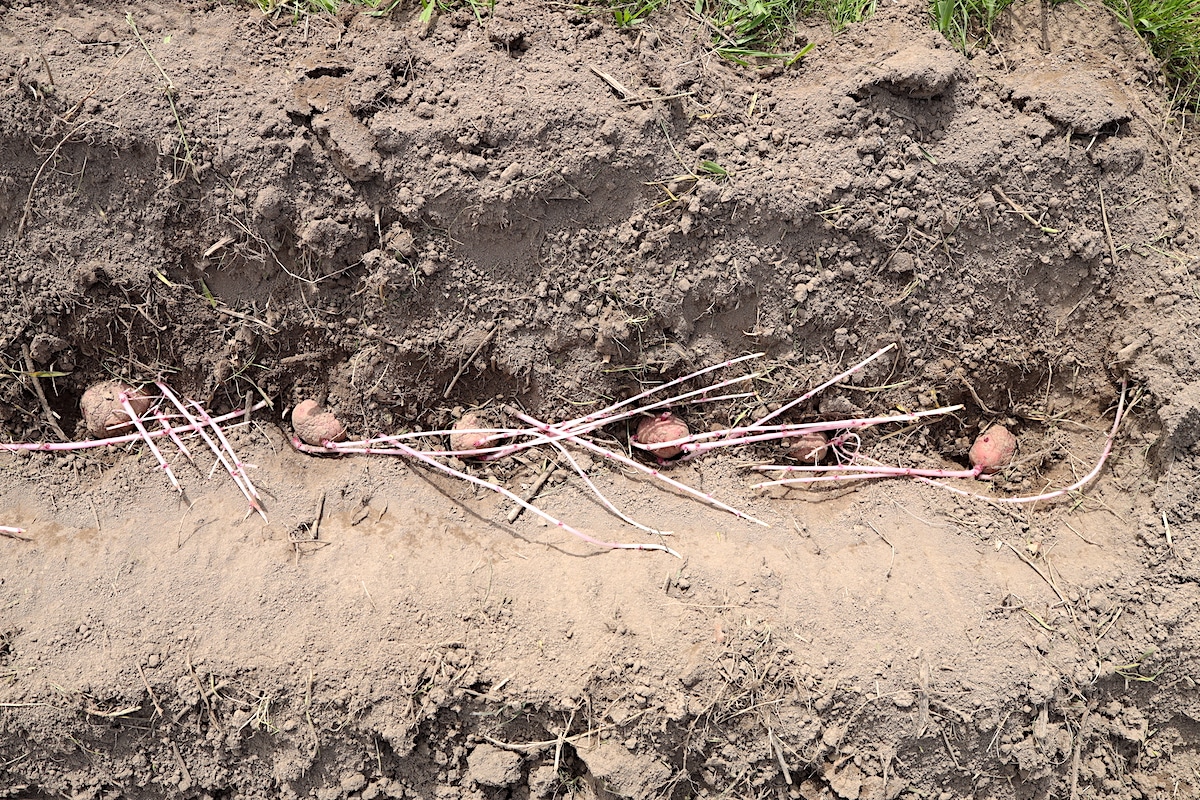
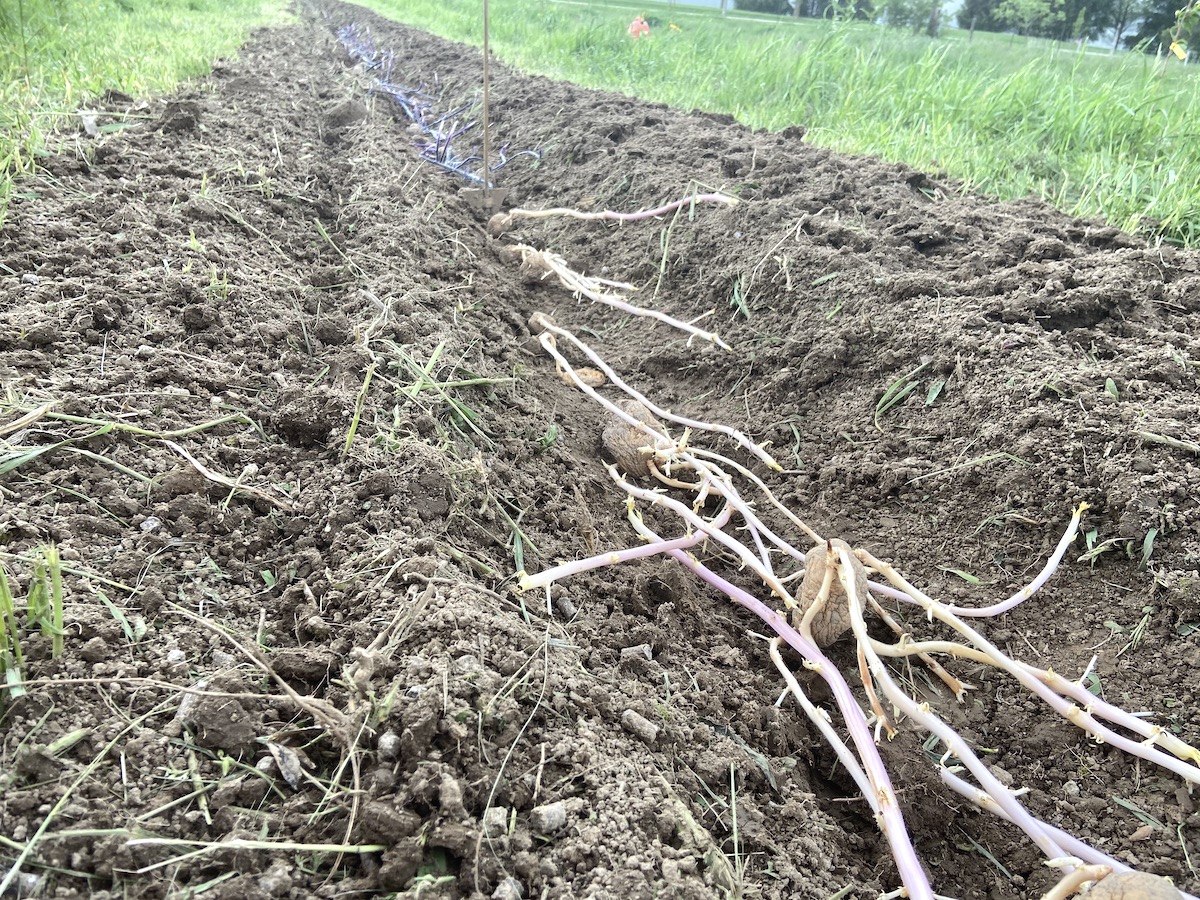
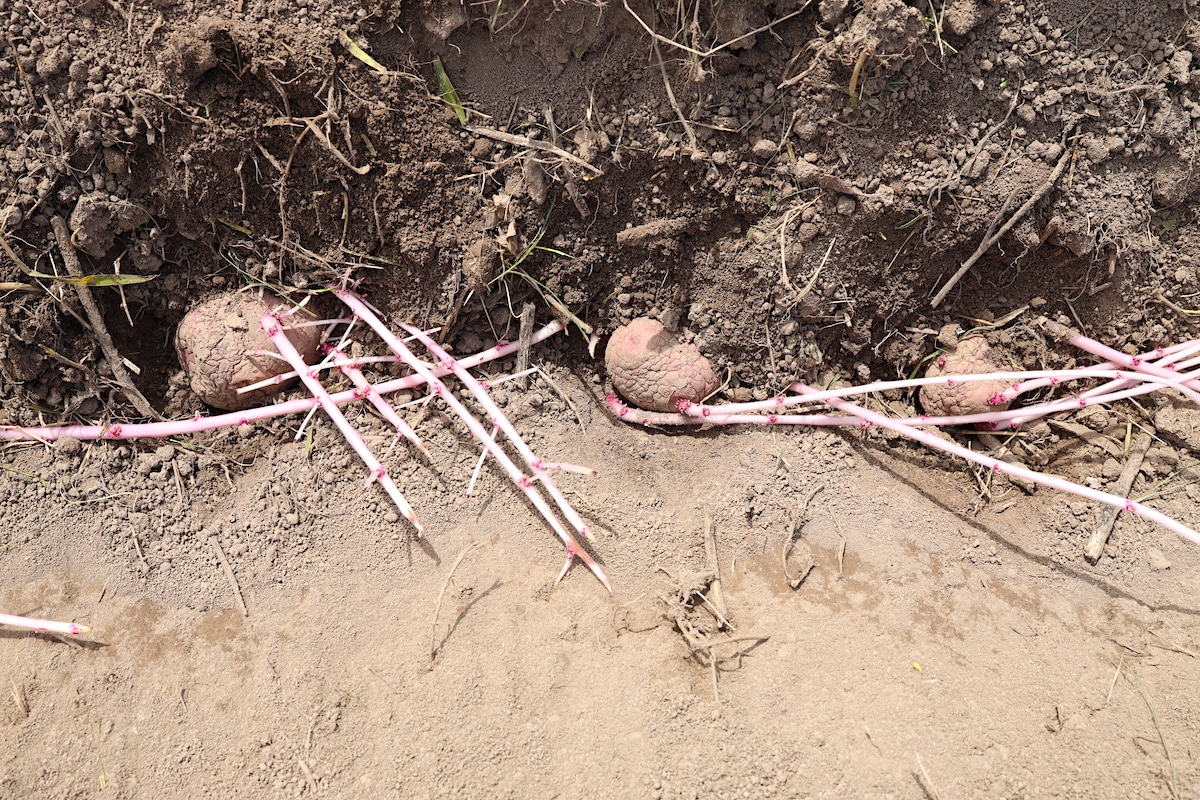
Gently place your potatoes into your trench spaced 12” apart with the sprouts also laying horizontally in the trench. If your sprouts are longer than 1 ft., they may overlap the next potato that is planted. This is Ok.
If you are planting cut potatoes, be sure to plant them with the cut side down and the sprouts facing up.
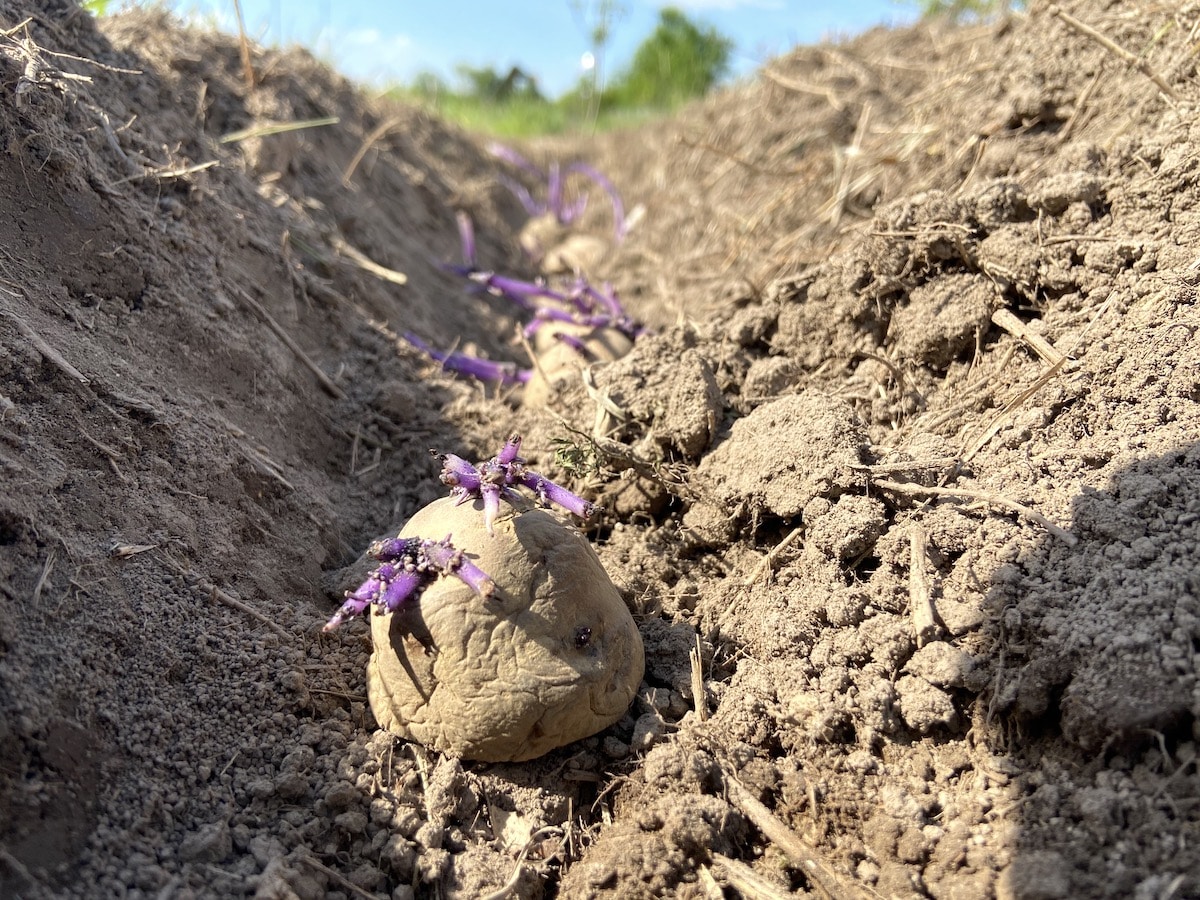
Once your potatoes are in the trench, cover your potatoes with soil. Use a landscape rake or shovel to pull soil on top of your potatoes. Make sure the potatoes and sprouts are fully covered. Mound soil to achieve maximum coverage right above the row where the potatoes were planted. Ideally they would be 10-12” deep after mounding.
If your soil and sunlight conditions are ideal, you might be able to get away with tighter spacing when planting. We often plant our potatoes 6-8” apart and have still had great yields. But you run the risk of your plants being overcrowded.
We also typically try to plan our potato planting right before rain is predicted. If it remains dry, you may want to consider watering your potato plants regularly to keep the soil moist.
Once you get this far, your potatoes are now in the ground and planted!
Moving that much soil can be a lot of work so give yourself a well earned pat on the back. In 1-2 weeks you should see your potato plants popping through the soil and begging to leaf out!
6. Tend Your Potatoes
We love growing potatoes because they can be fairly hands off between planting and harvest.
Keep on top of weeding and watering around your potatoes for best results. Since they grow in long rows, potatoes are a great candidate for drip tape irrigation. Drip Depot is our go-to source for all our drip irrigation needs.

Many pests can also target your potato plants. We’ve had to deal with the Colorado Potato Beetle every year. These pesky beetles devour your plants foliage above ground leading to decreased growth below ground. We try to keep on top of hand picking off and squashing them, but potato beetle traps can also be effective.
And after about 3 months of caring for your potato plants, they’ll be ready to start harvesting!
Is Hilling Potatoes Necessary?
Hilling, or mounding, is when potatoes are planted at a lesser depth to start (4-6”) and then additional layers of soil, compost, or mulch are added on top of the potato plants as they grow.
Typically, you’d wait until the plants have established themselves several inches above ground and then pull more soil on top of them. This can result in greater yields and less chance of potatoes being exposed above the surface of the soil.

However, we prefer a more hands off approach and don’t practice hilling. Instead, we dig our trenches deeper initially and then mound as much soil as we can on top of them right from the start.
There are some risks to this—like potatoes growing too close to the surface and turning green, in which case you won’t want to eat those. But it also saves you the ongoing need to hill them through the season which, in our experience, still provides ample yields.
Can You Plant Store Bought Potatoes?
Yes. Just keep in mind that many store bought potatoes are coated with a sprout inhibitor.
This inhibitor provides an artificially prolonged dormancy period so the potato preserves longer for fresh eating.
To encourage sprouts to form on your store bought potatoes, wash them thoroughly to remove the sprout inhibitor. Then, store them in a space around 70°F with plenty of light for a few weeks prior to planting. This is a process called chitting, or encouraging the growth of sprouts for planting potatoes as seeds.

Can You Plant Potato Sprouts?
No. A potato sprout on its own without a tuber attached to it will not grow underground. This is why it’s important to be delicate when handling your seed potatoes with long sprouts and make sure they stay attached.
If a long sprout falls off, will a potato plant still grow?
We can’t tell you for certain one way or another. Chances are there are other small sprouts already formed on the potato that will continue to grow.
Losing a long sprout decreases the odds of a potato reproducing. But nature is resilient! That potato wants to survive.
If you have plenty of seed potatoes and want to discard the ones that have a broken-off or damaged sprout, you can go that route. But if seed potato is limited, it’s worth putting it in the ground and giving it a chance!
We Love Growing Potatoes!
There are few crops as rewarding as potatoes. They are a key player that help us grow over 80% of the food we need to feed our family year round right from our homestead!
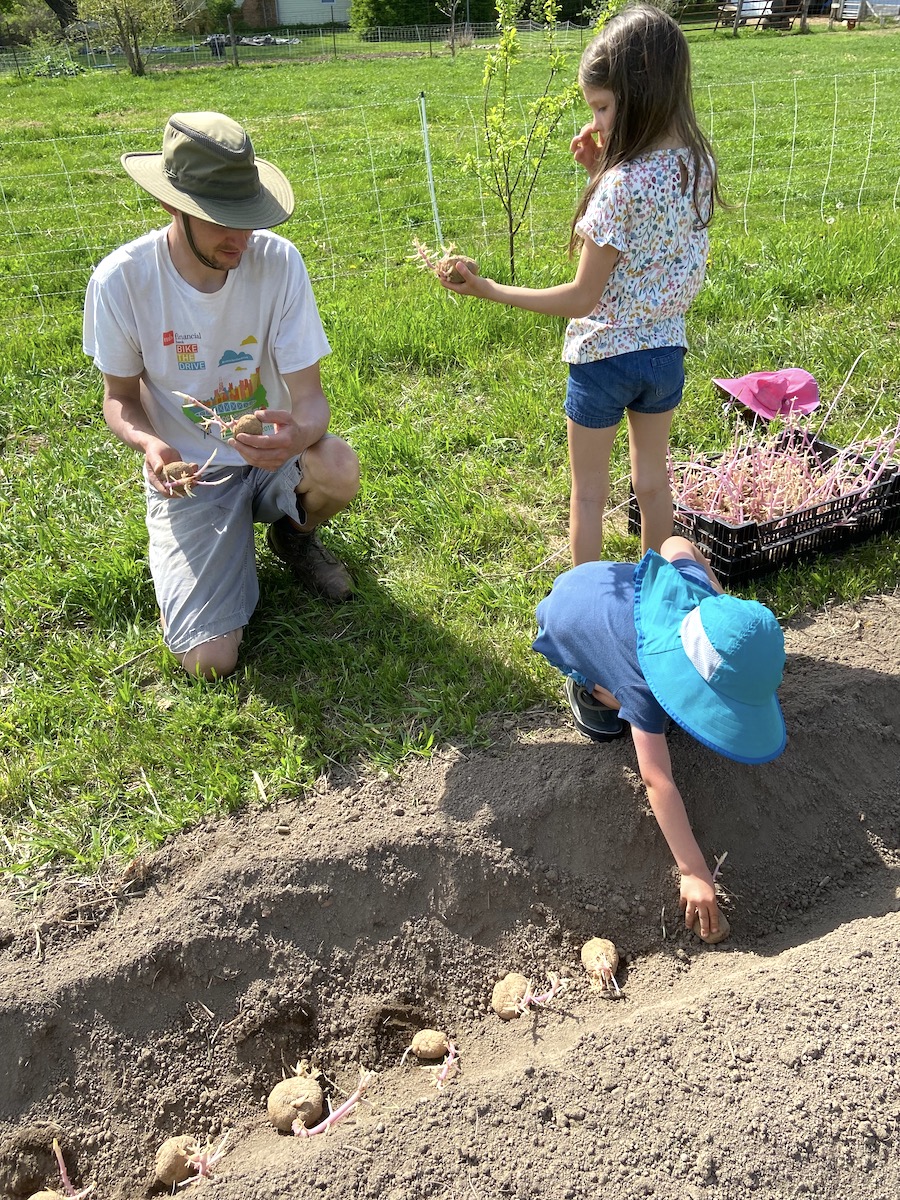
The plants produce abundantly. They’re fairly hands off to grow. They store amazingly well. Seed potatoes are easy to save. And planting them is the perfect activity for the whole family to get involved with!
Get more gardening inspiration:
- How To Store Potatoes From The Garden Long Term
- Beginners Guide to Self Sufficient Homesteading
- How To Use Soft Potatoes From The Garden + Recipes!
- How To Create A Quarter Acre Self Sufficient Homestead Garden
- 10 Essential Storage Crops You Need To Grow
Pin it for later!


I’m a 41 year old home school mom, gardening in AK. I was concerned my seed potatoes would be too sprouted before the ground thaws but I think it’s gonna be ok. This was very helpful. Thanks!
Glad it was helpful and hope things thaw out for you!
It is good to know that my seed potatoes that did this aren’t a total loss, but I’m still a little confused. Mine are seed potatoes bought this spring. The came early, we had a really late spring for our area so I put them in the cellar where I plan to store my harvest. But if they did this in a matter of about two months does this mean my harvest will do this too? I’m new to gardening and this is my first time growing potatoes. I thought storing them in a cool, dark place was supposed to keep them from sprouting..? Thank you for any insight you can offer!!
Hey there! That’s a really good question. As I understand it, and from our experience, the potatoes should lay dormant in your cellar or basement for many months after harvest. Taking time to properly cure them will help preserve them longer. Storage can look different though once the potatoes start to sprout. You want to keep them very cool, less than 50°F is ideal – I’ve heard of some even keeping their seed potatoes in the fridge. Keeping them dry with lots of airflow is also important – so if they came bagged or bundled up, you’d want to let them dry and then store them in something where they are more spread out for plenty of air movement. The last thing is, and this always seems counterintuitive to me, is that some exposure to light actually seems optimal for seed potatoes to store the longest and slow the growth of sprouts. That’s my understanding from reading up on it and what we would like to move toward in the future for better seed potatoes come springtime. Hope that helps and happy planting to you!