From Scratch Farmstead
  • About
  • Homestead How-to’s
    • Family Milk Cow
    • Gardening
    • Chickens
    • Small Scale Farming
    • Buying A Homestead
    • Homestead Living
  • Nourishing Recipes
    • Home Dairy
    • Food Preservation
    • Breakfast
    • Main Course
    • Sides
    • Dessert
    • Sauces & Condiments
  • Natural Living
    • Skin Care
    • Home Essentials
    • Living On A Budget
    • Our Healing Journey
    • Homestead Skills
    • DIY
    • AGA Stove
Tag:

homestead

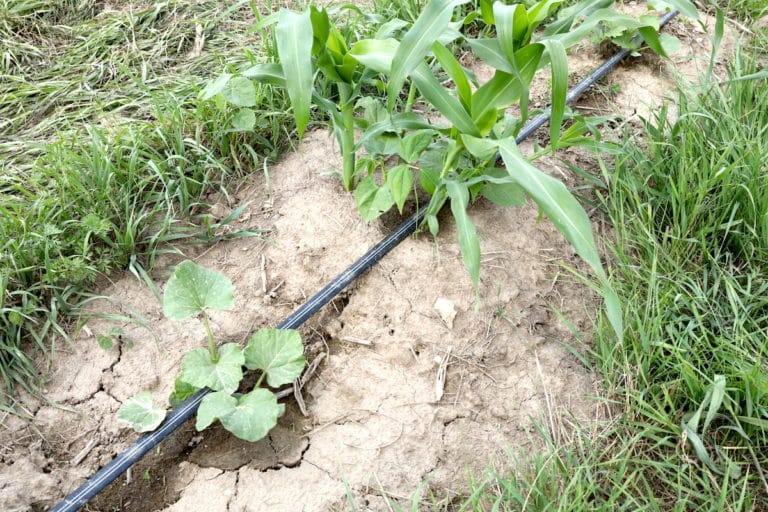
garden row with drip irrigation installed
GardeningHomestead How-to'sSmall Scale Farming

Drip Depot Review | Best Drip Irrigation Supplies

by From Scratch Farmstead May 27, 2023

We purchased our first drip irrigation system from Drip Depot in 2021 and haven’t looked back! This post covers our full drip depot review along with all the basics of piecing together your own DIY drip irrigation kit for a garden of any scale.

If you’re under the impression that drip irrigation is only for farmers and professionals, then think again!

Yes, it was a bit intimidating at first. But these foolproof irrigation systems are for ANYONE! And any application. 

Drip irrigation is easy, affordable, and the most reliable and efficient watering solution out there.

Let’s dig in!

Our Watering Woes

There’s a section of our barn that closely resembles a sprinkler graveyard. 

Maybe it’s us, but any mechanical sprinkler option we’ve tried just doesn’t last. The ratcheting types. The oscillating type. Overhead ones that mount on t-posts.

Sure they’ll work fine when new and just out of the packaging. But after a month or two of heavy use in the garden they get less and less reliable.

Oh, looks like the sprinkler jammed up again. One half of the garden is soaked while the other is bone dry. 

No problem. Remove the sprinkler, clean it a bit, set it back up. Two days later—jammed again! And the problem persists and gets worse and worse. Sprinklers that rely on mechanical motions—especially if your are on well water—just don’t hold up over time.

homestead vegetable garden

Eventually we just give up and go back to watering by hand. Not a good use of our time.

The year we moved onto our 5 acre homestead something else happened—drought set in.

We just couldn’t keep up with the hand watering anymore; especially after planting long rows of crops in our 1/4 acre self sufficient homestead garden.

We needed a solution fast. That’s when drip irrigation came to mind.

Drip Depot Review – Pros & Cons

That summer I happened to be working for our local farmers market in town. I knew nothing about drip irrigation. But I figured farmers would!

I asked one farmer where they get their drip irrigation supplies—Drip Depot.

Asked another—Drip Depot.

There seems to be a common thread here. So I went to the Drip Depot website.

They call themselves the “DIY Irrigation Superstore.” And that’s exactly what I found. A no-frills site with great prices, everything you need, helpful information, and fantastic customer service.

Drip Depot Review – PROS

Great Prices

The first thing I did after finding Drip Depot was price compare. They’re right on par or even more affordable than any other leading drip irrigation supplier out there. 

Huge Selection

They have everything! Every irrigation application you can imagine, most any brand of irrigation supplies out there—Drip Depot has you covered.

Helpful Information

Their website is a one stop shop for videos, tutorials, calculators, and other tips to make your DIY drip irrigation system a success. 

run of drip tape for irrigation

Fantastic Customer Service

From personal experience and from reading other customer testimonials, the customer support Drip Depot provides is top notch. You don’t need to be a drip irrigation expert. But they are and you’ll receive prompt and helpful support.

Free Shipping

Drip Depot offers free shipping on orders over $49. That can equate to huge savings. And while a basic drip irrigation system isn’t going to break the bank, most orders will have no problem meeting that minimum threshold. 

Drip Depot Review – CONS

No Phone Support Option

Maybe I’m old school, but my preference is still to talk to someone by phone. Drip Depot relies on an email messaging system for their customer support. You’ll get the answers you’re looking for in written form and not over the phone. Honestly, sometimes this can be more helpful since you have something to reference back to with easy links available to find what you’re after.

Website Learning Curve

I find the Drip Depot website a bit cumbersome. It’s all there. You can find whatever information or parts you need. There’s just a lot of it. And sometimes you have to dig through multiple links or pages to find what you’re after. But don’t get overwhelmed or discouraged. Use the search tool, watch some of their videos, reach out to customer support, and you’ll be just fine 🙂

drip tape irrigation system in homestead garden

No One-Stop-Shop Guide

Maybe it exists on the Drip Depot website, but I couldn’t find one singular guide that told me all the drip irrigation parts needed for a basic garden setup. What I did was reference their drip irrigation kits. While no kit exactly matched my needs, it allowed me to use the kit system as a template to know what parts I needed when building my own system. 

That is also a big part of why I’m creating this post—to create that one-stop-shop guide for a basic drip irrigation system.

Why We Love Drip Irrigation on our Small Scale Homestead

Truth be told, gardening is not our forte. But we’re committed to setting up our gardens year-after-year and growing as much food as we can to feed our family.

We previously assumed that drip tape was reserved for the elite. Farmers, market gardeners, greenhouse growers, and the like.

Surely, a drip irrigation system would be overkill for us ragtag, small-scale homestead gardeners? We were wrong!

Drip irrigation offers SO many benefits and you can create a system that meets your needs for ANY size.

Let’s look at some of those benefits.

Benefits of Drip Irrigation

Less Evaporation

When sunlight mixes with tiny droplets of water flying through the air, evaporation happens. Any overhead watering system is just not that efficient. Drip irrigation minimizes evaporation as water is applied directly at soil level where your plants are located.

Less Waste

Most sprinklers cover… well, everything. Weeds, walking paths between garden rows, the side of your garden shed. Drip irrigation is direct watering resulting in very little waste. Water what needs watering and don’t water what doesn’t. 

three sisters garden with irrigation

Less Relocation

Any mechanical sprinkler we’ve used needs to be relocated multiple times each watering session to hit the whole garden. A drip tape system can easily reach every row and area of your garden and it only requires a one-time setup. No moving required!

More Peace of Mind

After your sprinklers start failing, you become constantly paranoid that they’ll jam up again and flood an area of your garden. With drip tape, very little can go wrong. In our 3 years of use. It has run flawlessly without any time spent worrying or troubleshooting.

More Time Back

A hands-off drip irrigation system means you get time back in your world to focus on more important things. With a young family, running a business, and plenty of other things to tend to around our homestead, this set-it-and-forget-it setup has become invaluable to us!

Basic Drip Irrigation Parts for a Home Garden

Drip irrigation systems are not overly complex. But there are a fair amount of parts and fitting needed to make up a complete system.

The following is an overview of those parts and how to choose the right ones for you.

Don’t get overwhelmed. Take it one part at a time. Get some basic measurements of your garden area and you can put together your own kit in no-time!

basic drip irrigation parts for garden
A couple quick notes before we begin:

– All parts I’ve linked to are designed to work with a standard sized garden hose with 3/4” fittings. There are larger and smaller setups available. But for our purposes we’re going to stick with what’s most common for home use.

– These parts are designed to be hand tightened only without the need for thread seal tape. Don’t use tools to tighten. Just snug everything up with your hands and you are good to go.

– Keep in mind the parts we linked to are the ones we chose for our system. There are other options on the website for you to consider. Our criteria is typically to select what’s economical yet still meets minimum standards of quality and performance.

Parts at Your Water Supply

The following parts are needed at your water supply. We have a hydrant in our barn that supplies our drip irrigation system with water. A simple hose bib or spigot also works.

drip irrigation parts at water source
drip irrigation system connected at hydrant

Hose Manifold (optional)

To free up connections for additional hoses at your water supply a Hose Manifold can be used. We typically use all 4 connections on the 4-way manifold pictured. A manifold is optional, but gives you way more flexibility throughout the season.

4 way hose manifold

Automatic Water Timer (optional)

You can certainly use a simple shut off valve to turn your drip tape system on and off manually by hand. But in our experience, an Automatic Water Timer is worth the investment. Basic timers can also be found at most home improvement stores. They allow you to fully customize when, how often, and how long your drip tape runs for. If it rains, skip a day of watering with the push of a button! And you can program it to run during the early morning hours before the sun rises the it’s most efficient. 

automatic water timer for drip irrigation

Regardless, you will need some sort of shut off valve first in your system since most of the following components are not designed to operate under constant pressure.

Backflow Preventer

The Backflow Preventer is the first component after your timer or shutoff valve. It allows water to only flow one way and not feed back into your system. If your backflow prevent appears to leak, don’t worry, this is normal. It will drain out excess pressure and water from the system once the valve closes and water pressure is turned off.

backflow valve for drip irrigation

Filter

Next, a Filter utilizes a mesh screen to remove any particulate or debris from the water that could clog up the emitters in the drip tape. A removable cap on the filter canister allows for easy flushing to clear out the filter without dissembling the setup.

filter from drip depot for drip irrigation system

Pressure Regulator

The last part needed at your water supply is the Pressure Regulator. This creates even pressure and flow rates within your system. Most drip tapes are designed to run at 10 PSI. But you may need to adjust your pressure regulator based on the drip tape you choose. Keep in mind the basic pressure regulator I have linked is designed to work under an average flow rate of water in GPM (gallons per minute). If you have a larger well or water supply, you may need to upgrade your pressure regulator. There is a flow rate calculator on the Drip Depot site that gives you a GPM estimate by timing how long it takes to fill a 5 gallon bucket with water.

pressure regulator for drip irrigation
drip irrigation pressure regulator

Parts at Your Garden

After you hand tighten all the parts at your water supply, simply connect a garden hose up to it and run the hose out to your garden area. In your garden, you’ll need a run of main line tubing running the width of your garden, a run of drip tape at each garden row, and a smattering of fittings to connect everything together.

Tubing

Your garden hose will connect into a mainline tubing that runs perpendicular to your garden rows. We ordered a 100’ roll of 1/2” Polyethylene Tubing. You can measure out the width of your garden and determine the length you need. Tubing can be cut to length with a standard utility knife or scissors.

drip irrigation tubing and fittings from drip depot

Tubing Fittings

A Female Hose Thread Adaptor is needed at the front end of your tubing to allow your harden hose to connect into the tubing. At the end of your tubing, a Tubing End Cap is required. Both are installed by sliding the tubing onto the fitting, and then tightening the fitting clasp over the tubing.

Tubing Punch

We’ll get into drip tape next, but at each run or leg of drip tape, you’ll need to punch a hole in the tubing that your drip tape connects into. This Tubing Punch is needed for that. There are a few different punch sizes depending on your flow rates and needs. But the punch linked is the size for the parts referenced in this post.

Tubing Plugs

Don’t forget to pick up a package of Goof Plugs! These plug up the holes in your tubing in the event you ever need to relocate a run of drip tape.

Drip Tape

Drip Tape is plastic tubing with emitters. The emitters are where water drips out of at a constant, slow trickle when the system is on. Drip tape is most commonly installed along the soil surface, but some have specially designed emitters that allow the drip tape be buried just below the surface. This can actually extend the life of the drip tape since sun exposure is what most rapidly deteriorates the tape material.

drip irrigation roll with 8" emitters from drip depot

If there’s one part of the drip irrigation process that can send your head spinning, selecting your drip tape is it. Not only are there different brands available, but each offer different emitter spacing, emitter flow rates, and tape thicknesses. Drip Depot has produced this drip tape buying guide to help you select the proper drip tape for your application. 

If you’re not sure and just looking for an all around good fit for a variety of things, I selected this Drip Tape. It has 8” emitter spacing, an average emitter flow rate, and a thicker wall so your tape will last as long as possible.

To determine the length of drip tape you need, simply measure the length of your garden rows and multiply that length by the quantity of rows. For instance, if you have 10 rows that are 10’ in length, then a 100’ roll of drip tape is perfect. Even though the rolls come in sizes of 100’, 1,000’, or 10,000’, consider getting a bit more tape than what is immediately needed. Drip tape does not last forever and you may expand your gardening over time, so having some extra on hand can be a good thing.

drip tape takeoff fitting connected to tubing

Drip tape is installed with the emitters facing up and can be cut to length with standard household scissors or a knife. Note that depending on the width of your garden rows and what you have planted, you might also consider running two or more runs of drip tape per row. But for most applications, one line of drip tape per row is sufficient.

Drip Tape Fittings

Just like your tubing, your drip tape runs will have a fitting at each end. At the front end, a Takeoff Fitting connects your drip tape into your tubing. It simply plugs into the hole you’ve punched in your tubing at each garden row. These takeoff fitting come either with or without a shut off valve. If you can afford the extra cost, I recommend the ones with the shutoff valve. This gives you extra control to water or not water certain rows of your garden, which could be helpful throughout the season.

takeoff fittings and end cap fittings for drip tape
takeoff valves for drip irrigation system

At the end of each run of drip tape, an End Cap Fitting is needed. Both the takeoff and end cap fittings attach by sliding the drip tape onto the fitting, then tightening the clasp over the drip tape.

Tube Stakes

Both the tubing and drip tape need to be secured down with stakes. These stakes comes in either 6” or 8” lengths. I like to install them every 5 to 10 feet. Since the system is low pressure, things don’t move around too much. But you’ll definitely want to pick up enough stakes to make sure everything stays in place and you’re not creating trip hazards in your garden.

stakes for drip irrigation system

And those are the basic components of a drip tape irrigation system! The beauty is that once you have it all setup, it’s easy to replicate year after year in your garden space.

Drip Irrigation Frequently Asked Questions

Who is drip irrigation for?

We firmly believe that drip irrigation is for everyone! Even if you are just starting out as a gardener, a simple drip irrigation system can really simplify your watering world. And the components can adapt and be reconfigured as your garden layout changes over time. Make the investment upfront and avoid the hassle and inefficiency of other watering options.

How much does a drip irrigation system cost?

Our system with 1,000’ of drip tape, 100’ of tubing, and all the other basic components needed cost about $200 a few years ago. Prices have risen a bit since then, but not much. We already had an automatic watering timer, garden hoses, and a hose manifold. Of course, your cost will depend on your gardening setup. It’s possible to get a very basic system for a small garden for $100 or less. 

watering potatoes with drip irrigation

Are there drip irrigation kits?

Yes! Drip Depot offers a wide array of Drip Irrigation Kits to fit many different applications. These include kits for: container gardening, greenhouses, hanging baskets, landscaping, raised beds, row crops, small farms, trees, vegetable gardens, vineyards, window boxes, and more. The pre-bundled kits offer great value and highlight how versatile drip irrigation systems can be!

How long will a drip irrigation system last?

While most components on a drip irrigation system will last for years or decades, the drip tape itself can be the one exception. Drip tape, due to its constant sun exposure, tends to become brittle and crack over time. The longevity of drip tape is also dependent on the wall thickness you purchase. Thicker walls will last longer; thinner walls will have a shorter lifespan. Some replace their drip tape every year to avoid the cracking. We are on year 3 of using ours. There are some cracks, but the tape still works fine for our purposes. And locating the cracks and covering over them with heavy duty tape is always an option.

roll of 5/8" drip tape from drip depot

My garden is already planted!… Can I still install drip irrigation?

Yes! You can install a drip irrigation system at ANY point throughout the growing season. In fact, we’ve only ever installed them after our gardens are planted. This allows you to plant all your seeds or seedlings without the drip tape in your way. We’d recommend trying to get your system in before plants are too mature, for ease of laying down the tape without too much foliage in the way. But no time is too late for drip irrigation and then you’ll have it for future years!

What if I have multiple garden spaces or raised beds?

As you can see from some of the kits, like the Raised Bed Kits, drip irrigation can be very customizable. There are tons of fittings that allow you to split off your system into as many areas or zones as needed. The drip tape itself is designed to run in straight lines only. But with fittings that allow for bends you can configure your drip tape into almost any shape.

Garden On, Friends!

So go check out the Drip Depot website and see the possibilities for yourself!

Have fun customizing your very own drip irrigation system and see the stress of watering throughout the growing season disappear.

fresh organic garden basil

And while I’ve intended for this post to be somewhat of a plug-and-play template for a basic garden setup, you should still do your research and make sure you are buying the right parts for your application. 

If have questions you can check out their Customer Support or Contact Us pages, or feel free to ask us below! We can’t guarantee we have all the answers, but we’re happy to share more about our experience using drip irrigation and Drip Depot!

Happy gardening!

Some of the above links are affiliate links. This means we earn a small commission on qualifying purchases at no cost to you. We are so appreciative of your support!

May 27, 2023 0 comment
0 FacebookTwitterPinterestEmail
killing rats with baking soda sugar and cornmeal
Homestead How-to'sHomestead Living

Get Rid of the Rats in Your Barn

by From Scratch Farmstead May 6, 2023

Let’s face it, rats are the worst! Mice too. But how do you safely, naturally, and effectively get rid of the rats and mice in your barn, shed, or home? We found some really simple solutions. Let’s dig in!

We have a rat problem!

When rats invade, sometimes we’re not quick to admit it. Not even to ourselves.

About midway through this past winter on our homestead, I started to notice some signs of rodents in our barn. A hole dug here. Some droppings there.

But, between our fourth child on the way, wrapping up a bunch of projects prior to her birth, and Joelle breaking her leg on top of all of it, there wasn’t time to think about it, let alone deal with it.

Fast-forward to early spring, and it was no longer a small problem. One night I had to go out after dark to check on something in the barn. I flipped on the light, peeped in the chicken coop, and to my shock and horror it looked like the ground was moving.

This was no singular rat. It was a whole beady eyed rat colony!

This meant action. This meant war!

Signs That You Have a Rat Infestation in Your Barn

Rats in your home or outdoor spaces can start subtle. But if they take up residence, it won’t be long before you notice signs of their activity everywhere. 

Here’s some common signs of rat infestation that pop up:

Large Holes

Rats are proficient diggers. We started noticing one or two holes a couple inches in diameter along the base of our chicken coop. After a couple months, these holes turned into an intricate web of tunnels giving the rats free access to our chicken coop.

rat hole at base of chicken coop in barn

Strong Odors

After the rats are established and build a nest, you will begin to notice a strong ammonia smell from their urine and feces. Gross, but a surefire sign your rat friends aren’t planning on moving out any time soon.

Increased Feed Consumption

If you’re dealing with rats in a barn, you likely have feed around for your animals. I had thought our chickens were just getting extra hungry during the cold winter months as their feed consumption increased noticeably. I was wrong. The chickens were having their fill during the day and the rats at night.

tunnels from rats in chicken coop
Rat tunnels into chicken coop for easy access to feed.

Damaged Feed Bags

After removing the chicken feeder at night, it was only a matter of time before they found the bags of feed I had stored in the livestock trailer. They didn’t do me any favors and just target one bag. Each of the 10+ bags I had stored was speckled in 1” holes and feed spilled everywhere. Taping up the holes, cleaning things up, and relocating the bags to the garage was not a fun task.

Nibbled Chicken Toes

One day I noticed some fresh blood on one of the roosting bars in the chicken coop. Chickens can be heavy dozers and it turns out rats will nibble at chickens feet while they’re asleep. 

Missing Eggs

This can be hard to trace, but if you start noticing eggs mysteriously missing or damaged in your coop, it could be a sign of rat infestation. Rats are large enough to carry them off and bust into them. 

Rat Sightings!

And when there’s enough of them, you’ll just start seeing or hearing those rascals. They kept quiet and didn’t show themselves for quite some time. But at some point the encounters turned to almost daily.

rats chewing on the chicken coop
Rats chewing on corner of chicken coop.
rat droppings in barn
Rat droppings on top of chick brooder.

Our Early Attempts to Get Rid of the Rats

Our rat problem was quickly getting out of hand. A barn cat sounded appealing but we weren’t ready to take on one more animal on the farm. And poison bait stations is the obvious quick solution, but the chance of our chickens or Livestock Guardian Dog also getting poisoned in the process seemed too risky.

We did try two methods early on that were not going to cut it in our barn:

1. Getting some rat traps was a logical first step. Think of your standard mouse trap, but much larger and little easier to operate. I set it up every night for a week. Each morning the trap was set-off, but no rat in it! Finally, after many tries, the trap got one small rat. But with the number of rats I was dealing with, I’d need a whole fleet of traps! At $5 each that wasn’t going to happen.

rat trap setup in barn

2. Next, aromatic deterrents kept coming up in our research. We bought a natural botanical deterrent called FreshCab that had raving reviews. I placed the botanical packets strategically around our barn where I knew rats were lodging. This seemed to shake things up for a day or two. But they either just relocated to a new spot, or maybe even learned to deal with the scent. While that might work great in certain applications, like the cab of a car, a barn was just too big a space. The rats were still as strong as ever.

It was back to the drawing board. Clearly we needed something a little more heavy hitting.

What Worked – Home Remedies to Get Rid of Rats

After trying those options we were in no way ready to give up and accept the reality of becoming rat landlords.

So, we did some research, reached out to other homesteaders on social media, and came up with some promising methods to evict our tiny tenants—who really weren’t so tiny anymore.

The Baking Soda Method

We first came across a YouTube Video that claimed a mixture of baking soda, sugar, and cornmeal (or flour) can effectively take care of rats. But how does it work? 

Rats are drawn to the sugar. Since the ingredients are all mixed together, a hungry rat will also consume a significant amount of baking soda.

diy baking soda rat traps
Homemade baking soda rat traps using plastic food containers.

The baking soda reacts with the acids within a rats stomach producing carbon dioxide gas. Mix baking soda with vinegar and you can see the result first hand! 

While rats have the ability to fart, they can’t burp or vomit. This leaves them unable to handle the internal expansion of gasses when enough baking soda is consumed. 

The gas will build up within their system and eventually lead to rupture. Give it a bit of time and your rats will die off one-by-one after consuming the baking soda mixture. 

The Plaster of Paris Method

Much like the baking soda method, mix Plaster of Paris with sugar and cornmeal and you have an even more deadly rat remediation method.

plaster of paris to kill rats

Plaster of Paris is a powdery compound commonly used to patch plaster walls. When mixed with water it forms a paste that dries rock hard in about 20 minutes.

After a rat eats it, the plaster of Paris will mix with liquids and harden up inside a the rats digestive tract. Rats won’t survive long after that.

We were recommended the plaster of Paris method by someone in Chicago who successfully took out a colony of city rats!

How To Kill Rats with Baking Soda or Plaster of Paris

The makeup of these two rat removal methods is almost identical. Mix baking soda or Paris of plaster with an equal amount of sugar and cornmeal. Here are the steps we took:

Step 1 – Create Containers

You need a simple container to dispense your mixture from that rats can get in and out of. Any plastic food containers with a lid will work great. Think quart sized yogurt containers, takeout containers or those Ziplock food storage containers.

Cut a 2-3” hole in one side of each container. We used an Exacto knife but you can use a box cutter, scissors, or any other tools you have. You want it big enough for a rat to fit in and out of.

Since we had so many rats, we eventually realized we needed to upgrade. I took a 5 gallon bucket with a lid and cut a few 3” holes near the base. This worked great and held much more of the mixture.

diy 5 gallon bucket baking soda rat trap

Step 2 – Mix Ingredients

Mix at a 1:1 ratio. One part of the baking soda or plaster of Paris mixed with one part of sugar and cornmeal (or flour). 

For example, you can mix 2 cups of baking soda or plaster of Paris with one cup of sugar and one cup of cornmeal. The ratios are somewhat flexible and don’t need to be exact.

Break up any large clumps of baking soda that are found. If you are using a cornmeal mix that already contains sugar or a sweetener, you may be able to omit adding extra sugar.

mixing plaster of paris for rat trap

Step 3 – Fill Containers

Pour your baking soda, cornmeal, sugar mixture into your containers and secure the lid on top.

Our small containers typically only held about a cup of the mixture. The 5 gallon bucket was able to easily hold several cups or more.

Step 4 – Place Containers

Place your containers where the most activity has been observed. Often this will be along walls, where nests are observed, or around sources of food like garbage cans or animal feeders. Make it as easy for the rats to notice and get to the containers as possible.

rats swarming baking soda trap in barn
Rats swarming to sugary baking soda trap in our barn.

Step 5 – Monitor Containers

Check on your containers daily. Look for evidence of the baking soda/plaster of Paris mixture being eaten. If the rats don’t seem to be finding the containers in that spot, try relocating to a new spot.

Step 6 – Refill As Needed

Depending on your situation, the mixture may entirely disappear overnight, or it may dwindle down over days or weeks. Keep an eye on them and refill as needed. 

Instead of bringing the containers back inside and refilling them, we found it easiest to mix up the concoction in a jar and refill at the location of the containers. The traps may get messy over time and this helps you avoid bringing those traps into your home.

Does Killing Rats with Baking Soda or Plaster of Paris Work?

Yes! Just not as immediately as an option like poison.

We found our rat population to slowly dwindle down over the course of weeks. Of course, we started with a rather large amount of rats. If you have a smaller population, you may find the baking soda or plaster of Paris method to work much more quickly.

Remarkably, we never found a dead rat. But we didn’t necessarily expect to either. We heard from others with similar infestations using this method that only one or two dead rats turned up for them.

We did see other signs it was having its effect though. The biggest one was finding traces of blood along well traveled rat routes.

baking soda mixture to kill rats
Baking soda, cornmeal, and sugar mixed at a 1:1:1 ratio. We later found it to be more effective to mix at a 1:1 ratio – 1 part baking soda (or plaster of paris) and one part everything else.

There are a couple things we found helpful along the way. 

1. Make sure the mixture is the ONLY food source available. We weren’t sure if it was working effectively until we got serious about relocating our chicken feeder during the day and completely removing it at night. When they’re hungry enough, they’ll gobble the sugary mixture down and you want to make sure they get enough.

2. Have enough available. We were finding our small containers were often completely empty come morning. Once we switched to the 5 gallon bucket, there was always plenty of capacity and we knew the rats were getting their fill of the baking soda or plaster of Paris.

3. Refill often. Something about a fresh pile of sugary mix seemed to draw them in more rapidly than when it had been sitting for a few days. We tried to refill every day or every other day.

4. Take other measures alongside the mixture. Target where they’re hiding out. Remove anything they are making a home in. Clean things up. Fill in their holes. Make them no longer feel welcome. 

These rat removal methods aren’t instant. But if you stick with it and follow the steps above, those pesky rodents will eventually be no more.

Will baking soda rat traps harm other animals?

We’ve read from other sources that dogs, cats, chickens, and other animals will be safe if they consume the baking soda mixture. The unique anatomy of rats who can’t burp have a distinct disadvantage. Other animals should be able to expel the gasses that build up.

However, we didn’t want to take this at face value and let our animals have at it. Rats and mice can fit where most animals can’t, so we recommend placing your container traps where other animals can’t get to them. 

For instance, I locate my traps differently during the day while the chickens are our free ranging versus at night when they’re closed up in the coop. During the day, I place the traps in a barn stall the chickens can’t get into. At night, I relocate the traps to be around the outside of the chicken coop once the chickens are closed up knowing this is a prime area for rat traffic.

free ranging chickens with roosters on guard

Will Plaster of Paris rat traps harm other animals?

Yes. You want to make sure your traps are not accessible to animals other than the rodents you are trying to get rid of. The plaster of Paris will have the same internal hardening reaction in other animals and lead to illness or death if consumed.

We’d recommend you either only put the plaster of Paris containers out at night when other animals are closed up. Or, create an enclosure around the trap that assures only rats can get to it.

Will Baking Soda and Plaster of Paris Kill Mice Also?

Yes! Mice, like rats, will die soon after they’ve consumed enough of either substance. We have mice pop up in our home from time to time and plan to leave a few of these traps in the attic, crawlspace, basement, garage, and utility areas to keep mice at bay in our home. 

Other Methods To Get Rid of Rats and Mice

When we reached out to fellow homesteaders, we heard a wide range of methods others recommended. We haven’t necessarily tested these, but here is the list:

The Bucket Method

You can look up how to rig up this old farmer trick yourself. But in short you have a 5 gallon bucket filled halfway with water with ramp leading up to it. At the top of the bucket is some sort of spinning rod with bait like peanut butter on it. The rat goes for the bait, slips on the spinning rod, falls in, and drowns. 

The Garbage Can Method

Along the same lines of the bucket method, you can also rig up a spinning dowel or trap door at the top of a garbage can that rats fall into and can’t escape from. 

Raticator

The Raticator electronic rat trap advertises a more humane killing method through electrocution. Rats wander in and are electrocuted resulting in instant death. This will clearly not be your least cost option, but supposedly it works.

Terrier

Certain breeds of dogs, like terriers especially, were bred to hunt down rodents on farms and in populated areas. Many terrier breeds are exceptional rat hunters. So keeping one of these little yappers around might help curb the rat population and provide a new companion.

Barn Cats

Natures predator to rats! However, letting your cat hunt for their own food instead of keeping their bellies full all the time is key here. A pet cat that is well fed on a regular basis will likely have little motivation to go after a full sized rat. But a barn cat that’s on the prowl for dinner that night—that will make your rat invaders shake in their boots!

Bait Stations

AKA, the poison option. We don’t like using poison, but we have used them successfully in our home before for mice. The issue with this is that you have no control over where the rodent dies or what happens to them afterward. And in our barn instance, chickens or our livestock guardian dog eating a poisoned rat, and then being poisoned themselves was not the right solution. Even if it would likely have been effective in taking care of the rats.

How To Get Rid of the Rats and Mice Longterm

Once you go through the work of eradicating the current wave of rats or mice, don’t assume they won’t return! Here’s some ways you can continue to ward off future visitors before they become an issue.

Baking Soda or Plaster of Paris Traps

Keep your traps out! If you know you have trouble spots in your home or on your property, place traps in those areas. Check them monthly to see if there are signs of activity and refill or relocate as needed. Baking soda may be safer for a long-term, preventative trap than plaster of Paris. You wouldn’t want the risk of harming another animal who accidentally finds the trap.

how to get rid of rats in the barn

Reduce Nesting Options

Rats like to set up shop in the tightest of spaces or areas that don’t get a lot of traffic. That overturned wheelbarrow sitting there not getting use. That pallet in the corner storing materials. Or that stack of old feed bags you’ve let pile up over time. All great options for rats to burrow under and build a nest. The more you can remove those spaces and reduce clutter, the less rodent housing opportunities you’ll leave longterm. 

Store Feed Properly

The rats likely came because there was a supply of food in the first place. So keeping that food protected is key. Every night, remove any animal feeders you have out and replace them during the day. Keep bags of feed stored in a rat and mouse safe space. Large storage drums or plastic storage totes with secure lockable lids can work great. We use an old refrigerator to store our open bags of feed, which gives us easy access and seals up tight.

That’s been our experience with keeping rats out of our barn. But what techniques or methods have you tried? We’d love to keep learning how to keep our spaces safe and rodent free!

Some of the above links are affiliate links. This means we earn a small commission on qualifying purchases at no cost to you. We are so appreciative of your support!

May 6, 2023 2 comments
0 FacebookTwitterPinterestEmail
how to use round hay bales on a small farm
Family Milk CowHomestead How-to'sSmall Scale Farming

How To Feed Round Hay Bales By Hand

by From Scratch Farmstead April 23, 2023

Small square bales of hay don’t have to be the only option on your small farm or homestead! We’ll share how we feed round hay bales by hand without owning a tractor.

Hay Basics

I’ve come a long way from my suburban upbringing where I’m not sure if I could have told you the difference between hay and straw.

So, I full well realize that sometimes it’s helpful to start with the basics.

Hay is simply grass that has been preserved for later consumption. Many livestock graze on pasture during the growing season and then switch to hay during the colder months. Here in northern Illinois, our cows are fed hay roughly November through April each year.

cows eating hay on 5 acre homestead

A hay field is cut down, dried out, and then baled up. During the drying period, the cuttings are cured much like a potato is cured when dug up from the garden and goes on to last for months. Cured hay maintains its freshness and nutritional profile when properly stored for at least a year.

The three standard sizes of hay bales and their common dimensions are:

  • Small Square Bales – 1.5’ x 1.5’ x 3’
  • Round Bales – 4’H x 5’W
  • Large Square Bales – 2’ x 2’ x 8’ or 3’ x 3’ x 8’

Small square bales are light and compact enough to be moved by hand. The latter options both require heavy equipment to move. Because of this, many small farms have only ever dealt with small square bales.

But let’s look at some reasons to consider round hay bales.

Why Round Hay Bales Make Sense

When our neighbor who supplies our hay approached me about switching to round bales this past winter, I was skeptical.

However, after trying it for a full winter and assessing the pros and cons, I’m not missing small square bales as much as I thought I would—maybe not at all!

Let’s look at that more in the way of pros and cons of round hay bales.

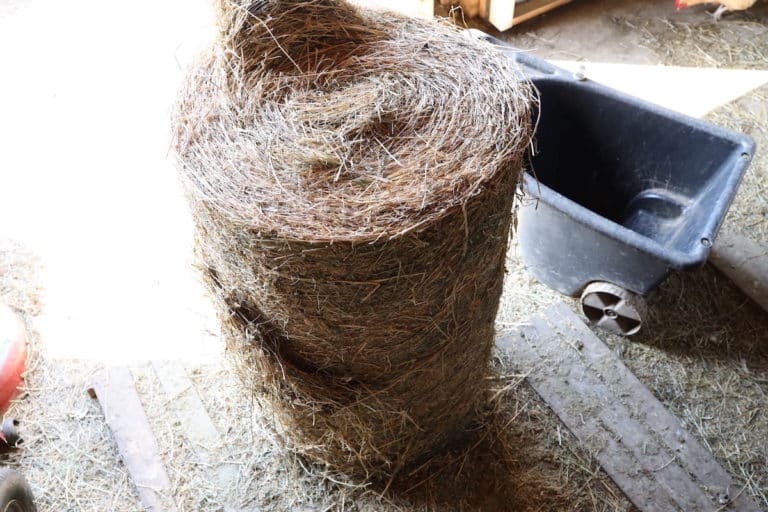
round hay bale in pole barn

Pros of Round Hay Bales

Cost

Round bales cost less. Pound for pound, you’re buying in bulk and there’s savings to be had there. In our area, a $90 round bale would cost me about $150 in small square bales. Add that up over an entire winter and that’s a lot of savings.

Efficiency

When a farmer has the option to move 1 round bale with a tractor versus 20 small square bales by hand, which do you think they’ll choose? With the right equipment and proximity, exchanging round bales between seller and buyer will save a lot of time.

Availability

Because of this efficiency, many farmers have invested in round hay bale equipment. If you’ve only ever used small square bales before, you might be surprised how many options of round bales are available if you search nearby.

Cons of Round Hay Bales

Moving Them

A standard round bale of hay is going to weigh around 1,000 lbs. You need a tractor or skid steer to move it. And wherever you plop it, it’s not going anywhere. You won’t even nudge it an inch once the tractor leaves—I’ve tried. The good news is that you don’t necessarily need to own the equipment yourself, which we’ll talk more about below!

tractor dropping 4x5 round hay bale in barn

Portioning Them

There’s no getting around it—portioning out the flakes of hay that come off your small square bales is just convenient. With a rolled up round bale it trickier to portion, but not impossible. I share more on how I do that coming up.

Keeping Them Tight

The first few round hay bales I dealt with felt both frustrating and wasteful. Without the right technique, they seem to just keep unraveling and making a mess all over your barn. But again, after learning the ropes this became much more manageable!

Feeding Round Bales of Hay by Hand – Step by Step

To save you some of the frustration and hassle I just mentioned, here is how we’ve made feeding round hay bales by hand work on our small homestead.

Step 1 – Receiving a round bale

We have a small pole barn with an opening large enough for a tractor to back a round bale into (approximately 8’). Assuming you also have a dry and accessible area to fit a round bale into, here are some considerations when receiving a delivery:

  • Lay pallets down first. This will raise your bale off the ground so it stays dry. You’ll likely need 4 standard sized pallets for this.
  • Have a couple feet of clearance. You’ll need space to efficiently unroll hay for your animals on a daily basis.
  • Lay the bale flat side down. This will make working with your bale by hand and unwrapping it easier, which is our next step.
round hay bale stored flat side down in barn

Step 2 – Unwrap your bale

Round hay bales typically have a plastic mesh netting wrapped around them 2-4 times. There’s two ways to remove this wrap.

First is by simply finding the end of it, pulling the netting around the bale, and unwrapping the bale fully. Second is to take a sharp knife or blade and cut through the netting from top to bottom on the bale, and then unwrap it. Both work, but I tend to prefer the first method.

unwrapping netting from round hay bale

Note that the outside roles of hay may be loose and come unraveled when you first unwrap a round bale. This can be especially dangerous if you have chickens or other small animals that can get trapped by a hay avalanche! Usually, this resolves as you go since the role gets tighter toward the center of the bale.

Step 3 – Unroll flakes of hay

Instead of separating flakes like on a square bale, round bales need to be unrolled. There’s two tricks here I’ve learned to make this easier.

The first is to roll the hay back up as you’re pulling it off and unrolling it. It’s less awkward to keep it in rolled form and work with it that way.

The second trick is how to release the hay you’re unraveling. When you’re done unrolling hay, instead of pulling the hay straight out from the bale, pull it back in the same direction you were rolling from until it releases cleanly.

unrolling flake of hay from 4x5 round bale

This clean release will help keep the rest of the bale intact. If you don’t do this, the bale will likely continue unraveling and leave you with some extra hay on the ground to clean up.

One more thing worth noting is that a fair amount of hay can fall to the ground while unrolling the bale. Gather this hay up—either by hand or with a rake—and use it. This helps to minimize hay waste.

Step 4 – Feed your animals

If you only need a small quantity of hay at a time, you can likely just unroll some hay by hand and bring it directly to your animals or hay feeder.

using a garden cart to feed hay

For larger quantities, like when I feed hay to our cows, I’ve found it easiest to have some kind of hay cart or wagon to distribute hay with. I use a plastic garden cart for this and unravel several rolls of hay at a time to fill the cart with. Then I wheel the cart out and dump the hay for them in their paddock.

Step 5 – Getting a replacement hay bale

Once the bale has gotten small enough to relocate, you can clear the space for the next bale of hay to be dropped off.

We’ve found it helpful to keep a careful watch of the weather and be in regular communication with the farmer you’re getting hay from so both sides can plan ahead. 

tractor dropping round hay bale in barn

If unfavorable conditions are forecasted like snow, ice, or really cold temps, you may need to expedite things and try to get a bale dropped off sooner so you’re stocked up. Or, if temperatures are going to heat up, you might want to try and get hay delivered before the ground thaws and turns into a muddy mess.

We always try to have a few spare small square bales on hand in case there’s an unforeseen lag period between getting a replacement hay bale. 

Round Hay Bales – FAQ’s

Can I use round hay bales if I don’t own a tractor?

Yes! This is very dependent on your farm’s hay intake needs and proximity to sources of hay. But, as we have discovered, it is very possible without owning a tractor or skid steer.

Check with local farms near you to see if they will not only sell you round hay bales, but also be able to deliver them as needed. Even if they charge a delivery fee, it may still be more economical than small squares bales.

And how about that neighbor with a tractor or skid steer? Maybe you can get a few bales delivered and see about borrowing equipment from a neighbor to move them as needed.

With a little creativity and networking, there’s a good chance you’ll find an option that works.

feeding cows from round hay bale by hand

Do you remove netting off round bales when feeding?

Yes. the safest way to feed round bales is to remove the entire netting and dispose of it properly prior to giving it to animals. The plastic mesh netting that wraps a round bale can be dangerous if consumed or an animal gets caught in it. 

This post focuses on how to feed round bales by hand. But round bales are also commonly fed in whole form and placed in a field or hay feeder for livestock to consume. In both cases, always remove the plastic wrap first.

How Much Does a Round Bale of Hay Cost?

This will depend both on your location and the quality of hay being purchased. I can speak for our area in northern Illinois, which is pretty representative of the midwest. 

High quality, tightly packed round hay bales cost $80-$100. A lesser quality round bale will likely cost $65-$80.

high quality alfalfa hay mixture

How Much Does a Round Bale of Hay Weigh?

Contents and sizes can vary widely among round bales. A small round bale can weigh as little as 600 lbs. and a large bale as high as 1,600 lbs.

The four standard sizes of round bales are listed below along with their average weight:

  • 4’ x 4’ – 600 lbs.
  • 4’ x 5’ – 950 lbs. 
  • 5’ x 5’ – 1,200 lbs.
  • 5’ x 6’ – 1,500 lbs. 

How Many Square Bales are in a 4×5 Round Bale?

On average, there will be about 19 square bales in a 4×5 round bale.

Small square bales typically weigh between 40-60 lbs. each. If you figure 50 lb. small square bales and a 950 lb. 4×5 round bale, then you would have 19 square bales per round bale.

A 1,500 lb. round bale would be equivalent to 30 square bales at 50 lbs. each.

small square hay bales stacked in barn

Tips When Purchasing Round Hay Bales

Well grown, cut, and preserved hay is a beautiful thing. It’s sweet smell and freshness is unmistakable.

If you are new to hay and don’t yet have a barometer for high quality hay versus poor quality hay, I’d encourage you to befriend a long-time farmer (preferably one that cuts their own hay) and learn as much from them as you can. Observe some different bales of hay with them and get a feel for what they look for, the smells they notice, the compositions they prefer. That will be your best teacher.

But here are some other things to look for, or to avoid, when purchasing round hay bales.

How To Purchase Round Hay Bales:
  • Ask what cutting the hay was from. Farmers typically cut hay three times a season. The 1st cutting is comprised of mainly early season grasses. Your 2nd and 3rd cutting will yield higher percentages of alfalfa and clover. Therefore, later cuttings of hay are typically more desirable.
  • Is the bale tightly packed and rolled? A tight bale will contain more hay and therefore be of higher value. Loosely packed bales will also likely lead to more waste.
  • Look for hay that has a sweet smell and avoid anything that smells moldy, musty, fermented, or moist.
  • It’s normal for the outside of a bale to be discolored, but make sure the majority of the inside contents are green and crisp throughout. Avoid anything that is excessively discolored or bleached beyond the outside layers.
  • Look for fine-stemmed grasses and plants and avoid hay that appears fibrous and overgrown.
  • Avoid bales that feel warm to the touch or are excessively heavy from moisture. Too much moisture in hay can cause mold or spontaneous combustion.
  • Understand the makeup and nutritional profile of the hay. The most common hay mixtures include grasses, clover, and alfalfa. In addition to energy and nutrient rich grasses, alfalfa and clover are high in protein and offer different vitamins and minerals. 
  • Understand the farmers growing practices and make sure they align with your values. Were synthetic pesticides, herbicides, or fertilizers used? Was the field planted in genetically modified pasture seed?
4x5 round hay bale in barn

Tips for Reducing Waste When Feeding Round Bales

Round hay bales are commonly fed to animals in whole form—meaning the entire bale is placed in their paddock and consumed over the course of days or weeks.

This is the most convenient way to feed round bales, but also the least efficient. Research has shown as much as 60% of hay can be wasted using this method. The simple addition of a hay feeder can reduce this to only 5% being wasted.

The topic of this discussion, however, has been feeding round bales by hand in smaller quantities. How do you do this and reduce waste?

Our method has been to:

  1. Dial in the intake amount of your animals
  2. Dump hay in a different location every day

To get the quantity of hay dialed in, simply start with what seems like a standard amount and observe what happens. 

Are your animals showing you signs of being hungry when the next feeding time comes around? If so, increase your quantity.

Is there still hay left that they didn’t eat when the next feeding time comes around? Then try decreasing a bit. 

cows eating hay from round bale in snow

Find the happy medium where your animals are content with minimal hay being wasted. Note that intake needs can change based on variables like temperatures. 

Once you have the quantity of hay dialed in, my next method to reduce hay waste is to dump hay in a fresh location at every feeding.

My experience has been that if you feed your animals the right amount of hay in smaller quantities, very little gets wasted. They eat it up before they are able to trample it and poop all over it. Then by the time they’re hungry again, you’re right there with their next round of hay!

For us, this has looked like giving our couple cows one full cart of hay in the morning and one full cart in the evening.

And this leaves us with one final question.

Is a hay feeder necessary when feeding round bales by hand?

Our answer is a resounding—NO! 

Could a hay feeder be helpful? Maybe. But it is definitely not a necessity.

We are all about simple homesteading on a budget. Until something becomes an absolute must have on the homestead, we avoid it. This way, we have less things to manage and less expenses.

If you manage your hay situation using the methods I’ve outlined above, I’m willing to bet you can get by without a hay feeder too—wether you use round bales, square bales, or any shape in between 🙂 


Related Small Scale Farming Posts:

How Many Cows Per Acre On A Small Farm
What To Know About Rotational Grazing On A Small Scale
Owning a Family Milk Cow Basics
Why a 5 Acre Homestead is the Perfect Size for a Beginner
Beginners Guide to Self Sufficient Homesteading
How To Create A Quarter Acre Self Sufficient Homestead Garden

April 23, 2023 2 comments
0 FacebookTwitterPinterestEmail
quick and easy stock tank brooder design
ChickensHomestead How-to's

Quick Stock Tank Chick Brooder Box

by From Scratch Farmstead April 14, 2023

You’re getting chicks any day now BUT you don’t have a brooder yet! No sweat. We were in that same position and this easy stock tank chick brooder box was the perfect solution!

What is a Chick Brooder Box?

If you’re new to world of chicken keeping, the word brooder will likely be new in your vocabulary. While we live on a 5 acre homestead now, that was certainly true for our formerly suburban family.

The natural way baby chicks are raised is by mama hen. If you’re hatching your own chicks or purchasing them, you won’t have that protective and nurturing mama to, quite literally, take them under their wing.

baby chicks in stock tank brooder

So, a chick brooder box is a safe and dry shelter to raise your baby chicks their first several weeks of life.

You take on the role of mama hen and provide your chicks with fresh bedding, food, and water daily, along with a source of heat.

For more on what you need inside your brooder and some of the lessons we’ve learned along the way, check out our post—How To Care For Baby Chicks.

We Need a Brooder—Fast!!

To be fair, we actually did already have a brooder on our homestead. It was just already filled with our Freedom Ranger chicks for raising our meat chickens.

That brooder was extremely low cost. We built it out of large shipping crate we bought for hardly anything on Facebook Marketplace, along with some scrap lumber and hardware cloth. 

You can check out more about that brooder in our post—Simple Outdoor Chicken Brooder Ideas.

While that crate brooder has worked great, it also took a couple days to build. With our batch of layer chicks coming any day, we didn’t have that sort of time!

That’s when we turned to repurposing a stock tank for a brooder.

What is a Stock Tank?

A stock tank, or galvanized water trough, is a large metal tank commonly used on farms and homesteads for livestock to drink from.

galvanized livestock water troughs

You can find them in all shapes and sizes. They’ll typically range from 40 gallons to 300+ gallons. Some have higher sides (or walls) for larger animals. Some have lower sides for smaller animals.

Metal stock tanks are most common. But other plastic or poly tanks are also available.

Why Use a Stock Tank for a Chick Brooder?

Whether new or old, stock tanks are great for repurposing!

Galvanized water troughs have a shelf life. They can only be used to hold water so long before the inside rusts out enough that it will either spring a leak or no longer be safe for animals to drink from.

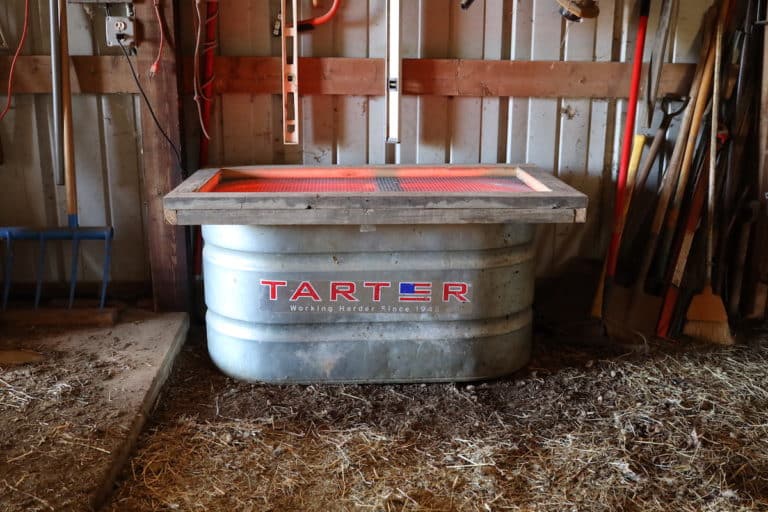
stock tank brooder in barn

You’ll often see stock thanks in this condition turned into raised beds or planters in a garden.

Another use can be to house small animals in them—in our case, baby chicks!

Here’s why stock tanks make great brooders:

Spacious

Depending on the size of stock tank you’re working with, most of them have a large enough footprint to house many chicks.

Predator Proof

The heavy duty metal construction of stock tanks will make the sides and bottom impenetrable to predators. All you need is a secure cover, which we’ll show you how to build below.

Easy Access

Pop the cover off and stock tanks are easy to reach down into to give your chicks the daily attention they need.

stock tank brooder with easy access top cover
Keep Chicks In

Some brooders have low sides that older chicks can easily flutter out of. Don’t walk away with the cover off! Most stock tanks are deep keeping your chicks right where they should be.

Portable

With a stock tank, there’s no need to build a permanent brooder setup. You can move it around as your needs or setup changes. It can even fit within an existing chicken coop or run if space allows.

Multipurpose

Baby chicks are typically only in the brooder for 3-6 weeks. Once they’re out, give the tank a good cleaning and you can use it for other animals, storage, or any other use you can think up.

grazing cows on pasture with electro netting
Low Cost

Yes, a shipping crate or plastic storage tote will cost less. But, for somewhere in the ballpark of $100-$200 you can go to your local farm store and pick up a brand new stock tank that will last you a lifetime and serve other purposes as mentioned above.

Used Options

Can’t afford a new one? No worries! Used stock tank options are abundant. This is our preferred route. I’ll share more of my tips and tricks of how to find them used below.

How To Build Your Own Chick Brooder Box from a Galvanized Water Trough

For our brooder we used a spare 100 gallon stock tank that measures approximately 2’ x 4’. It’s mainly a backup if our Jug Waterer ever froze or stopped working during the winter time.

To turn it into a brooder, I built 2 simple things:

1. A top cover that was both predator proof and easy to take on and off.
2. A moveable bar that sits below that top cover allowing a heat lamp to hang from.

I wracked my brain for a while trying to think of a way to not have to feed the heat lamp cable through the top cover, or hang it off of the top cover. That would make taking the top cover on and off a real hassle. Plus you’d be removing the heat from your chicks every time.

easy top cover design for stock tank brooder

I am really happy with how the heat lamp bar functions within the brooder. Your heat lamp stays put every time you pull the cover off. And you can slide the bar to position the heat lamp anywhere you prefer within the brooder.

Before we talk about building, let’s look at what you’ll need.

Materials List:

Since the dimensions of stock tanks vary widely based on capacity and manufacturers, I can’t give exact quantities of what you’ll need. But here’s a general list you can go off of.

2×4’s
2×2’s
Hardware cloth*
3” construction screws
Staples
Sheet metal**
Sheet metal screws

* 2’ wide hardware cloth with 1/2” spacing worked perfectly for mine. You can use chicken wire but keep in mind larger predators like raccoons may be able to tear through it.

** At each end of the heat lamp bar, you’ll need to fabricate a simple angled metal piece that allows your bar to hang from the top rim of the stock tank. I used a roll of metal flashing that I had, but any sheet metal or metal strap will work that can support the weight of a heat lamp and be bent to the proper shape.

Tools:

This project is very beginner friendly and uses tools many will already have on hand.

Circular saw
Drill
Small drill bit (for pilot holes)
Large drill bit
Stapler*
Wire cutters
Tin snips
Tape measurer
Speed square
Pencil
Safety Glasses
Quick clamps (optional)

* Any manual stapler should work for securing the hardware cloth to your top cover. I had a pneumatic brad nailer that shoots 1” staples, so that’s what I used. The longer your staples, the more secure your hardware cloth will be.

How To Build A Top Cover

A top cover is necessary to protect the open top side of your brooder box. I chose to build an “L” shaped top cover that fits similar to the top of shoe box. This way, the cover stays in place and won’t slide off.

You’ll start with horizontal 2×4’s that sit along the top rim of your stock tank. Under, fasten 2×2’s along the the outside of the 2×4’s forming an “L” shape.

DIY top cover for stock tank brooder box

Step 1 – Measure your top cover

Every stock tank is a different size. I can’t give you the dimensions you’ll need for your top cover. 

However, if you measure your cover to be approximately 4” wider than the outside rim dimensions of your stock tank, this should give you the right fit without being too tight.

Step 2 – Cut and assemble 2×4’s

Once you have your dimensions, cut your 2×4’s to size. Screw those pieces together. I used (2) 3” construction screws at each corner.

I drilled small pilot holes before fastening in screws so that the wood didn’t split. If you have clamps, clamping the 2×4’s together first will also make the process go much smoother.

horizontal 2x4s for stock tank brooder cover

Step 3 – Staple hardware cloth

While the cover is still flat, this is the easiest stage to install your hardware cloth.

Start by stapling hardware cloth on one end making sure it is aligned properly on the cover. Continue stapling hardware cloth toward the opposite end pulling it tight as you go.

hardware cloth fastened to brooder top cover
staple hardware cloth for brooder top cover

Once you’re at the other end, cut your hardware cloth to the desired length and staple it in.

Note that the hardware cloth would ideally lap 1″ or more onto the wood. I installed a staple approximately every 6” to make sure it was secure.

Step 4 – Install 2×2’s

All that’s left for your cover now is the outside rim. You’ll want to measure and cut your 2×2’s to the proper length.

finished top cover for stock tank brooder

Clamp the 2×2 pieces to align with the outside edge of the cover, forming an L shape. Drill pilot holes and fasten together with a few screws along each side.

And that’s your top cover!

How To Build A Heat Lamp Bar

Heat lamps are commonly used as a heat source in a chick brooder box. This bar will allow you to:

  1. Not have to mess with your heat lamp every time you open or close your brooder.
  2. Easily position your heat lamp wherever you need it.

Heat lamps, when not installed or maintained correctly, can be very dangerous! Make sure you read up on heat lamp safety to reduce the risk of starting a fire.

If you’re not using a heat lamp then you can obviously skip building the heat lamp bar.

Step 1 – Measure and cut your bar

This time, measure the inside width or your stock tank from rim to rim. Subtract 1/2” from that measurement, and cut your 2×4 bar to length.

making heat lamp bar for stock tank brooder box

Step 2 – Drill holes

You’ll need to drill or notch holes in the heat lamp bar big enough for the plug of your heat lamp to fit through. 

I used a 1-1/2” spade bit which worked great. You can also just use the largest drill bit you have and drill many holes in a circle so you can punch out a larger hole.

I did one hole in the center of the bar. Then I also drilled holes about 6” from that center hole that gave more options for positioning the lamp.

Step 3 – Make and install metal hangers

The trickiest part of this whole project is fabricating some sort of metal bracket that allows the bar to hang level with the top rim of your stock tank.

hanging heat lamp in stock tank brooder

I just cut my metal about the width of the 2×4 bar. Use tin snips for cutting if you have them. If not, you can avoid cutting by picking up some basic metal straps from the hardware store. Then bend the metal so it forms an L shaped bracket to hang from the tank.

Align your metal brackets on each side of the bar so they’ll hang off the top rim of the stock stank. Fasten securely with sheet metal screws.

Step 4 – Install your heat lamp

At this point, your brooder is ready to assemble!

The last step is feeding your heat lamp cable through the desired hole in your heat lamp bar. I used a zip tie to secure the cord of the heat lamp in place on the bar. Then drape the heat lamp cable over the top of the stock tank and plug in.

From there put your bedding, food, and water in the brooder, place the cover on top, and you’re all set!

securing heat lamp cord with zip tie

Do I need to secure the top cover?

This depends on your setup. But I’d recommend either weighing or strapping down your top cover. Larger predators may be able to pry the cover off and get to your chicks.

One option is to place heavy blocks or stones on the top cover to help keep it in place.

Another option, and probably the most secure, would be to wrap the stock tank and cover with a ratcheting tie down strap to secure the cover.

how to install heat lamp in stock tank brooder

Tips for Finding a Used Stock Tank

We found our stock tank used for less than half the price we would have paid for a new one. Here’s some tips for how to find a used stock tank.

Search Second Hand Sites

Facebook Marketplace and Craigslist are my go-to sites for anything we need around the homestead. Lots of stock tanks/water trough options pop up. Keep an eye out and you’ll be able to find the right size at the right price.

Check Urban Areas

This is my favorite tip! Don’t just search in rural areas for stock tanks. They’re super popular in more urban areas at parties and events to be used as a cooler or ice box for drinks. I’ve seen stock tanks listed in urban areas on Marketplace that look brand new at really reduced costs.

DIY chick brooder box made from stock tank

Barn Sales

Barn sales are common in rural areas. This might be the perfect place to track down an aged stock tank that still has life left in it.

Ask A Farmer

It’s not all that uncommon for stock tanks to just be hanging around farms not getting any use. Maybe you drive past a farm regularly that has some sitting there. Check with that farmer and see if you might be able to take one off their hands for the right price.

How Much Brooder Space Per Chick Do I Need?

Most of the sources I’ve found say around 6 square inches per chick. This might work for the first week. But they grow fast and 6 square inches is not very big.

Our shipping crate brooder is 4’ x 5’. Last year we had 60+ chicks in there. It was too tight! They were our Freedom Ranger meat chickens and we actually noticed that the average butcher weight of the birds was noticeably lower than the previous year—likely because they were overly cramped in the brooder and didn’t develop as fully.

easter egger chicks in stock tank brooder box

Keeping 40-50 chicks in that brooder feels much more appropriately sized. From our experience, somewhere in the ballpark of 60-70 square inches of space per chick is necessary. Or roughly 2 chicks per square foot.

Keep in mind that is a minimum and the more space you can offer them the better. This is especially true for raising meat chickens where they can grow twice as fast as layers.


Related Posts:

How To Care For Baby Chicks
Simple Outdoor Chicken Brooder Ideas
Predator Proof Chicken Coop Essentials You Need To Know
Custom A-Frame Chicken Tractor For (Almost) Free
Chicken Roost Designs | Two Simple DIY Ladder Perch Ideas

April 14, 2023 0 comment
1 FacebookTwitterPinterestEmail
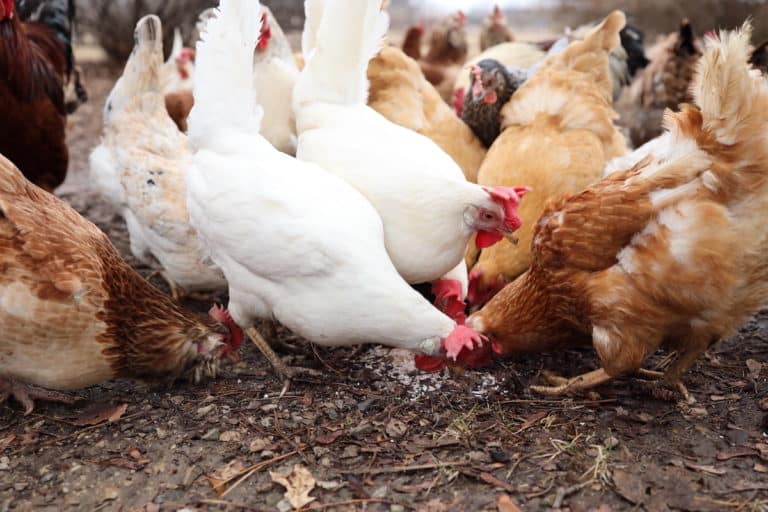
chickens eating crushed egg shells for calcium
ChickensHomestead How-to's

Feeding Chickens Egg Shells (Why, When, & How)

by From Scratch Farmstead February 22, 2023

Homesteading is all about being resourceful! Minimize waste. Use everything. Find ways to repurpose things. Well, one of the best homesteading hacks out there is feeding chickens egg shells instead of tossing them out! We’ll talk all about do’s and don’ts of egg shells for chickens.

If you’re new to backyard chickens, it can be overwhelming looking into what chickens can and can’t eat. In the video below, we give an overview of what kitchen scraps we’ve learned to avoid giving our chickens in our 9+ years of chicken keeping.

Can Chickens Eat Egg Shells?

In short—Yes!—chickens will gladly eat crushed egg shells. A chickens body does not produce calcium on its own so they rely entirely on their feed and forage to intake calcium. And egg shells are a great supplemental source of calcium for chickens!

Many pre-mixed layer feeds will contain some source of calcium in them. However, it is always best to give your chickens a free-choice calcium source in addition. The common options you’ll find at your feed or farm supply store are oyster shells or limestone. 

But wouldn’t it be great if there were a free option? Aha—egg shells! 

collected egg shells for feeding to chickens

Repurposing egg shells to feed back to your chickens is a great source of calcium. Chicken keepers have been putting this to practice for hundreds of years to help keep their chickens happy, healthy, and laying consistent eggs.

When a laying hen is deficient in calcium, it shows. In our own flock, I know our ladies aren’t getting enough calcium when I reach for an egg in the laying box and poke a finger right through the shell! On rarer occasions, we’ve even had chickens lay eggs with the shell entirely missing and just the thin, translucent inner membrane surrounding the egg.

And have you ever seen the ole’ golf ball in the laying box trick? If a chicken is really deficient in and desperate for calcium, they may start canibalizing their own eggs and eating them. Hence, farmers long ago discovered a golf ball, or hard fake egg, can help discourage a chicken from this behavior.

Regardless, all these signs point to the importance of calcium in a chickens diet. So let’s look at why feeding chickens egg shells can be a good idea.

WHY Feeding Chickens Egg Shells is Beneficial

Chickens lay eggs almost every day. And producing and delivering an egg is an incredibly energy and resource intensive process.

farm fresh eggs from local farm

Egg shells themselves are made up almost entirely of calcium. Therefore, too little calcium present in a chickens diet may result in thinner than desired egg shells. While an abundance of calcium may result in too thick an egg shell.

Chickens are best at regulating their calcium intake themselves. Which is why it’s important you never mix egg shells or other supplemental calcium sources into their feed. This can cause calcium toxicity. 

Instead, give them egg shells free choice. We do this by simply dumping a small pile of crushed egg shells out for them couple times a week that is separate from their feed. This way, they can take it or leave it as needed.

When chickens are lacking calcium too severely, their body will compensate by pulling calcium from their bones. This can weaken the skeletal structure of the chickens and lead to other issues, especially as chickens age.

crushed eggshells for chickens

Many also fear that feeding your chickens egg shells will result in chickens eating they own eggs. In reality, the opposite is true. Chickens turn to eating their own eggs because they are deficient in calcium in the first place. So, a chicken regularly given a steady source of egg shells or another calcium supplement is much less likely to develop this habit.

WHEN – What age can chickens eat egg shells?

Chickens should not need supplemental calcium until they begin laying eggs. Typically, this is when they are between 18-22 weeks old.

If you are raising baby chicks, your best bet is to hold off on giving them egg shells until the whole flock has started laying. Young chickens whose reproductive organs are not yet fully developed may begin egg production prematurely if exposed too soon to supplemental calcium. This can lead to serious issues like a prolapsed vent or becoming egg bound.

So, don’t rush into giving your chickens crushed egg shells too soon! Wait until they have all begun laying consistently, and then gradually introduce a calcium supplement for them.

free ranging chickens with roosters on guard

The timing of this can get tricky when you introduce a new batch of pullets that are yet to start laying into a flock of mature layers. In this case, we have found it most beneficial for the whole flock to significantly reduce, or cut out altogether, giving our chickens supplemental calcium as the pullets near that 8-12 week old mark. This may be less than optimal for your mature layers, but it helps avoid egg laying troubles in your young layers.

HOW To Feed Chickens Egg Shells

There are many ways to feed egg shells to your chickens and its best not to overthink it. Here is the simple method we use.

  1. Collect egg shells in a large bowl, bucket, or container. They can be crushed down to make more room. If there is a substantial amount of dirt or poop stuck to the eggs, rinse off with warm water prior to consumption.
  2. Dry in the oven (OPTIONAL). When enough are collected, lay flat on a cookie sheet and dry shells in the oven for 15-30 minutes at 200°F. This will make them more brittle. Note that this step is optional. Many may choose to skip it and go directly to Step 3. 
  3. Crush your egg shells into bite-size pieces. We like to do this by using a mortar and pestle. You can also place in a thick bag, like a ziplock bag, and crush the shells by hand or with a rolling pin. Or, pulsing in a blender or food processor can also work. Just be sure to keep your egg shells at a crumble consistency and not a powder, so the chickens can easily eat them.
dried egg shells for crushed egg shells
Drying egg shells on cookie sheet.
crushed eggshells in mortar and pestle
Using mortar and pestle to crush egg shells.

Once your egg shells are crushed they are ready to be fed to your chickens! There’s a couple different ways you can do this.

One is to keep a trough or bowl in your chicken coop continually filled with crushed egg shells and top it off as needed. Another method is to just offer them egg shells in a pile on the ground a few times a week or as it is available.

As mentioned earlier, we do the latter and have had consistently strong egg shells from our chickens. Both methods work and you can choose what is best for you and your flock.

What to Avoid when Feeding Chickens Egg Shells

We’ve already mentioned a couple of these, but there are some things you’ll want to avoid when feeding your chickens egg shells. Here’s the list:

  • Never mix egg shells with your chickens feed. Always offer it free choice.
  • Crush egg shells into small enough pieces so they no longer resemble an egg. You don’t want to whet the appetite for your chickens to start eating eggs in the coop.
  • Egg shells should not be offered to young chickens who haven’t started laying yet or to roosters.
  • Don’t give chickens anything but their own eggs. This includes avoiding eggs from other flocks or store bought eggs which could carry parasites or diseases.
  • Consider supplementing with a calcium grit in addition to egg shells.
chickens eating crushed egg shells

In regard to that last point, some recommend chickens also have access to larger, grittier forms of calcium like crushed oyster shells. This is because chickens lack teeth to chew their food. To compensate, they have what’s called a gizzard that collects pebble sized rocks and other materials that aid in the digestion of food.

So, whether it’s oyster shells or some other form of pebble or grit, it is important to make sure your chickens have access to something in order to have proper digestion of food. Free ranging chickens have an easier time finding and ingesting the grit they need naturally. Either way, it’s good to consider adding a supply of grit for your chickens that is separate from their feed and egg shells.

Other Sources of Calcium For Chickens

Dairy can be another rich source of calcium for chickens. Many farms and homesteads have a milking animal and often that means a generous supply of fresh milk to go around.

freshly cut authentic mozzarella cheese

The key, however, is moderation. A chickens digestive system is not designed to handle dairy, which could upset their stomach if consumed too often and in too high a quantity.

Dairy can come in many forms and some are better suited for chickens than others. For instance, butter should NOT be fed to chickens because of its high fat content. Cheese on the hand, can be a great source of calcium, along with protein, that your chickens will love to gobble up. You can learn more in our post—Can Chickens Eat Cheese?

Other Ways to Use Egg Shells

Did you know egg shells can be commonly used for human consumption as well? When ground down to a fine powder, egg shells can be a great source of supplemental calcium when sprinkled in a dish or smoothie. It can also be used in skin care such as a homemade remineralizing toothpaste.

You can check out our post—How To Make Eggshell Powder—for the extra steps needed to make egg shells safe for human consumption.

how to make eggshell powder
February 22, 2023 0 comment
0 FacebookTwitterPinterestEmail
how we made our predator proof chicken coop
ChickensHomestead How-to'sSmall Scale Farming

Predator Proof Chicken Coop Essentials You Need To Know

by From Scratch Farmstead February 11, 2023

The reality of backyard chicken keeping is that predators come with the territory. It’s not a matter of IF, but WHEN. So, there are some must-do steps to make a predator proof chicken coop that every chicken keeper NEEDS to know and implement.

We had never lost a chicken, then…

We’re grateful in our 9+ years of keeping backyard chickens to have a pretty good track record.

This includes about 5 years of raising chickens in our suburban backyard where we never had a predator casualty! We started with free-ranging 6 hens out of a stationary coop and quickly learned two things:

1) Our chickens got more and more adventurous over time.
2) More and more predators took note of our chickens over time.

Hawks, raccoons, skunks, neighbor’s dogs, and even the family of foxes that moved in next door every winter. We ran up against all of it.

When foxes moved next door to our free ranging chickens

That’s when we discovered mobile coops and built an A-frame chicken tractor out of a used kids swing set. Moving them to fresh grass every day gave us many of the benefits of free-ranging while keeping them protected during the day and night. It worked great!

When we moved to our current 5-acre homestead, we expanded once again to 50+ chickens that roam free all day and sleep in our chicken coop inside our barn at night. That many chickens has come with its own learning curve. And because they free-range all day, predators have proven challenging to manage.

custom a frame chicken tractor in suburban backyard
chicken coop built inside pole barn

After some close calls, we finally lost our first chicken to a predator—a hawk! Another hawk casualty followed. Then, a rooster mysteriously disappeared one day—likely picked off by a fox. But, we’ve taken some measures and not had any incidents since!

Whether you’re on an urban or suburban lot, or out in the country, we’ll share everything we’ve learned about keeping your feathery flock safe all day and all night!

Common Chicken Predators

When it comes to predators, chickens are unfortunately an easy prey.

By day, chickens can be oblivious and flighty. By night, they sleep hard and are entirely immobile and vulnerable. Therefore, the list of predators can be lengthy!

Chicken Predator List:

  • Coyotes
  • Foxes
  • Racoons
  • Skunks
  • Rats
  • Opossums
  • Weasels
  • Bobcats
  • Bears
  • Birds of prey
  • Neighbor’s (or stray) dogs & cats
  • Snakes

Each predator represents different threats and at different times. 

Coyotes, foxes, bobcats, dogs, and birds of prey might result in missing chickens that are taken. Smaller chickens, chicks, or eggs can be taken by smaller predators such as opossums, skunks, rats, cats, and snakes (while still including coyotes, foxes, and birds of prey). Predators like birds of prey and raccoons can also result in missing heads or limbs from chickens.

chickens roosting on diy 2x4 ladder roost design

Many predators like foxes and coyotes represent a dual threat during the day and night. Hawks will typically strike during the day while owls might carry off chickens in the evening. Most rodents are on the prowl at night, but could still be active in the early morning or evening hours.

Yes, the threats are many. But keeping your chickens safe is not a lost cause! With some basic measures, you can keep your feathery friends safe and put your mind at ease! Let’s dig in.

Predator Proofing Basics

Any chicken coop is comprised of 6 sides. The four walls of the coop, the top, and the bottom. To keep your chickens safe, all 6 sides must be secure.

If you are thinking your chickens are safe if the coop sits tightly to the ground, you are mistaken. Most of the predators on the above list can easily dig under a coop, even in a single night, to gain access.

stationary backyard chicken coop

And on top, even with a coop and run wrapped tightly in chicken wire or latches on every door, you birds may still be at risk! The materials and methods you use to secure your coop could make all the difference.

So let’s dig deeper into the essentials of a predator safe chicken coop.

5 Predator Proof Chicken Coop Essentials

Long lists of ways to predator proof your chicken coop can get overwhelming. We’ll look at some alternative options later in this post. But for now, let’s look at the simple predator proofing methods that every chicken keeper should implement.

1. Prevent Predators from Digging Under

As discussed above, the bottom side of a chicken coop is often the most under-looked point of entry for predators. Here are some options to address it.

Fully Enclosed Bottom Side

The ideal solution is to fully enclose the bottom side. This option makes the most sense for small sized coops. We did this for our stationary coop when living in the suburbs. I dug out the footprint of the whole coop 8-12” down. Then I lined the underside of the coop with hardware clothe bending the sides up to meet the bottom of the coop to create a continuous bottom barrier. Then, I filled the base of the coop back in with soil on top of the hardware cloth. With this solution, as long as all the doors were securely shut on top, the coop was 100% predator proof from all 6 sides.

chicken coop with hardware cloth bottom

Buried Hardware Cloth

As your coop increases in size, digging out the entire base gets pretty challenging. In this case, you can dig a trench around the base of your coop, and bury hardware cloth vertically at least 12” down. Most predators will try digging down right at the base of your chicken coop and get discouraged by the buried hardware cloth.

Similarly, an alternative is burying a hardware cloth apron around your coop. This involves digging a few inches deep around your coop, burying a horizontal layer of hardware cloth at least 12” wide, and then replacing the soil on top of it. While not as effective as hardware cloth buried vertically, this can be an easier addition to a coop that’s already in place.

Concrete Blocks

Yet another solution is to swap the buried hardware cloth option with either concrete blocks or bricks. This is what we did on our chicken coop inside our barn. The benefit is that the blocks can act as a solid foundation for your coop, especially if it’s on the larger side. Just a note to make sure your blocks still go down at least 12”. Our only went down 8”, and after some rats learned they can dig underneath the blocks this past winter, I’ll be needing to go in and retrofit some hardware cloth in addition.

installing concrete block chicken coop foundation
cmu foundation for chicken coop in barn

2. Use Hardware Cloth (when necessary)

While chicken wire is most commonly associated with chicken coops, it’s easier for predators to penetrate than you may think. And the hole sizes are large enough for some predators to reach through.

freedom ranger chicken in chicken tractor

So, when able, use hardware cloth—chicken wires tougher, more robust cousin. Whereas some predators have been known to break through chicken wire, especially at ground level, hardware cloth will stand up to any common backyard chicken predator.

A few considerations:

1) Correct installation is important! Your hardware cloth is only as secure as the fastener holding it. Shallow staples may not hold tight enough to keep large predators out. When building our chicken coops and tractors, I bought 1/2” staples and used a pneumatic brad nailer to install them. Nothing is ripping those out!

2) Use 1/4” Hardware Cloth. Hardware cloth comes with many sizes of mesh openings. Sticking with 1/4” (1/2″ at most) is your best bet. Larger openings might allow predators to get a claw or mouth through it. And smaller predators, like rats or snakes, might be able to sneak through a larger opening. No predator should be able to do substantial harm through 1/4” hardware cloth.

3) Use it if it makes sense. Hardware cloth is expensive! Much more so than chicken wire. This is where the “when necessary” part comes into play. There are times where we’ve opted for chicken wire over hardware cloth and still feel our chickens are safe. For instance, predators are less likely to get through chicken wire when it’s raised off the ground. So, on our barn chicken coop, I built it with solid knee walls at the base, and then installed chicken wire above the walls.

chicken coop in barn with repurposed door

Also, when we built our mobile chicken tractor, I surrounded the run with chicken wire because the enclosed area that the chickens slept in at night was impenetrable. Nothing ever got to them at night and they were protected from aerial predators in the chicken wire run during the day.

3. Make Enclosed Coop Area Impenetrable

The enclosed area of your chicken coop should be able to be 100% sealed tight! This is where your chickens will sleep at night, roost, and lay eggs—the times they’re most vulnerable.

This means that:

  • Solid materials should be used (wood, metal, etc.)
  • No gaps, cracks, or openings should be greater than 1/4”
  • Doors should be able to be closed up completely and latched
  • Any air vents should be covered over with hardware cloth
mobile chicken tractor with laying box
stationary backyard chicken coop with hardware cloth

Chickens will begin to retreat to their roosting location as the daylight fades. This is also when predators become most active. Our strategy has always been to go out each evening and close the door of the enclosed area of the coop so the chickens are locked up safe. This way, even if something manages its way into the run, the chickens will still be protected within the coop.

4. Use Secure Door Latches

Going off of that, any time there is a door or access point in the coop, it’s important you install the right type of latch. Animals are smart—and motivated. Raccoons, for instance, have been known to open up simple hook, pin, or throw latches. 

A 2-step lockable latch is most secure. This includes spring locks and barrel locks. These require more than just a simple and singular motion to unlock and will prove a bothersome task for any furry foe without opposable thumbs.

nestinb box on mobile chicken coop

5. Be Observant and Vigilant Every Day

Perhaps the best defense of all is you! Your eyes and ears will help keep your flock protected when threats arise. 

There have been numerous times we have heard a commotion in the yard and come bolting out the door only to narrowly interrupt a hungry hawk from dealing its deadly blow. Our takeaway has been, DON’T WAIT! When you hear something suspicious, run out there right away, or throw open the nearest window and yell with everything you got. Sometimes, each second matters!

feeder and waterer in a frame chicken tractor

Beyond the extremes of when predators do surface, your role as protector is also important in the mundane daily tasks and chores. Like checking, and then double-checking, that you’ve locked up the coop securely each night. When you’re lying in bed wondering, “Did I close up that latch I opened earlier in the day?”—ALWYAS go out there and check! It’s worth it every time. Even when we doubted, there have been countless times we did indeed leave something open.

And when you’re out doing chores and tending to your chickens each day, check for any signs of predators. Are there tracks around? Was something gnawing or digging? Is something moved or out of place? These things are sure signs predators are about and you should be extra vigilant. Or, you may need to reinforce an area of your coop.

Other Predator Safe Chicken Coop Ideas

Beyond the basics, these are other predator proof chicken coop ideas I have seen successfully implemented in backyard, homesteads, or farms.

Guardian Animals

Many animals or livestock can act as companion animals to help keep chickens safe. This is especially true when chickens are free-ranging and beyond the protection of the coop. 

Here is a list of guardian animals that can protect your flock:

Roosters
Geese
Guineas
Livestock Guardian Dogs
Goats
Donkeys
Llamas
Cows
Pigs

While most urban or suburban settings won’t allow it, a rooster is a likely first candidate to guard your flock. Many roosters take their role of protecting the flock very seriously. Our roosters will accompany our hens when out foraging, keep a watchful eye, and alert them of any threats. Roosters will also stand their ground and may even give their life to protect the flock. We had a rooster mysteriously vanish without a trace, while no hens were harmed—likely from standing up to a predator.

free ranging chickens with roosters on guard

Livestock Guardian Dogs (LGDs) will also ward off predators. Stella, our Maremma LGD on our homestead, takes her role protecting our cows and chickens very seriously. Since getting her, we have rarely seen hawks come anywhere near our chickens where they were under attack almost weekly prior.

Maremma livestock guardian dog on a homestead

Electric Poultry Netting

Electro-netting fencing is a simple way to eliminate ground predator threats for your chickens. Companies like Premier 1 Supplies makes poultry netting setups that can surround your coop and run while also providing boundaries for free ranging.

cows on pasture in electro netting
pulling chicken tractors through garden

We use this system for rotationally grazing our cows. So if it can contain our cows, it can keep chickens in and predators out! We also use it as a perimeter around our meat chickens we raise in Suscovich Chicken Tractors. They even make solar fence energizers that don’t require an electrical connection and are easy to install, connect to your fencing, and move around.

Predator Detterents

There are many simple or low cost predator deterrents that can be setup in your yard. Perhaps the most simple is to install a bright light on a motion sensor. Predators don’t like surprise or when things shift and change. Along those lines, there are sprinklers on motion sensors that you can setup near your coop and turn on when they detect motion. I’ve even seen someone setup one of those inflatable floppy people you see at car dealerships to keep predators away. And supposedly it worked!

Removing Feed

Even if your chickens are snuggled away safely in their coop, predators might still be interested in the feed that is left behind. Taking your chickens feeder away at nighttime and replacing it in the morning may help reduce pesky predators. 

Limit Free Ranging

One tactic we’ve used is to limit free ranging to only when we were at home or outside to keep close watch on things. This can get a little complex, especially if you’re regularly on the go. But we found it to be a happy middle ground for a time when predator pressure was high to still give our chickens the chance to roam free and forage.

Try a Chicken Tractor

As mentioned earlier, our mobile A-frame chicken tractor was the right solution for us to keep our chickens safely contained in the coop and run while still giving them regular access to fresh grass. Check out that post for how we were able to build a custom A-frame chicken tractor from a used kids swing set for hardly any cost!

enclosed area of chicken tractor

When Predators Strike…

DON’T GIVE UP!

Losing a chicken is heartbreaking. And sets you back. We know. 

So, let it be a learning opportunity for next time. Any time a predator breaches your coop they’re revealing areas that can be shored up and reinforced for next time.

What tips and tricks have you found helpful for protecting your feathery friends? Drop us a comment and let us know if you have questions!


Related Posts:

Custom A-Frame Chicken Tractor For (Almost) Free
How To Care For Baby Chicks
Simple Outdoor Chicken Brooder Ideas
How To Care For Chickens In The Winter Basics
Chicken Roost Designs | Two Simple DIY Ladder Perch Ideas
Farm Fresh Eggs | What’s the Difference and How to Use Them Safely

February 11, 2023 8 comments
0 FacebookTwitterPinterestEmail
custom a frame chicken tractor in suburban backyard
ChickensHomestead How-to'sSmall Scale Farming

Custom A-Frame Chicken Tractor For (Almost) Free

by From Scratch Farmstead February 4, 2023

When we wanted to expand our backyard chicken flock beyond our small stationary coop without spending a fortune, it was time to get creative. So, we picked up a used, wooden kids playset for free and transformed it into a mobile A-frame chicken tractor. 

This post talks about the benefits of mobile chicken coops and how to build your own custom A-frame chicken tractor for around $150.

What is a Chicken Tractor?

A chicken tractor is simply a mobile chicken coop that is regularly moved to patches of fresh grass. They come in all shapes and sizes (A-frame, rounded, rectangular) and can be constructed using a variety of materials and methods.

The typical chicken tractor design sits on rails (or skids) at the base with an attached rope, bar, or handles used to pull and maneuver the tractor. Sometimes they have the addition of wheels on one or both ends to make this task easier.

rectangular chicken tractor

Mobile chicken coops have long been used. Here, Laura Ingalls Wilder recounts the moveable coop that Pa had built from Little Town On the Prairie:

“She carried the chicks in her apron, to set them one by one into the coop that Pa had already made. It had a front of laths, to let in air and sun, and a little door with a wooden button to fasten it. It had no floor, but was set on clean grass that the chicks could eat, and when the grass grew trampled and dirty, the coop could be moved to fresh grass.”

Beyond moving chickens regularly onto fresh grass, chicken tractors offer many benefits. Let’s look at those.

Benefits of a Mobile vs. Stationary Chicken Coop

Our homesteading journey began with 6 laying hens in our suburban backyard. We kept them in a stationary coop that was a kit from Costco. It was bare bones. But it worked and allowed us to easily get started as backyard chicken keepers.

stationary backyard chicken coop

A couple years in, we started to see some of the challenges and limitations of that stationary coop:

  • It was tight (for us and chickens!)
  • Needed frequent cleaning.
  • Increased predator pressure while free ranging.
  • Trouble keeping free ranging chickens contained to only our yard.
  • And then the difficulty of trying to wrangle the chickens back into the coop during the day when we needed to run out somewhere.

Our video on stationary vs. mobile coops gives a more thorough breakdown of the pros and cons of each and what we ran up against.

But, because of some of those cons of the stationary coop, we decided to venture into the world of mobile coops, or chicken tractors.

Here’s a quick list of the benefits a chicken tractor can offer:

Fresh grass! Chicken tractors are typically moved onto fresh grass each day giving your gals new forage opportunities.

Large run. Tractors come in all shapes and sizes, but often have a larger footprint offering space for chickens to move about.

Easy access. A-frame chicken tractors are tall making maneuvering inside them for daily chores like food and water more manageable.

a frame chicken tractor with backyard chickens

Safe & secure. Your chickens have many of the benefits of free ranging with less risk of predators getting to them.

Urban friendly. Whether you’re often on the go or have close proximity neighbors, your chickens stay in one place and keep your mind at ease.

Less mowing. My personal favorite—when appropriately moved and managed your chickens will mow down your lawn for you while also fertilizing it!

A-Frame Chicken Tractor FAQ’s

Before we get into how to build your own custom A-frame chicken tractor, you’ll want to make sure it’s the right fit for you, your lot, and your flock. Here are some frequently asked questions:

How much land do I need for a mobile chicken coop?

There are several factors that will play into this including the size of your tractor, how many chickens you have, and your yard space. We had our tractor on our 1/3 acre lot, which felt plenty spacious. The minimum time for grass to regrow is 30 days. And it is typically best to move your tractor onto a fresh patch of grass every day. Based on this, my recommendation would be to size your tractor to allow at least 30 moves through your yard before being brought back to its starting point. 

suburban backyard chickens with moveable coop

How many chickens can I fit in my chicken tractor?

Chickens need anywhere between 4-8 square feet of run space per bird to be happy, healthy layers that aren’t cramped. So, step one is deciding the appropriate size of your backyard flock and then building a chicken tractor to suit. We recommend getting a lesser quantity of chickens to start and increasing as able over time as opposed to maxing out your space right away.

Can I let my chickens free range with a chicken tractor?

Yes, you certainly can! Just because the coop is designed to move while still keeping your chickens contained doesn’t mean the door needs to stay shut. If you’re comfortable with them free ranging and have a good setup to do so, then have at it! We would still let ours free range as much as possible if we were at home and keeping watch on them. But, for many of the reasons already mentioned, keeping the chickens in the tractor most of the time was the perfect option to keep our chickens safe and happy in our suburban backyard.

layers free ranging in yard

What about predators?

We never lost a chicken to a predator in our chicken tractor or our stationary coop. With the stationary coop, we were able to dig down and run hardware cloth underneath it to keep predators from digging under the coop. However, the bottom is obviously exposed in a mobile coop. But, most predator pressure comes at night when the chickens have retreated to the enclosed area of the tractor. This means, if you design the enclosed area to keep predators out and make sure they are securely locked up each night, then your flock will likely stay well protected.

How To Build an A-Frame Chicken Tractor From a Kids Playset

Many stationary coops come as a kit or prebuilt. Mobile chicken tractors, however, are much less common to come by and few plans for them exist. Therefore, you will likely end up building your own custom tractor—like we did!

This post is not an exact A-frame chicken tractor plan to follow. Rather, it can give you the inspiration and general guidance to build your own custom A-frame chicken tractor. And do so at a very low cost. 

Here’s what you’ll need to start.

Materials

Kids Playset – This project gives you the added bonus of up-cycling lumber from a used children’s playset to give it a second life. If you search for playsets on Craigslist or FB Marketplace there are usually TONS of options. And many are free! Look for something simple with an A-frame design for swings and other playset accessories. This will give you enough lumber for the majority of your chicken tractor.

free used a frame kids playset
free used kids playset

Roofing – If the playset doesn’t already have roofing, you’ll need to come up with a material option for roofing. We found used cedar fencing that someone had listed for free, removed the pickets, and lapped them as roofing. You can also use metal or PVC panels, asphalt shingles, or any other waterproof material that will stand up to outdoor use.

used cedar fencing panels
fence panel pickets used for roofing on chicken coop

Siding – Some playsets may give you the siding you need for the enclosed coop section and nesting boxes. Ours did not. So, I picked up a 4×8 sheet of 3/4” exterior plywood that I used for the enclosed coop area and laying boxes.

After tracking down those main materials, you’ll need a few other things.

Here’s a more complete materials list:

Lumber from playset
Roofing
Siding
Chicken wire
Wire cutters
Hinges & latches
Wheels (optional)
Rope
Various sizes of exterior grade construction screws

Tools

Most playsets will be made with 4×4 posts. These are beefy and will be too heavy to construct a mobile coop out of. Therefore, I took those 4×4’s and cut them lengthwise, or ripped them down to smaller sizes. A table saw makes this task so much quicker and easier. But, you can also do it with a circular saw if that is what you have. Likewise, a miter saw will makes some angled cuts easier. But they can also be achieved simply with a circular saw. 

ripping down lumber from 4x4s
used lumber from kids playset

Here’s the tools to have on hand:

Circular Saw
Table Saw (optional)
Miter Saw (optional)
Drill
Impact driver (or drill if that’s what you have)
Stapler
Tape measurer
Speed square
Pencil
Quick clamps (if you have them)
Safety glasses

How To Build a Custom A-Frame Chicken Tractor

Step 1 – Build A-frame

As mentioned above, the 4×4 posts from your playset will need to ripped down to smaller dimensions. I ripped one in half to provide 2×4’s for the two bottom rails or skids the tractor will be pulled on. The rest of the 4×4’s I ripped into quarters (2×2’s) for the remainder of the tractor framing. The top spine of the A-frame was another 2×4 I had ripped down from the original 2×6 atop the playset.

Once the materials were cut to size, I laid out the dimension and footprint of the tractor size I wanted, cut the pieces to the appropriate sizes and angles, and screwed the frame of the tractor together. My tractor was roughly 7’x7’. 

building a frame chicken tractor

To tie a tow rope or add wheels (optional) on the tractor, it’s best to have the bottom rails of the tractor extend 4-8” out from the tractor. You can see I didn’t do this initially and just screwed on some shorter pieces of wood on the front and back. They held up fine.

The front of the tractor will need a door. I built a simple door and door frame out of extra 2×2’s that fit on the front A-section of the tractor.

I also added diagonal 2×2’s spanning the A-frame sections laterally so the tractor had more stability when being pulled. 

Step 2 – Construct Enclosed Coop Area

The goal here is to create a triangle shaped, fully enclosed area where your chickens can roost, sleep, be protected from cold and rain, and go to lay eggs.

Here I was able to repurpose the bridge, or deck, from the playset I found. I spaced the upright A-frame sections from the previous step so the deck would fit between them. This will give your enclosed area a solid base.

a frame chicken tractor being built
adding laying box to a frame chicken tractor

Next, cut your siding to fit on the horizontal sections of your enclosed area and install with screws

building enclosed area on chicken tractor
adding siding to a frame chicken tractor

On the side facing the interior run, you will need to cut out a door that can be closed up tight at night. The easiest way I have found to do this is to make my own vertical rails out of 2×4’s for a door to slide up and down in. Simply notch out one of the corners lengthwise of a 2×4 section, mount them next to your door cutout, and slide a rectangular section of siding into those tracks as a door.

sliding door to keep chickens safe in tractor

The backside of your tractor will fit a nesting box (or laying box). I used spare 2×2’s to build a nesting box frame and then used more of the siding board for the floor and walls of the nesting box. I then built a cover on hinges that can be easily lifted up to check for eggs or access the enclosed portion for cleaning.

nestinb box on mobile chicken coop

And don’t forget ventilation! This is critical to provide airflow on warmer days. A the top of the triangle enclosed areas, I cut off the top of the triangle, put it on hinges, then lined the opening with hardware cloth so I could open and close it for ventilation as needed.

Note, the top of your enclosed area will still be open until roofing is added!

Step 3 – Install Chicken Wire (or Hardware Cloth)

Next, the run of your tractor will be ready for chicken wire! There is no easy way to install chicken wire. I recommend you wear long sleeves, pants, gloves, and eye protection to avoid getting cut up. Also, having a second set of hands makes it much easier.

I bought 4’ wide chicken wire and spaced the A-frame sections appropriately to accommodate. Cut the length you need with wire cutters (leaving a little extra never hurts and can always be cut off at the end). Fasten one side in place with your stapler. Stretch the chicken wire across to the other side and staple in place.

chicken tractor with chicken wire added

You want the staples to be continuous and spaced every 4-6” so the run is secure and nothing can get in or out. The door will also need to be backed with chicken wire. Working with chicken wire can be frustrating and require patience. But stick with it and you’ll get there!

Hardware cloth is chicken wires much stronger and more secure cousin. It’s also more expensive. My theory was that ground predators that could to tear through chicken wire are usually only out in the evening. Therefore, I built the enclosed area to be impenetrable from predators and made sure all our chickens were closed up there securely each night. This allowed me to use chicken wire on the run and save some cost. After a couple years of use, that theory proved true and nothing ever got to the chickens in the run or the enclosed area.

Step 4 – Add Roof

At this point, the only area still open on your A-frame chicken tractor is the top of your enclosed area where roofing needs to be added.

mobile chicken tractor with laying box

I discussed roofing materials above. The simplest and most commonly found solution is probably to use metal roofing sheets and fasten them with roofing screws. Often you can find these tin panels used for cheap or free. I found some cedar fencing that someone had removed and lapped the pickets like shingles.

The bottom line is that whatever you use for roofing, it needs to be fully enclosed and secure so nothing can pry into the enclosed area of your coop at night.

Step 5 – Install Wheels (optional)

I never installed wheels on our A-frame chicken tractor and got by alright. However, they would not be that hard to install and would likely make it significantly easier to move the tractor.

We’ve since built a couple of John Suscovich chicken tractors for raising meat chickens that have wheels and they do pull very nicely. His design involved using lawnmower wheels, 1/2” carriage bolts, locking nuts, and washers to get the spacing of the wheel right.

chicken tractor and three sisters garden

This is where extending the bottom rails comes into play. Drill a 1/2” hole in the rails on the back of the tractor, install your carriage bolts, washers, lock nuts, and wheels, and you’re all set.

Step 6 – Add Finishing Touches

There’s a few extra steps needed to finish off your tractor.

First, drill 1/2” holes where the bottom rails overhang on the front side of your tractor. Tie a section of heavy duty rope through each end. Adjust the rope as needed to get the right fit for pulling your tractor. The thicker rope you buy, the less it will bite into your hands. Note, you might also consider adding a pull rope on the backside of the tractor. I did this, and it helps with maneuvering, especially if space is tight.

a frame chicken tractor made from playset

Second, build a ladder to the entrance of your enclosed area. I used a 2×4 and added small steps for traction. I also put this ladder on a hinge so I could lift it off the ground, tie it up, and keep it out of the way when moving the tractor.

You’ll also want to set them up for food and water. I bought a hanging feeder and waterer, added hooks below the enclosed area, and hung both in the tractor. Having them hanging also makes moving your tractor much simpler.

feeder and waterer in a frame chicken tractor

And finally, add any hinges or latches needed. This includes the doors, nesting box, vent holes, ladder, or anywhere else. Make sure any and all points of entry fasten securely and close up tight!

At this point, you’ve probably got yourself the coolest custom chicken tractor on the block 🙂

Moving and Managing Your A-Frame Chicken Tractor

Managing your chicken tractor will vary a lot based on:

  • The size of your tractor.
  • How many chickens you have.
  • How much land you have.
  • The health of your soil and grass.

Moving your tractor

Most chicken tractors are moved once a day. But you can do this more, or less, depending on your needs. For instance, if you only have a couple chickens, they might be able to stay in one spot for multiple days. If you have lots of chickens, they’ll really appreciate being moved more frequently and will tear up your lawn less. With our Suscovich chicken tractors that we raise 25 birds at a time in, that many chickens will tear through a patch of grass in no time, so I move them twice a day.

chickens mowing down lawn in moveable coop

Chicken tractors in the winter

The question also comes up of what to do with your chickens in the wintertime. Grass stops growing, so is it really necessary to keep moving your tractor?

Our solution has been to park our chicken tractor over our garden area for the winter. We’ll typically utilize the “deep litter method” where we’ll continue to add layers of dry straw as manure builds up. The straw and manure will compost down and give your soil tons of natural fertilizer to plant into for next growing season. Plus, come spring as the ground begins to thaw, your chickens will scratch, dig, and help prep your garden areas for planting!

chicken tractor in suburban backyard during winter

We would move the tractor during the winter to a new spot every couple of weeks to avoid too much buildup in any one area. But it was much less moving than during the growing season.

Dust bathing

Something else that comes up is that chicken tractors generally limit a chickens innate desire to dust bathe, which they use to clean themselves. If not given access to loose soil or sand to dig into and dust bathe in, chickens will get stressed out over time. Or, they’ll start digging holes in your lawn!

To resolve this, we found a bin and filled it with some dirt and sand. The chickens in the tractor took to it instantly and were happy campers afterward! The only tricky part of the bin system was moving it around with the tractor.

bin with dirt and sand for dust bathing

Roosting

Another quick fix for the tractor was figuring out how to best give the chickens roosting space in the enclosed area. I didn’t want anything permanently fixed in there because it would make cleaning out the coop tricky. So I made some really simple portable roosting bars out of 2×4’s and those worked great!

simple portable chicken roost design
moveable roosts in chicken coop

Another A-Frame Option – The Suscovich Chicken Tractor

I’ve referenced the John Suscovich chicken tractor multiple times. It is another great A-frame chicken tractor option. His book, Stress Free Chicken Tractor Plans, gives you the full step-by-step instructions of how to build one. And we also made a supplemental post about how to add a metal roof on top of it.

suscovich chicken tractor with metal roof

Keep in mind this is a big chicken tractor. The footprint is 6’x10’. And it’s designed for raising pastured meat chickens, so some of the elements necessary for laying hens are missing. But, others have gotten creative with the design and figured out to retrofit it for laying hens.

The A-Frame Advantage

Both mobile and stationary chicken coops have their pros and cons. You need to weigh out which chicken coop style is right for you. But hopefully this post has given you an idea of the advantages of a mobile A-frame chicken coop and how they can benefit your chickens, yard, and ultimately you through healthy pastured eggs.

free ranging chickens in a frame chicken tractor

And, we hope you also have the inspiration and guidance you need to build your own chicken tractor—on a shoestring budget at that!

We’d love to hear how your own chicken tractor adventures go and any questions you have in the comments!

Some of the above links are affiliate links. This means we earn a small commission on qualifying purchases at no cost to you. We are so appreciative of your support!


Looking for more on backyard chickens? Check out these posts:

How To Care For Baby Chicks
Simple Outdoor Chicken Brooder Ideas
How To Care For Chickens In The Winter Basics
Chicken Roost Designs | Two Simple DIY Ladder Perch Ideas
Farm Fresh Eggs | What’s the Difference and How to Use Them Safely

February 4, 2023 2 comments
0 FacebookTwitterPinterestEmail
Best Homesteading Quotes
Homestead How-to'sHomestead LivingOur Healing Journey

25 Homesteading Quotes To Empower And Inspire

by From Scratch Farmstead January 18, 2023

From the founding fathers to more modern day pioneers of the regenerative agriculture, permaculture, and homesteading movements, there is no shortage of places to look for inspiration on your homesteading journey. We have compiled a list of 25 of our favorite homesteading quotes that have inspired us to pursue this lifestyle.

Several of the individuals quoted here were featured in the book, Letters to a Young Farmer. This is a favorite book of ours and one that was particularly inspiring and helpful as we were beginning to contemplate homesteading and farming in our lives. And it gave us tons of inspiring homesteading quotes that we have been ruminating on ever since. Head to the bottom of this post to learn more about our story and homesteading resources!

letters to a young farmer

Some of the above links are affiliate links. This means we earn a small commission on qualifying purchases at no cost to you. We are so appreciative of your support!

Our Top Homesteading Quotes

“It is not the critic who counts; not the man who points out how the strong man stumbles, or where the doer of deeds could have done them better. The credit belongs to the man who is actually in the arena, whose face is marred by dust and sweat and blood; who strives valiantly; who errs, who comes short again and again, because there is no effort without error and shortcoming; but who does actually strive to do the deeds; who knows great enthusiasms, the great devotions; who spends himself in a worthy cause; who at the best knows in the end the triumph of high achievement, and who at the worst, if he fails, at least fails while daring greatly, so that his place shall never be with those cold and timid souls who neither know victory nor defeat.” –Theodore Roosevelt

Theodore Roosevelt - Homesteading Quotes

“Agriculture is the greatest and fundamentally the most important of our industries. The cities are but the branches of the tree of national life, the roots of which go deeply into the land. We all flourish or decline with the farm.” –Bernard Baruch

Bernard Baruch - Homesteading Quotes

“Strong communities are built around local, real food. Food we trust to nourish our bodies, the farmer and planet.” –Kimbal Musk

Kimbal Musk - Homesteading Quotes

“Why does no one speak of the cultural advantages of the country? For example, is a well-groomed, ecologically kept, sustainably fertile farm any less cultural, any less artful, than paintings of fat angels on church ceilings?” –Gene Logsdon

Gene Logsdon - Homesteading Quotes

“Our land is like a poem, in a patchwork landscape of other poems, written by hundreds of people, both those here now and the many hundreds who came before us, with each generation adding new layers of meaning and experience.” –James Rebanks

James Rebanks - Homesteading Quotes

“Farms and food production should be, I submit, at least as important as who pierced their navel in Hollywood this week. Please tell me I’m not the only one who believes this. Please. As a culture, we think we’re well educated, but I’m not sure that what we’ve learned necessarily helps us survive.” –Joel Salatin

Joel Salatin - Homesteading Quotes

“I think having land and not ruining it is the most beautiful art that anybody could ever want to own.” –Andy Warhol

Andy Warhol - Homesteading Quotes

“We must begin making long-term, permanent change in a world of short-term thinking. In a world impatient for a quick fix, we must continue to make the long, steady progress needed toward a rich, green, abundant world, started by planting one tree at a time and repeated over and over around the world.” –Mark Shepherd

Mark Shepherd - Homesteading Quotes

“Life is either a daring adventure or nothing.” –Helen Keller

Helen Keller - Homesteading Quotes

“Even a wounded world is feeding us. Even a wounded world holds us, giving us moments of wonder and joy. I choose joy over despair. Not because I have my head in the sand, but because joy is what the earth gives me daily and I must return the gift.” –Robin Wall Kimmerer

Robin Wall Kimmerer - Homesteading Quotes

“A farm is a manipulative creature. There is no such thing as finished. Work comes in a stream and has no end. There are only things that must be done now and things that can be done later.” –Kristin Kimball

Kristin Kimball - Homesteading Quotes

“Agriculture is our wisest pursuit, because it will in the end contribute most to real wealth, good morals, and happiness.” –Thomas Jefferson

Thomas Jefferson - Homesteading Quotes

“We have neglected the truth that a good farmer is a craftsman of the highest order, a kind of artist.” –Wendell Berry

Wendell Berry  - Homesteading Quotes

“Do what you love to do, and be around things that make you smile. The cows make me smile every day.” –David Jackson

David Jackson - Homesteading Quotes

“The fight to save family farms isn’t just about farmers. It’s about making sure that there is a safe and healthy food supply for all of us. It’s about jobs, from Main Street to Wall Street. It’s about a better America.” –Willie Nelson

Willie Nelson - Homesteading Quotes

“I am beginning to learn that it is the sweet, simple things of life which are the real ones after all.” –Laura Ingalls Wilder

Laura Ingalls Wilder - Homesteading Quotes

“You can solve all the world’s problems in a garden.” –Geoff Lawton

Geoff Lawton - Homesteading Quotes

“When we traded homemaking for careers, we were implicitly promised economic independence and worldly influence. But a devil of a bargain it has turned out to be in terms of daily life. We gave up the aroma of warm bread rising, the measured pace of nurturing routines, the creative task of molding our families’ tastes and zest for life; we received in exchange the minivan and the Lunchable.” –Barbara Kingsolver

Barbara Kingsolver - Homesteading Quotes

“Some people buy lottery tickets. I plant potatoes.” –Jill Winger

Jill Winger - Homesteading Quotes

“Despite all of our accomplishments, we owe our existence to a six-inch layer of topsoil and the fact that it rains.” –Paul Harvey

Paul Harvey - Homesteading Quotes

“I think America’s food culture is embedded in fast-food culture. And the real question that we have is: How are we going to teach slow-food values in a fast-food world? Of course, it’s very, very difficult to do, especially when children have grown up eating fast food and the values that go with that.” –Alice Waters

Alice Waters - Homesteading Quotes

“Ultimately, the only wealth that can sustain any community, economy, or nation is derived from the photosynthetic process – green plants growing on regenerating soil.” –Allan Savory

Allan Savory - Homesteading Quotes

“Is there any practice less selfish, any time less wasted than preparing something nourishing and delicious for the people you love?” –Michael Pollan

Michael Pollan - Homesteading Quotes

“To forget how to dig the earth and to tend the soil is to forget ourselves.” –Mahatma Gandhi

Mahatma Gandhi - Homesteading Quotes

“Working hard for something we don’t care about is called stress. Working hard for something we love is called passion.” –Simon Sinek

Simon Sinek - Homesteading Quotes

More Inspiration for your Homesteading Journey

We are believers that homesteading is a mindset and a way of life that you can strive toward wherever you are at. Our own journey started in the suburbs and then led to our current 5 acre homestead. So, in addition to these homesteading quotes, check out these other great resources to pull inspiration from in your homestead journey:

Homesteading Resources | Where To Begin In Your Homesteading Journey
Buying a Homestead on a Budget
Urban Homesteading | 25 Ways To Begin Today
Setting Up A Homestead Budget For One Small Income
14 Frugal Homestead Ideas
Farm vs. Homestead vs. Farmstead | What They Are and How To Choose
Top 10 Resources and Tips for Finding Farmland

And if you’re at the stage where you’re searching for the right homestead property, we share our own search story and what we learned along the way in this video.


January 18, 2023 0 comment
0 FacebookTwitterPinterestEmail
farm fresh eggs from local farm
ChickensHomestead SkillsNatural Living

Farm Fresh Eggs | What’s the Difference and How to Use Them Safely

by From Scratch Farmstead January 15, 2023

We’ve become accustomed to running to the store to pick up a dozen eggs. But in reality, there can be a big difference between eggs bought at your local grocery story vs. eggs purchased directly from a farm. We will breakdown the differences and how to handle farm fresh eggs for the best and safest results!

How to Select Eggs from the Grocery Store?

You go to the store to pick up eggs for your morning omelet and are hit with a barrage of options. All natural, farm fresh, cage free, organic – how do you know what to buy and what the differences really are?

What’s a Standard Conventionally Raised Egg?

When it comes to eggs from the grocery store, according to this NPR article, roughly 95% of eggs produced in the United States are from hens raised in what are referred to as “battery cages”. 

egg cartons with a variety of different egg labels

These are cages that house on average 8 birds and give each chicken about 67 square inches of floor space. This is similar to the size of an iPad or standard 8” x 11” piece of paper.

These cages are stacked on top of each other. So, upwards of a thousand birds will fill one barn. Hens in these facilities are typically fed a combination of corn with other animal byproducts.

The majority of eggs in the supermarket come from eggs raised in factory farmed systems as described above. But there’s a growing trend of wanting to buy better eggs. So, what about the rest of the lingo on egg packaging?

What do the Different Terms Mean on Egg Packaging?

Cage Free Eggs

Most people think this means chickens are spending time outdoors. But this is far from the truth. Being labeled “cage free” is a government defined label meaning that there must be at least 1.2 square feet per chicken. No access to the outdoors, grass, or the sun. Just as it sounds, free of cages but basically nothing else.

Free Range Eggs

Free range is also a government regulated term on egg cartons. It means that each chicken must have at least 2 square feet of outdoor space. So, in addition to the ability to roam, they must also be able to access the outdoors. While this sounds good and is certainly an improvement, this small amount of outdoor space usually looks like a small fenced in patio on cement or dirt ground.

how to choose eggs at the store

Pasture Raised Eggs

Pasture raised is an unregulated term by the USDA and Government agencies. In that regard, it is open to interpretation by producers of how it is used and labeled on cartons.

However, in recent years, other third party agencies like the American Welfare Institute and Humane Farm Animal Care have created their own certifications and definitions for pasture raised eggs. If you see a carton with the “Certified Humane”, “American Humane Certified” or “Animal Welfare Approved” certification AND a carton being labeled as “pasture raised” it means that the chickens must be raised on 2.5 acres per 1,000 hens or 108 square feet per chicken. This is a huge improvement!

This is where doing your research is important as a consumer! Companies like Vital Farms is one of the few to offer this certified humane and pasture raised label.

Organic Eggs

Organic is another regulated term in the egg industry. It primarily refers to the feed that chickens receive. By definition organic eggs mean that chickens must be fed organic certified feed, be cage free so they have the ability to roam, and have access to the outdoors in some capacity. Essentially, organic is the same as the “free range” label while also being fed an organically grown diet.

Omega-3 Eggs

This nutritional variation in eggs is determined by the feed that the animal gets. Eggs that claim to be Omega-3 eggs mean that the hens are generally fed flaxseed which is high in omega-3 fatty acids.

omega 3 cage free eggs

Vegetarian Diet Eggs

Sounds good, right? You picture chickens munching away at kale leaves. Except chickens are omnivores and their typical diet would include plenty of bugs, grasshoppers, worms, etc. An egg carton claiming that the chickens are fed a vegetarian diet typically means a diet of non-organic corn fortified with some amino acids for protein. This label is also unregulated.

Unregulated Terms

Other terms that are unregulated and essentially mean nothing on packages include: farm fresh, all natural, hormone free, vegetarian fed.

Farm Fresh Eggs vs. Store Bought

Hopefully this helps you be more informed as an egg consumer in knowing where the standard grocery store egg came from and what to look if purchasing eggs.

This is also why we are big advocates of buying farm fresh eggs directly from a local farm, farmer’s market, or co-op. When doing so, there’s much less need to worry about questionable claims and labels. And typically, the eggs come from healthy hens in much more ideal conditions than what we described above.

layers free ranging

Of course, it’s always important to do your research. This is one of the benefits we see in buying eggs fresh from the farm. You can talk to the farmer, visit the farm, ask questions, and hopefully see firsthand where these farm fresh eggs are coming from. 

Good Questions to ask Your Farmer When Purchasing Farm Fresh Eggs?

How are the chickens raised? Meaning do they have sufficient access to the outdoors, bugs and grass or are they kept in indoor coops?

What are they fed? Organic vs non-organic feed? If soy is an issue for you, finding soy-free eggs may be something to consider. Do they get other food scraps and can they regularly forage for bugs, worms, and other insects?

Is the coop and conditions clean? This is a great one to go check out for yourself!

In our experience most farms and homesteaders that raise eggs are not doing it to make money but because they genuinely care about where their food comes from and do all they can to ensure an optimal life and health for their flock. But, it’s always important to do your own research!

How to Safely Handle Farm Fresh Eggs

Should Farm Fresh Eggs Be Washed?

The short answer, NO! When an egg is laid, it naturally comes with a coating called the bloom. The bloom was specifically designed to be a layer of protection for the egg and keep bacteria out. When an egg is washed, the bloom is destroyed making the egg much more susceptible to bacteria. If an egg is washed it should be immediately refrigerated and eaten as soon as possible.

fresh eggs just collected on the farm

If you do need to wash a farm fresh egg to clean any dirt or debris that may have found its way onto the shell, the best way to do this is with warm water. Warm water helps the contents of the egg to expand making it more difficult for unwanted bacteria to penetrate the porous shell of an egg. Cold water does the opposite making the egg more susceptible of exposure to bacteria.

On our homestead, our daily collection of farm fresh eggs is usually very clean and great for eating without any washing. Occasionally, if there is a little bit of something on the shell, we’ll leave it unwashed on the countertop and just wash right before we crack it open for use. From time to time, we’ll get a dirty egg that needs to be washed right away. We will either feed it to one of our dogs or wash it in warm water, store it in the fridge, and eat it up within a day or two.

How Long are Farm Fresh Eggs Safe to Eat?

One of the biggest perks of buying eggs fresh from the farm is that you are likely getting them within just a few days of being laid. This is quite different from eggs from the grocery store that are typically between one and two months old before they even hit the shelves.

There is a definite advantage here in buying the freshest eggs which will have much less nutrient loss than eggs that have been sitting around for well over a month!

Farm fresh eggs store just fine on the counter, unwashed for at least 2 weeks. After that, you can store them in the refrigerator for up to 3 months.

fresh eggs sitting on countertop

If you are unsure how old your farm fresh eggs are and whether or not they are safe for eating, you can always give them the float test.

Float Test for Farm Fresh Eggs

A fresh egg should quickly sink when put in a bowl of water. If the egg floats, then you know this egg is not fresh or suitable for eating and should be discarded. The float test is especially useful when we discover a pile of eggs in some abnormal place on the farm and are not sure how long they’ve been sitting there.

What about Fertilized Eggs?

If there is a rooster on your farm, then some of the eggs will be fertilized. There is no visible difference in outward appearance between a fertilized and unfertilized egg. They are completely safe to eat and do not taste any different.

Sometimes you will notice a small dot of blood in a cracked egg. This is typical and completely safe to eat. However, it is always good to crack your eggs in a separate bowl before use to make sure everything looks as it should.

Store Farm Fresh Eggs Pointy Side Down

Contrary to what may look normal, eggs are best stored pointy side down. This is because there is a naturally occurring air bubble at the rounded side of the egg. By storing eggs point side down, it keeps the air bubble at the top and the yolk centered. This preserves the freshness of the egg and helps them last longer!

How to Preserve Farm Fresh Eggs

Like most things on the farm and in nature, egg laying is seasonal. Typically, March-September are peak times for egg production. Shorter days in the cooler months and other factors like chickens molting can cause a steep decline in egg production from a laying flock.

farm fresh eggs

This means, when eggs are in abundance in these warmer, sun-filled days, you may want to consider preserving them to pull out in the winter when farm fresh eggs can be harder to come by.

There are several methods of preserving eggs including water glassing, freezing, dehydrating, and freeze-drying. This article goes into more detail about the ins and outs of long-term egg preservation.

A Final Plug for Farm Fresh Eggs

While there can be fears and timidity around getting eggs fresh from the farm, we’ve come to see the vast benefits in purchasing eggs this way. They are typically fresher, more nutritious, taste better, and often provide an all-around better environment for the chicken itself.


For more on chickens and keeping your own chickens on your farm or in your backyard, check out these posts:

Can Chickens Eat Cheese? | How To Nourish Your Backyard Flock!
Simple Outdoor Chicken Brooder Ideas
Chicken Heart and Liver | How To Sneak Nutrient Dense Organs Into Your Diet Without Anyone Knowing
Simple DIY Chicken Coop Inside Your Barn
Cornish Cross vs. Freedom Ranger Chickens
How To Care For Chickens In The Winter Basics
Cost of Raising Chickens for Meat on a Small Scale

January 15, 2023 2 comments
1 FacebookTwitterPinterestEmail
Newer Posts
Older Posts

About Us

About Us

So Glad You're Here!

Hi! We are Jim and Joelle. We love sharing homestead how-to’s, from scratch recipes, and natural do-it-yourself projects to help you nourish your family. To learn about our story, click the image above!

Stay Up-To-Date

Popular Posts

  • How Many Cows Per Acre On A Small Farm

    May 26, 2022
  • Chicken Tractor Plans for 25 Chickens

    May 1, 2022
  • Easy Farmhouse Cheddar Hard Cheese Recipe

    July 17, 2022
  • Predator Proof Chicken Coop Essentials You Need To Know

    February 11, 2023
  • How To Make Quick and Natural Mozzarella Cheese with Vinegar

    August 7, 2022

Follow Along!

  • Email
  • Facebook
  • Instagram
  • YouTube

Instagram

  • Facebook
  • Instagram
  • Youtube
  • Email
  • About
  • Privacy Policy

© 2021-2023 From Scratch Farmstead | As an Amazon Associate we earn from qualifying purchases.


Back To Top
From Scratch Farmstead
  • About
  • Homestead How-to’s
    • Family Milk Cow
    • Gardening
    • Chickens
    • Small Scale Farming
    • Buying A Homestead
    • Homestead Living
  • Nourishing Recipes
    • Home Dairy
    • Food Preservation
    • Breakfast
    • Main Course
    • Sides
    • Dessert
    • Sauces & Condiments
  • Natural Living
    • Skin Care
    • Home Essentials
    • Living On A Budget
    • Our Healing Journey
    • Homestead Skills
    • DIY
    • AGA Stove