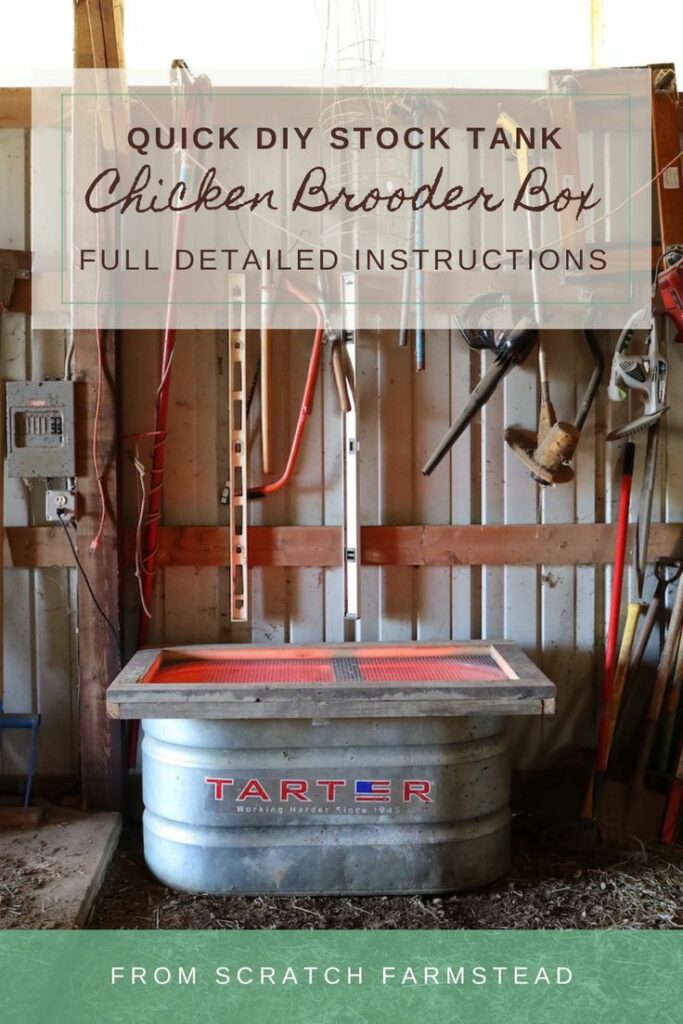
Quick Stock Tank Chick Brooder Box
You’re getting chicks any day now BUT you don’t have a brooder yet! No sweat. We were in that same position and this easy stock tank chick brooder box was the perfect solution!
What is a Chick Brooder Box?
If you’re new to the world of chicken keeping, the word brooder will likely be new in your vocabulary. While we live on a 5 acre homestead now, that was certainly true for our formerly suburban family.
The natural way baby chicks are raised is by mama hen. If you’re hatching your own chicks or purchasing them, you won’t have that protective and nurturing mama to, quite literally, take them under their wing.

So, a chick brooder box is a safe and dry shelter to raise your baby chicks in their first several weeks of life.
You take on the role of mama hen and provide your chicks with fresh bedding, food, and water daily, along with a source of heat.
For more on what you need inside your brooder and some of the lessons we’ve learned along the way, check out our post—How To Care For Baby Chicks.
We Need a Brooder—Fast!!
To be fair, we actually did already have a brooder on our homestead. It was just already filled with our Freedom Ranger chicks for raising our meat chickens.
That brooder was extremely low cost. We built it out of large shipping crate we bought for hardly anything on Facebook Marketplace, along with some scrap lumber and hardware cloth.
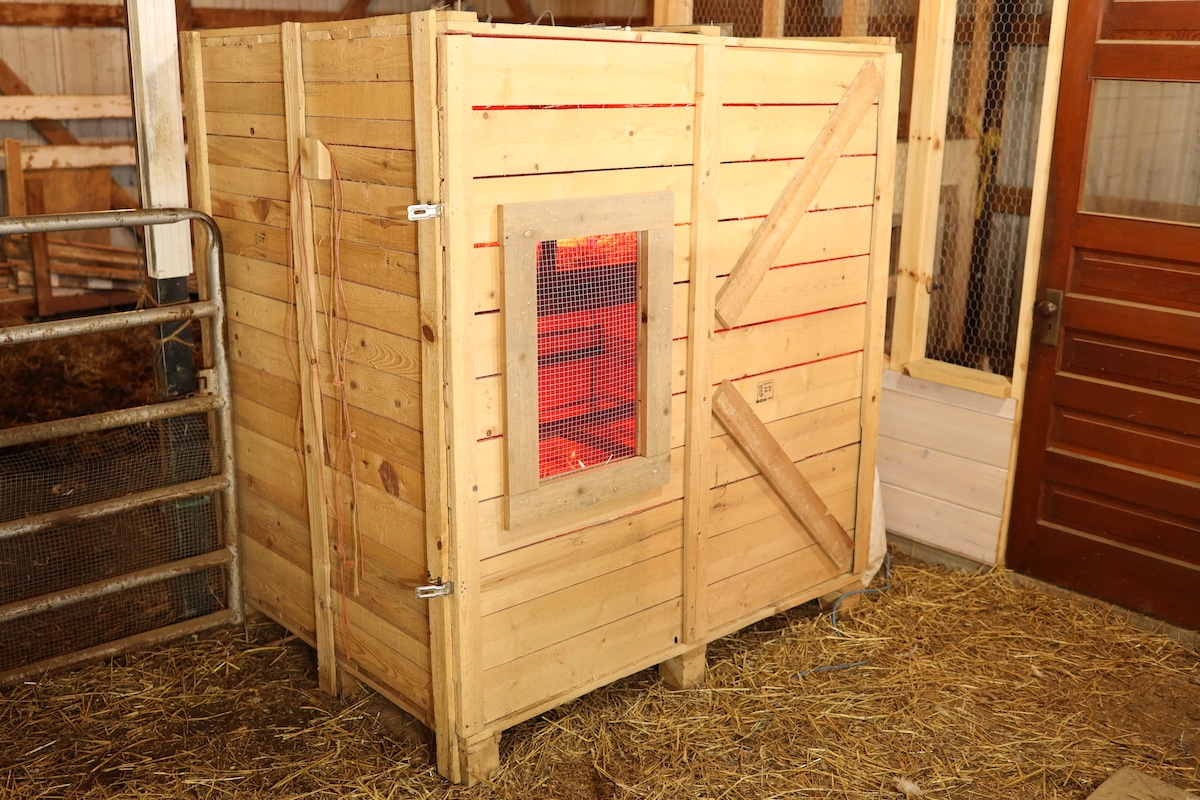
You can check out more about that brooder in our post—Simple Outdoor Chicken Brooder Ideas.
While that crate brooder has worked great, it also took a couple days to build. With our batch of layer chicks coming any day, we didn’t have that sort of time!
That’s when we turned to repurposing a stock tank for a brooder.
What is a Stock Tank?
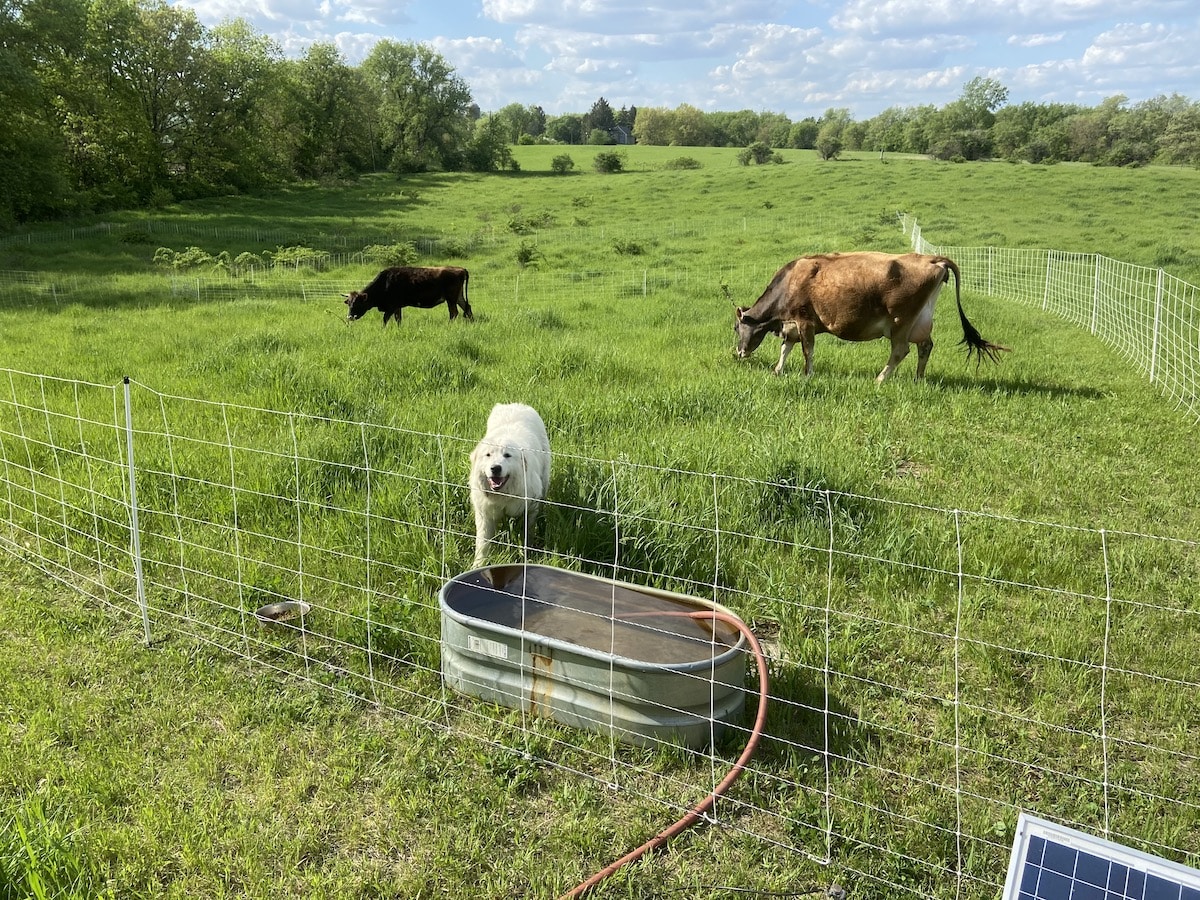
A stock tank, or galvanized water trough, is a large metal tank commonly used on farms and homesteads for livestock to drink from.
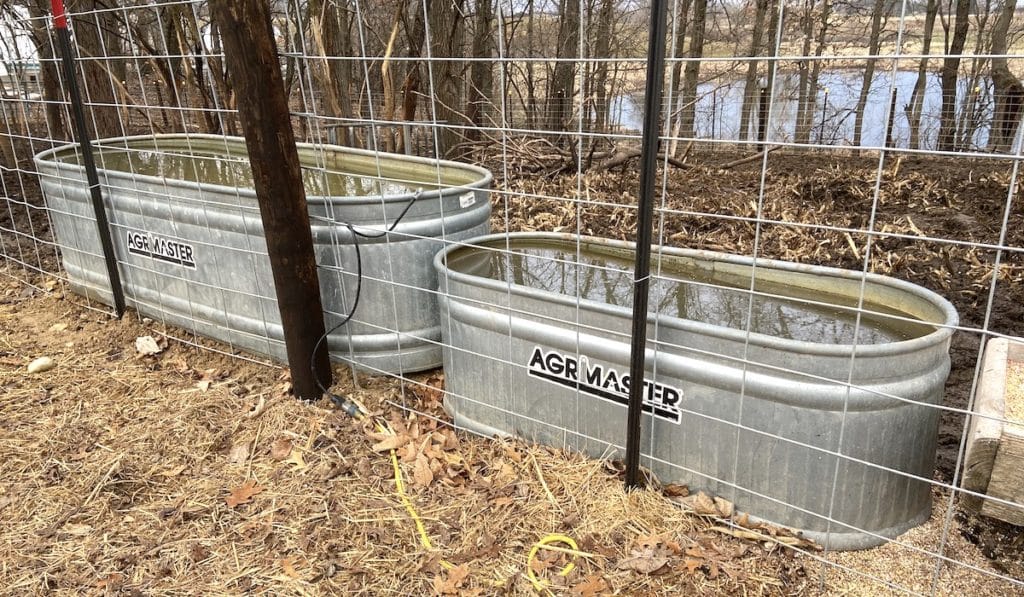
You can find them in all shapes and sizes. They’ll typically range from 40 gallons to 300+ gallons. Some have higher sides (or walls) for larger animals. Some have lower sides for smaller animals.
Metal stock tanks are most common. But other plastic or poly tanks are also available.
Why Use a Stock Tank for a Chick Brooder?
Whether new or old, stock tanks are great for repurposing!
Galvanized water troughs have a shelf life. They can only be used to hold water so long before the inside rusts out enough that it will either spring a leak or no longer be safe for animals to drink from.
You’ll often see stock thanks in this condition turned into raised beds or planters in a garden.
Another use can be to house small animals in them—in our case, baby chicks!
Here’s why stock tanks make great brooders:
Spacious
Depending on the size of stock tank you’re working with, most of them have a large enough footprint to house many chicks.
Predator Proof
The heavy duty metal construction of stock tanks will make the sides and bottom impenetrable to predators. All you need is a secure cover, which we’ll show you how to build below.
Easy Access
Pop the cover off and stock tanks are easy to reach down into to give your chicks the daily attention they need.

Keep Chicks In
Some brooders have low sides that older chicks can easily flutter out of. Don’t walk away with the cover off! Most stock tanks are deep keeping your chicks right where they should be.
Portable
With a stock tank, there’s no need to build a permanent brooder setup. You can move it around as your needs or setup changes. It can even fit within an existing chicken coop or run if space allows.
Multipurpose
Baby chicks are typically only in the brooder for 3-6 weeks. Once they’re out, give the tank a good cleaning and you can use it for other animals, storage, or any other use you can think up.
Low Cost
Yes, a shipping crate or plastic storage tote will cost less. But, for somewhere in the ballpark of $100-$200 you can go to your local farm store and pick up a brand new stock tank that will last you a lifetime and serve other purposes as mentioned above.
Used Options
Can’t afford a new one? No worries! Used stock tank options are abundant. This is our preferred route. I’ll share more of my tips and tricks of how to find them used below.
How To Build Your Own Chick Brooder Box from a Galvanized Water Trough
For our brooder we used a spare 100 gallon stock tank that measures approximately 2’ x 4’. It’s mainly a backup if our Jug Waterer ever froze or stopped working during the winter time.
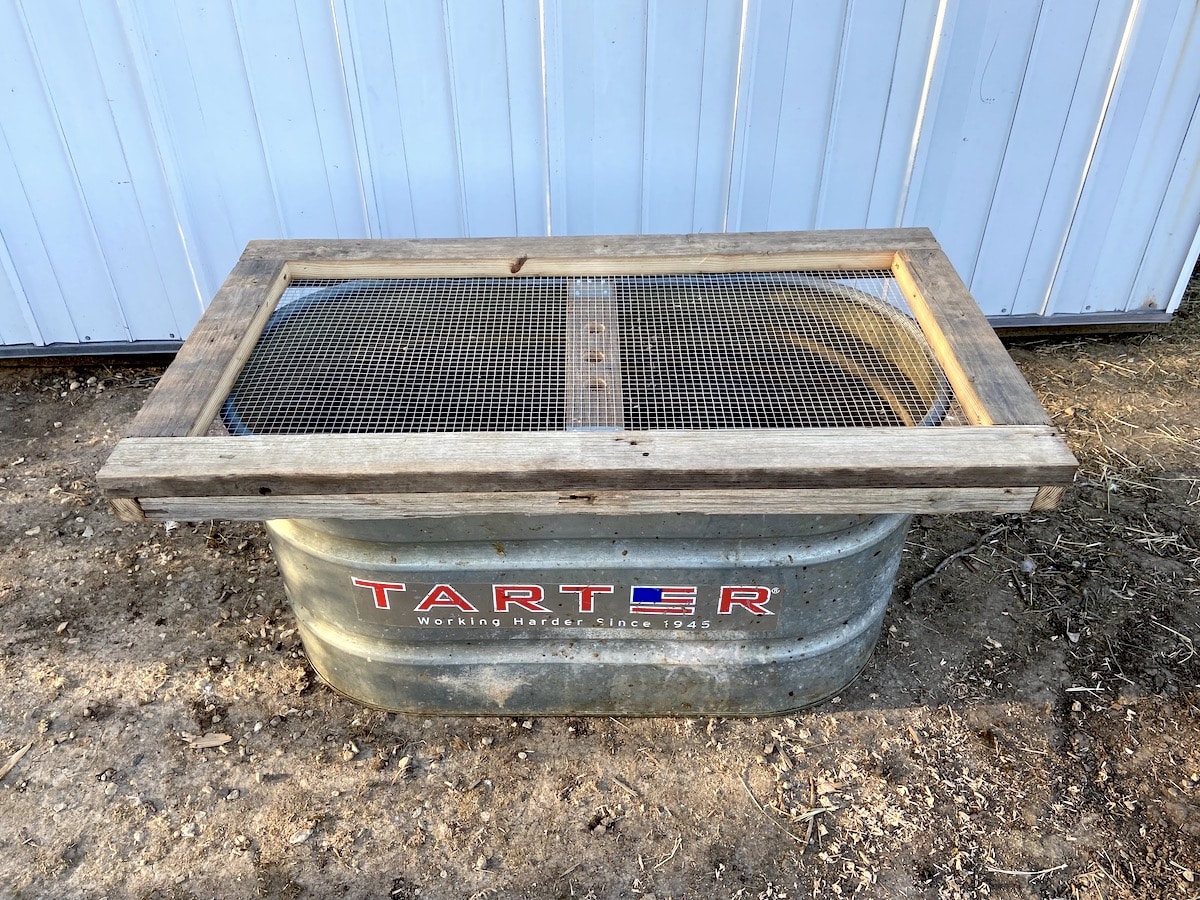
To turn it into a brooder, I built 2 simple things:
1. A top cover that was both predator proof and easy to take on and off.
2. A moveable bar that sits below that top cover allowing a heat lamp to hang from.
I wracked my brain for a while trying to think of a way to not have to feed the heat lamp cable through the top cover, or hang it off of the top cover. That would make taking the top cover on and off a real hassle. Plus you’d be removing the heat from your chicks every time.
I am really happy with how the heat lamp bar functions within the brooder. Your heat lamp stays put every time you pull the cover off. And you can slide the bar to position the heat lamp anywhere you prefer within the brooder.
Before we talk about building, let’s look at what you’ll need.
Materials List:
Since the dimensions of stock tanks vary widely based on capacity and manufacturers, I can’t give exact quantities of what you’ll need. But here’s a general list you can go off of.
2×4’s
2×2’s
Hardware cloth*
3” construction screws
Staples
Sheet metal**
Sheet metal screws
* 2’ wide hardware cloth with 1/2” spacing worked perfectly for mine. You can use chicken wire but keep in mind larger predators like raccoons may be able to tear through it.
** At each end of the heat lamp bar, you’ll need to fabricate a simple angled metal piece that allows your bar to hang from the top rim of the stock tank. I used a roll of metal flashing that I had, but any sheet metal or metal strap will work that can support the weight of a heat lamp and be bent to the proper shape.
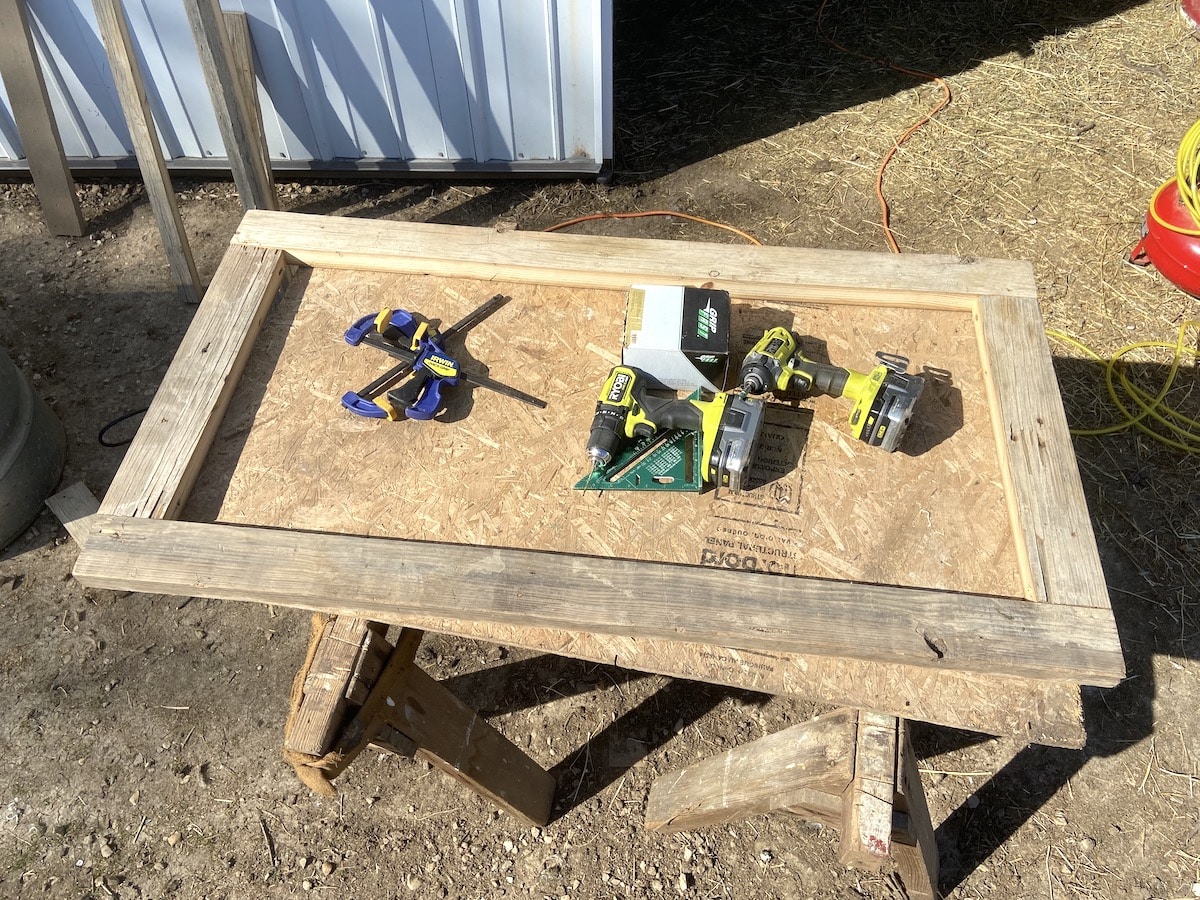
Tools:
This project is very beginner friendly and uses tools many will already have on hand.
Circular saw
Drill
Small drill bit (for pilot holes)
Large drill bit
Stapler*
Wire cutters
Tin snips
Tape measurer
Speed square
Pencil
Safety Glasses
Quick clamps (optional)
* Any manual stapler should work for securing the hardware cloth to your top cover. I had a pneumatic brad nailer that shoots 1” staples, so that’s what I used. The longer your staples, the more secure your hardware cloth will be.
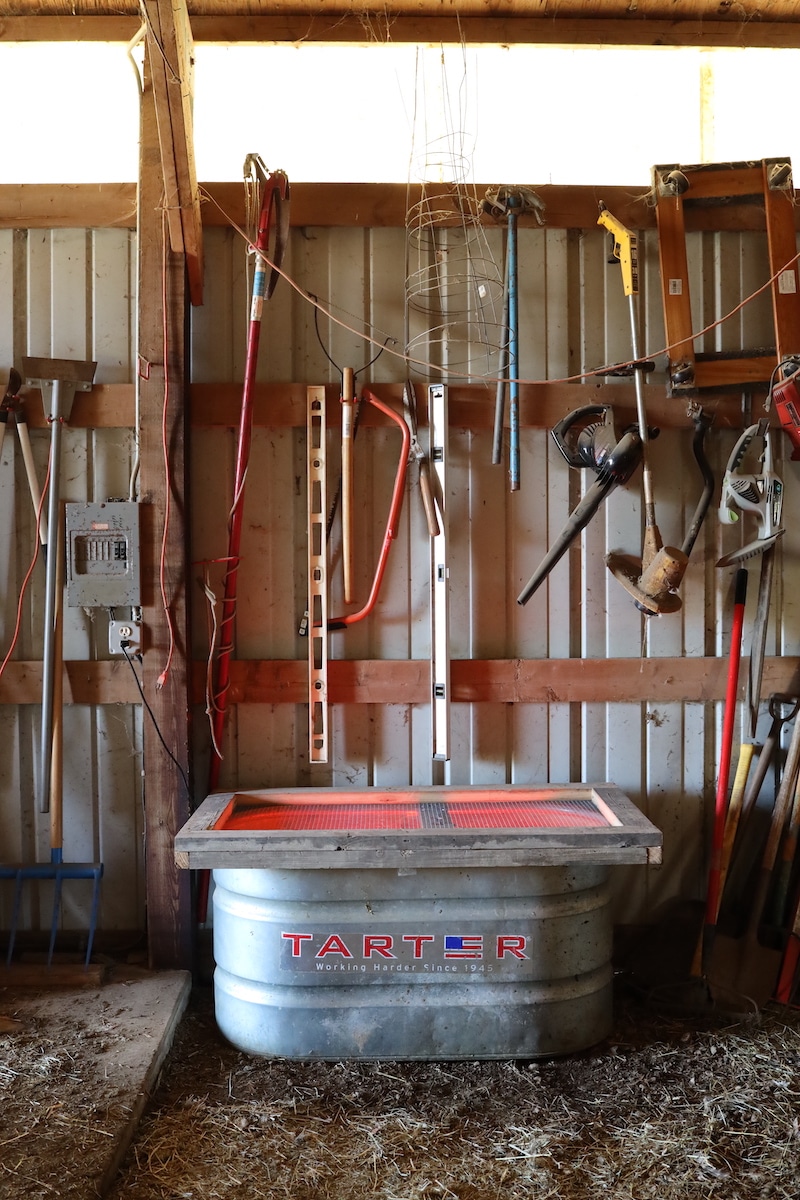
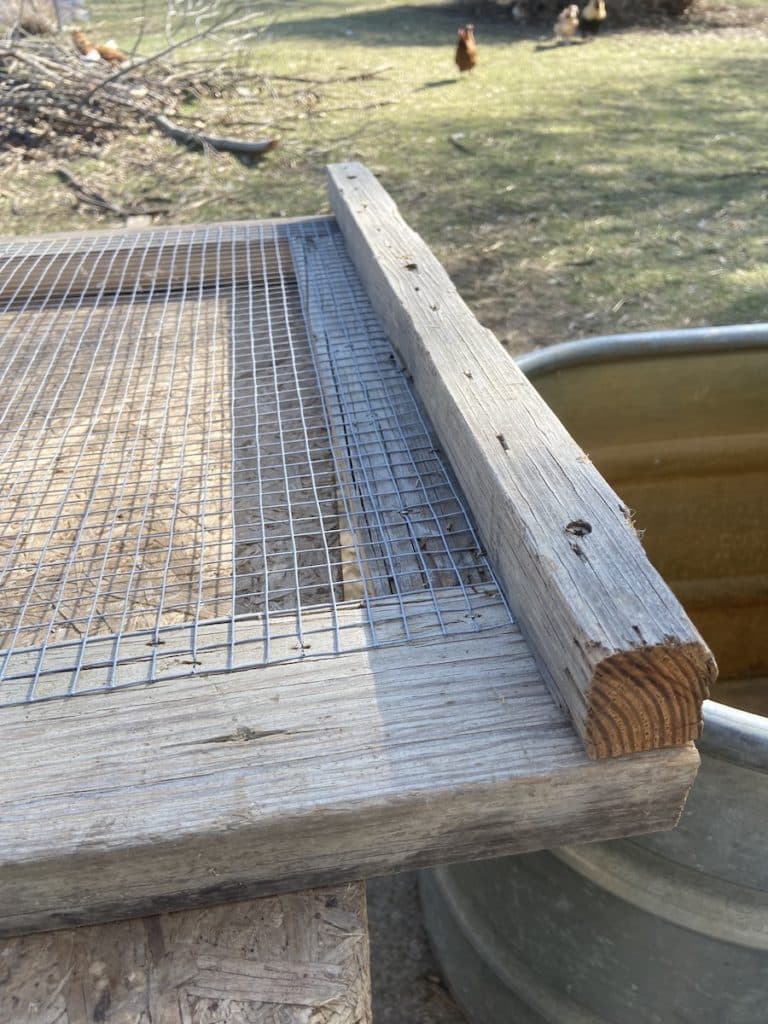
How To Build A Top Cover
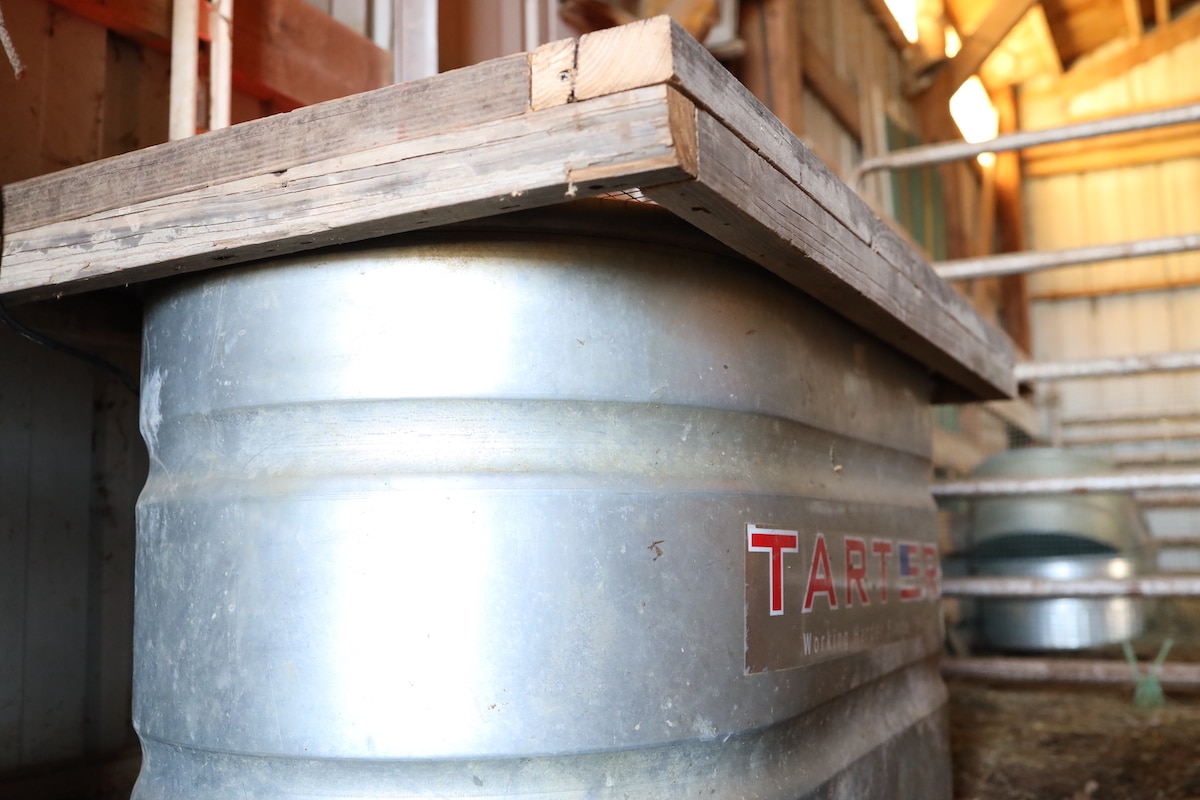
A top cover is necessary to protect the open top side of your brooder box. I chose to build an “L” shaped top cover that fits similar to the top of shoe box. This way, the cover stays in place and won’t slide off.
You’ll start with horizontal 2×4’s that sit along the top rim of your stock tank. Under, fasten 2×2’s along the the outside of the 2×4’s forming an “L” shape.
Step 1 – Measure your top cover
Every stock tank is a different size. I can’t give you the dimensions you’ll need for your top cover.
However, if you measure your cover to be approximately 4” wider than the outside rim dimensions of your stock tank, this should give you the right fit without being too tight.
Step 2 – Cut and assemble 2×4’s
Once you have your dimensions, cut your 2×4’s to size. Screw those pieces together. I used (2) 3” construction screws at each corner.
I drilled small pilot holes before fastening in screws so that the wood didn’t split. If you have clamps, clamping the 2×4’s together first will also make the process go much smoother.
Step 3 – Staple hardware cloth
While the cover is still flat, this is the easiest stage to install your hardware cloth.
Start by stapling hardware cloth on one end making sure it is aligned properly on the cover. Continue stapling hardware cloth toward the opposite end pulling it tight as you go.

Once you’re at the other end, cut your hardware cloth to the desired length and staple it in.
Note that the hardware cloth would ideally lap 1″ or more onto the wood. I installed a staple approximately every 6” to make sure it was secure.
Step 4 – Install 2×2’s
All that’s left for your cover now is the outside rim. You’ll want to measure and cut your 2×2’s to the proper length.

Clamp the 2×2 pieces to align with the outside edge of the cover, forming an L shape. Drill pilot holes and fasten together with a few screws along each side.
And that’s your top cover!
How To Build A Heat Lamp Bar
Heat lamps are commonly used as a heat source in a chick brooder box. This bar will allow you to:
- Not have to mess with your heat lamp every time you open or close your brooder.
- Easily position your heat lamp wherever you need it.
Heat lamps, when not installed or maintained correctly, can be very dangerous! Make sure you read up on heat lamp safety to reduce the risk of starting a fire.
If you’re not using a heat lamp then you can obviously skip building the heat lamp bar.
Step 1 – Measure and cut your bar
This time, measure the inside width or your stock tank from rim to rim. Subtract 1/2” from that measurement, and cut your 2×4 bar to length.
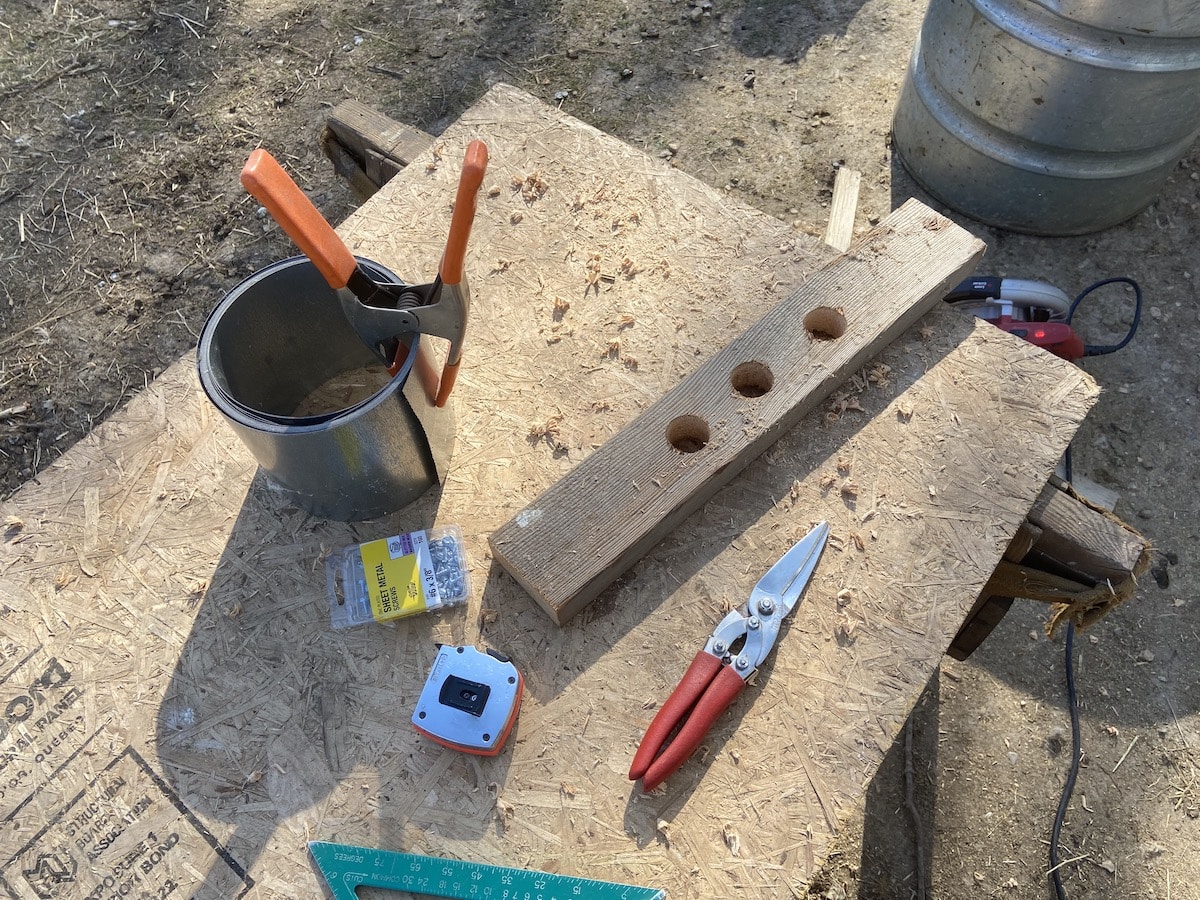
Step 2 – Drill holes
You’ll need to drill or notch holes in the heat lamp bar big enough for the plug of your heat lamp to fit through.
I used a 1-1/2” spade bit which worked great. You can also just use the largest drill bit you have and drill many holes in a circle so you can punch out a larger hole.
I did one hole in the center of the bar. Then I also drilled holes about 6” from that center hole that gave more options for positioning the lamp.
Step 3 – Make and install metal hangers
The trickiest part of this whole project is fabricating some sort of metal bracket that allows the bar to hang level with the top rim of your stock tank.
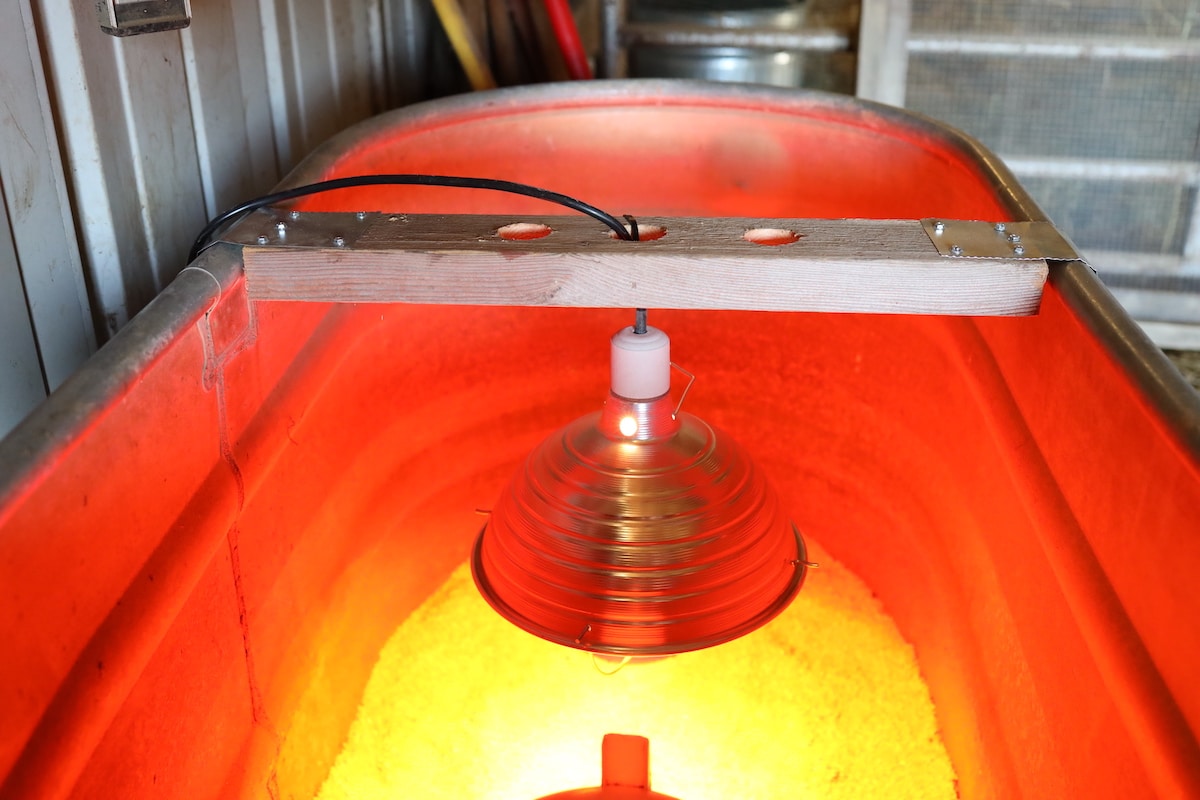
I just cut my metal about the width of the 2×4 bar. Use tin snips for cutting if you have them. If not, you can avoid cutting by picking up some basic metal straps from the hardware store. Then bend the metal so it forms an L shaped bracket to hang from the tank.
Align your metal brackets on each side of the bar so they’ll hang off the top rim of the stock stank. Fasten securely with sheet metal screws.
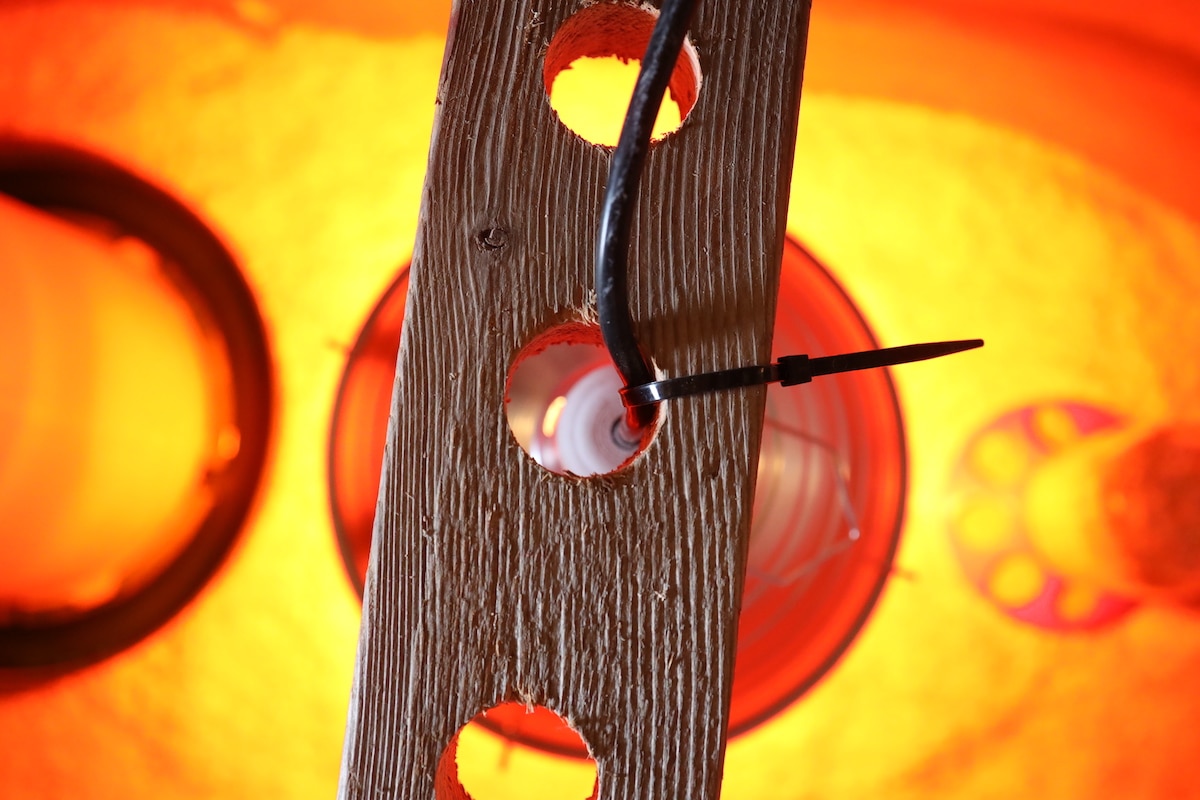
Step 4 – Install your heat lamp
At this point, your brooder is ready to assemble!
The last step is feeding your heat lamp cable through the desired hole in your heat lamp bar. I used a zip tie to secure the cord of the heat lamp in place on the bar. Then drape the heat lamp cable over the top of the stock tank and plug in.
From there put your bedding, food, and water in the brooder, place the cover on top, and you’re all set!
Do I need to secure the top cover?
This depends on your setup. But I’d recommend either weighing or strapping down your top cover. Larger predators may be able to pry the cover off and get to your chicks.
One option is to place heavy blocks or stones on the top cover to help keep it in place.
Another option, and probably the most secure, would be to wrap the stock tank and cover with a ratcheting tie down strap to secure the cover.

Tips for Finding a Used Stock Tank
We found our stock tank used for less than half the price we would have paid for a new one. Here’s some tips for how to find a used stock tank.
Search Second Hand Sites
Facebook Marketplace and Craigslist are my go-to sites for anything we need around the homestead. Lots of stock tanks/water trough options pop up. Keep an eye out and you’ll be able to find the right size at the right price.
Check Urban Areas
This is my favorite tip! Don’t just search in rural areas for stock tanks. They’re super popular in more urban areas at parties and events to be used as a cooler or ice box for drinks. I’ve seen stock tanks listed in urban areas on Marketplace that look brand new at really reduced costs.

Barn Sales
Barn sales are common in rural areas. This might be the perfect place to track down an aged stock tank that still has life left in it.
Ask A Farmer
It’s not all that uncommon for stock tanks to just be hanging around farms not getting any use. Maybe you drive past a farm regularly that has some sitting there. Check with that farmer and see if you might be able to take one off their hands for the right price.
How Much Brooder Space Per Chick Do I Need?
Most of the sources I’ve found say around 6 square inches per chick. This might work for the first week. But they grow fast and 6 square inches is not very big.
Our shipping crate brooder is 4’ x 5’. Last year we had 60+ chicks in there. It was too tight! They were our Freedom Ranger meat chickens and we actually noticed that the average butcher weight of the birds was noticeably lower than the previous year—likely because they were overly cramped in the brooder and didn’t develop as fully.

Keeping 40-50 chicks in that brooder feels much more appropriately sized. From our experience, somewhere in the ballpark of 60-70 square inches of space per chick is necessary. Or roughly 2 chicks per square foot.
Keep in mind that is a minimum and the more space you can offer them the better. This is especially true for raising meat chickens where they can grow twice as fast as layers.
Learn more about raising backyard chickens:
- How To Care For Baby Chicks
- Simple Outdoor Chicken Brooder Ideas
- Predator Proof Chicken Coop Essentials You Need To Know
- Custom A-Frame Chicken Tractor For (Almost) Free
- Chicken Roost Designs | Two Simple DIY Ladder Perch Ideas
Pin it for later!