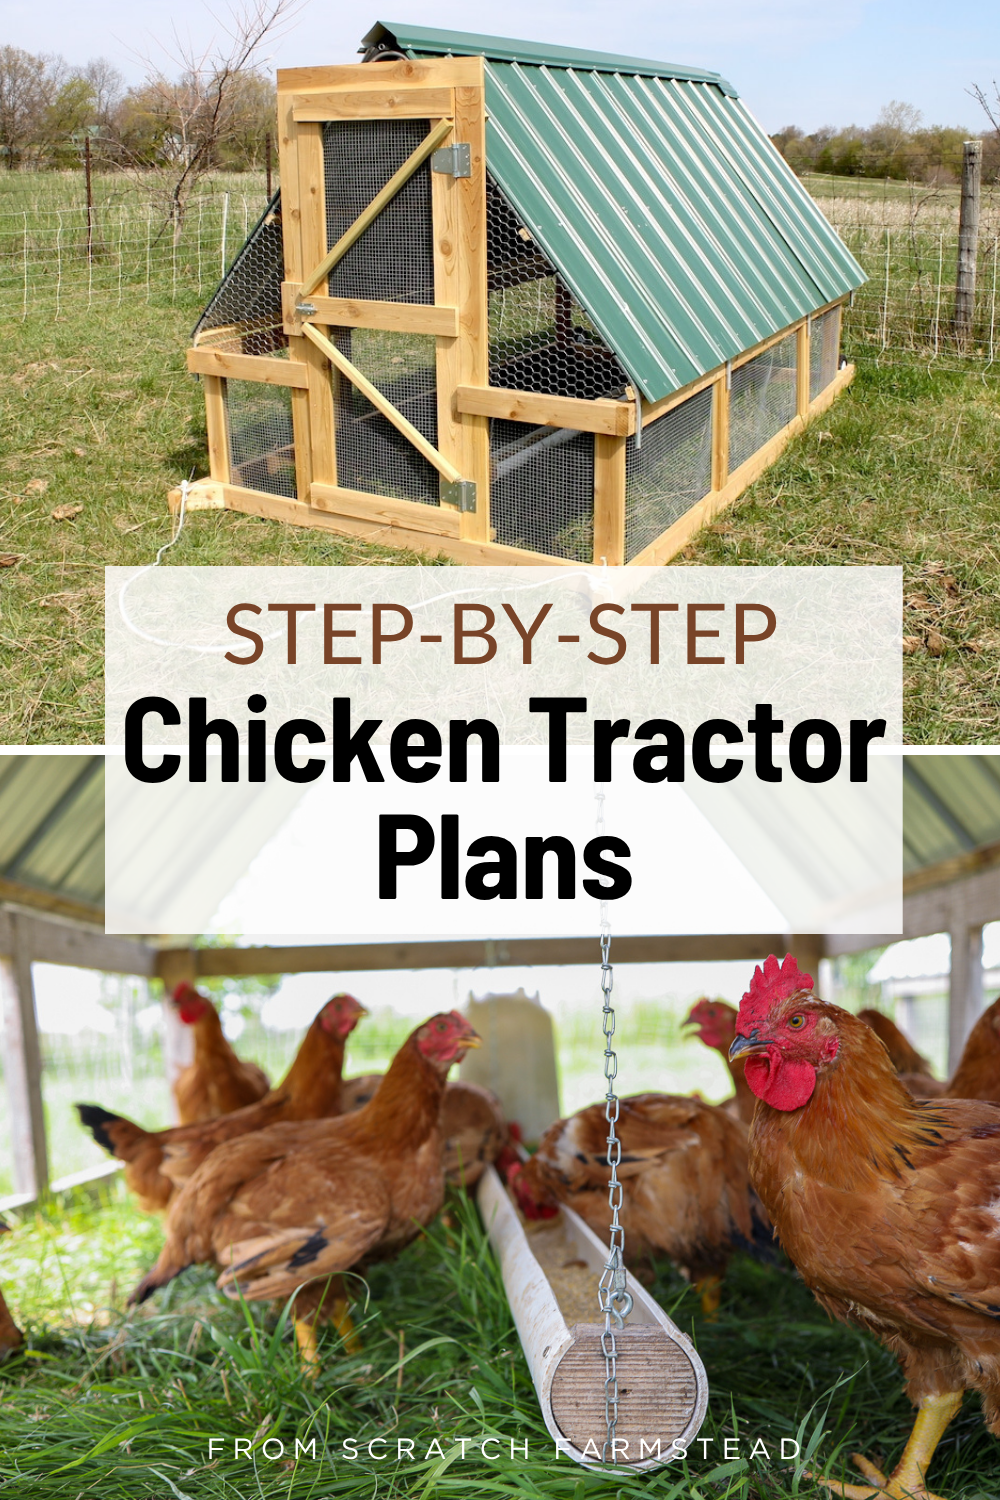
Chicken Tractor Plans for 25 Chickens
Whether you’ve already built a whole fleet of Suscovich chicken tractors, or are building your first one, this step-by-step tutorial will show you how to add a metal roof to these beloved chicken tractor plans.
Why A Metal Roof?
I love the Suscovich chicken tractor plans but, in my mind, it has one flaw – the ROOF!
The plans call for a tarp to cover the top of the tractor and act as a roof. There are two things I don’t like here: 1) tarps wear out quickly and I really didn’t like the idea of buying a new tarp each year, and 2) it leaves a weak link for predators. If a predator really wanted to get into your tractor, they could easily find a way to chew through or get under the tarp for easy access to your chickens.
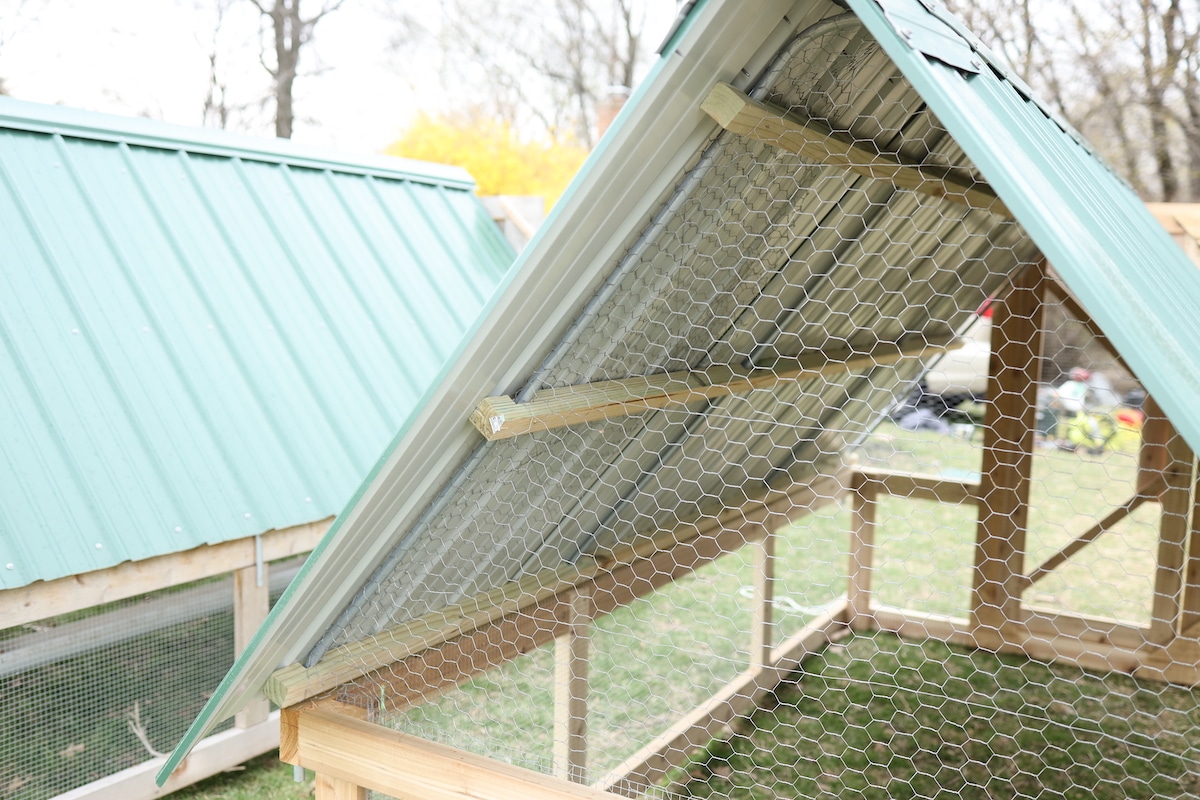
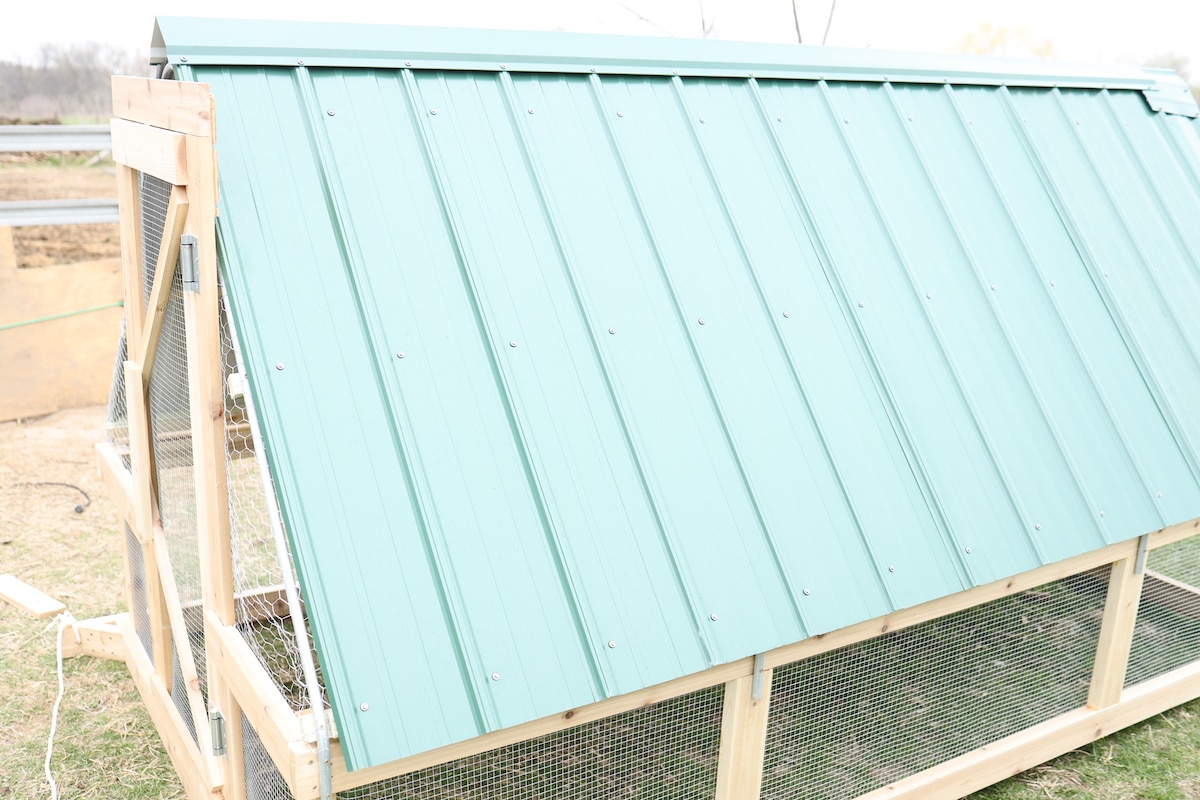
A metal roof is the perfect solution to fully enclose your Suscovich chicken tractor, make it entirely maintenance-free, and it will look really sweet. The metal roof will likely outlast the chicken tractor itself.
Why Build a Suscovich Chicken Tractor?
I owe a great deal of gratitude to John Suscovich in my own farming journey. John is a farmer on the east coast and started Farm Marketing Solutions. He specializes in raising meat chickens on pasture at a small scale. His podcast was one of the first entry points I had into small scale farming.
When we wanted to raise meat chickens on our homestead, I knew I needed to pick up a copy of John’s book, Stress Free Chicken Tractor Plans. In it, John walks you through his simple, yet ingenious, plans of how to build a chicken tractor for raising meat chickens on pasture.
Now, I love building things and coming up with my own designs. But spring is always a very busy time. The to-do list is a mile long. Just being able to follow a step-by-step guide and knowing you’ll have a really solid finished product in the end has been just the ticket.

The plans do leave a little room for interpretation in some areas. But they are well done and I totally recommend buying the plans if you want to raise meat chickens on your farm or homestead.
In the rest of this guide, I’ll share the details of how I added a metal roof onto my Suscovich chicken tractor and how you can too, along with some other build tips when following John’s plans.
How to Add a Metal Roof – Step-By-Step Guide
Materials
To start you’ll need to pick up the materials for your metal roof. Here’s a materials list:
(4) 10’ long sheets of metal roofing (36” wide)
(1) 10’ long metal corner and gable trim*
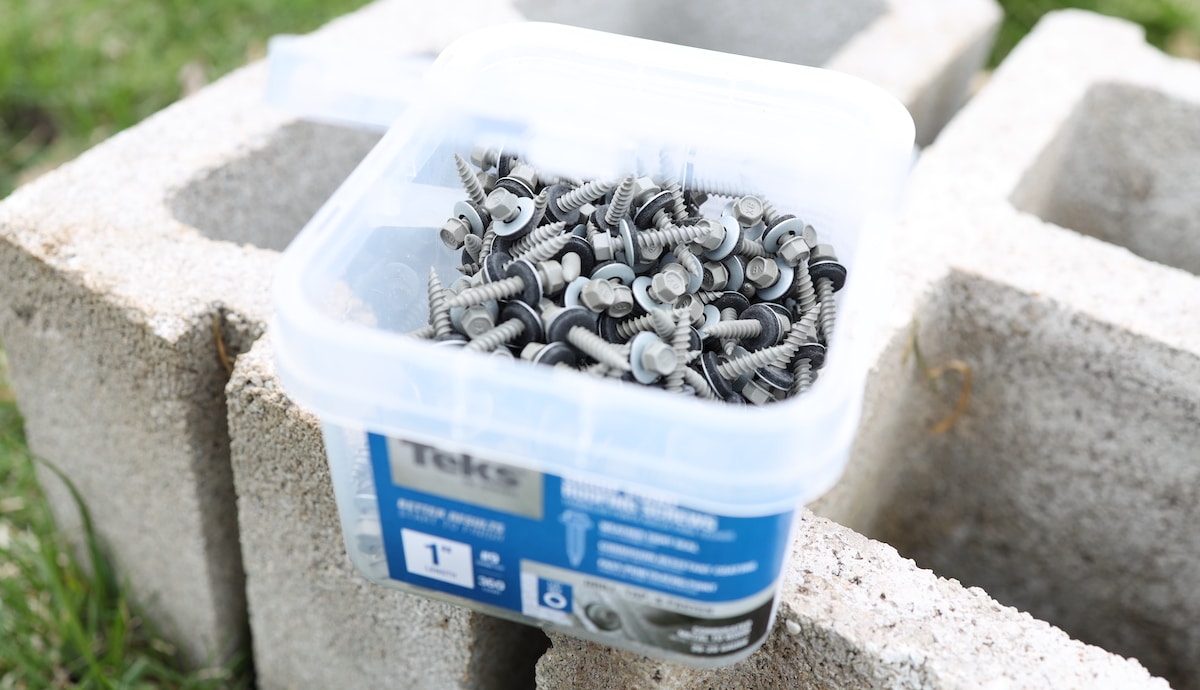
(1) box of metal roofing screws with rubber washers
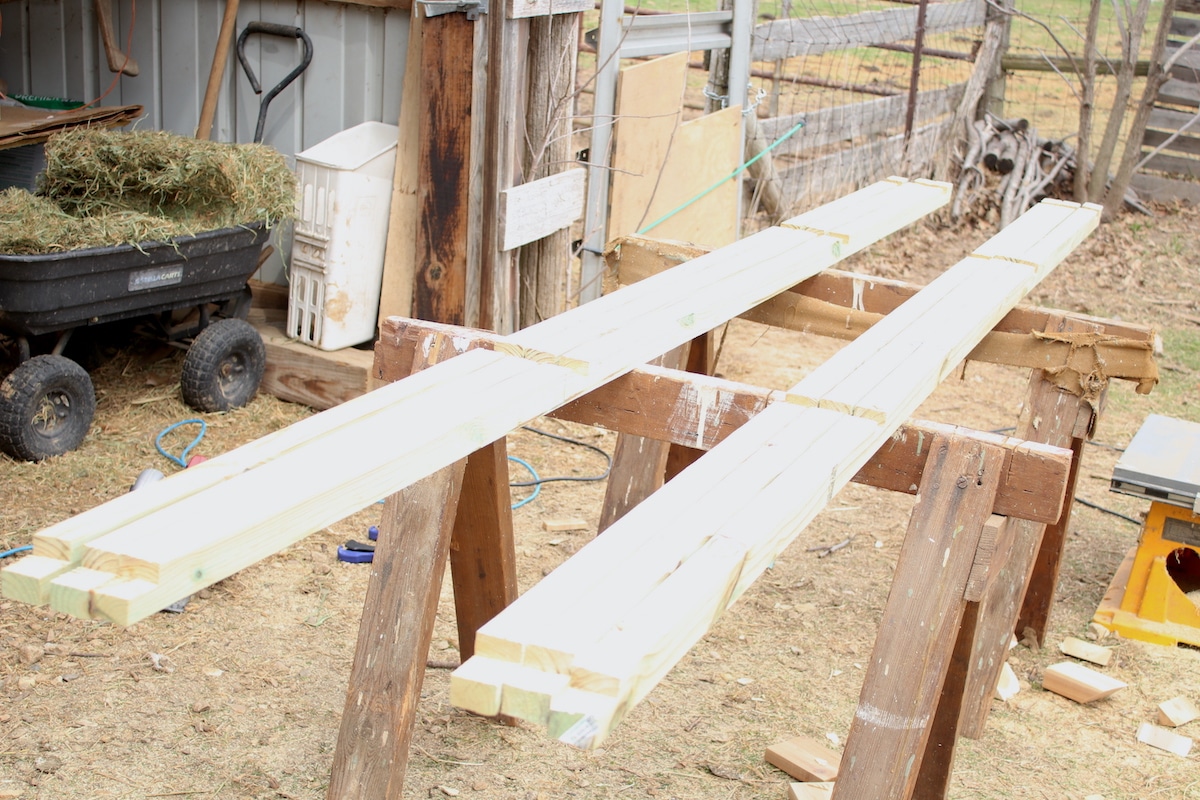
(3) 10’ 2×4’s for exterior use (either treated or cedar lumber)**
*I opted for the corner trim piece instead of a ridge cap. Both will work, but the corner trim piece is about half the price and, in my opinion, looks a bit more size appropriate on the tractor.
** The 2×4’s will need to be ripped in half to essentially make 2×2’s or furring strips. You can buy furring strips instead to avoid needing to cut them in half, but furring strips are notorious for being twisted and you may not even be able to find them in a 10’ length. In my case, it was easier to buy straight 2×4’s and rip them in half with a table saw.
Step 1 – Cut Your Horizontal Runners or Purlins
You’ll start by cutting all three of your 10’ 2×4’s in half so they are approximately 2×2’s. I did this with a table saw. If you don’t have a table saw, you can also do it with a circular saw. It will just take some extra time with the circular saw. Note that these pieces of wood will be covered up under the roof, so the cuts don’t need to be perfect.
You should now have (6) 10’ 2×2’s.
Step 2 – Notch your Horizontal Runners
The next part of this step is to take one of the 2×2’s and clamp it running perpendicular to the metal pipes that make up your chicken tractor roof. Do this near the base. The 2×2 will be nearly even with the front side of the tractor (door side) and will overhang the metal piping at the back side of the tractor by a few inches. With a pencil, mark where each metal pipe rests. I made my marks about 2” wide so there is some horizontal play when installing the 2×2’s.
Grab another 2×2 and repeat that same step on the other side of the tractor, so you have marked out where the pipes fall on the 2×2.
With your marked 2×2’s (one for the right side and one for the left) line them up with an additional (2) 2×2’s, so that there are (3) 2×2’s for each side. With a speed square, trace the lines you made onto each set of 2×2’s. Each 2×2 will now have four small sections marked out that represent where the metal pipes fall on each side of the tractor.
Measure how wide your pipe is. Mine was ¾” thick. Set the blade of your circular saw to that depth.
Using the half-lap joint method from the Stress Free Chicken Tractor Plans book, cut out notches between the roughly 2” marks you made. These notches will be wide enough for your metal roof pipes to fit into. After you have cut away what you can with the circular saw, a hammer and chisel may be needed to remove any remaining wood chunks. The notched sections do not need to be perfect.
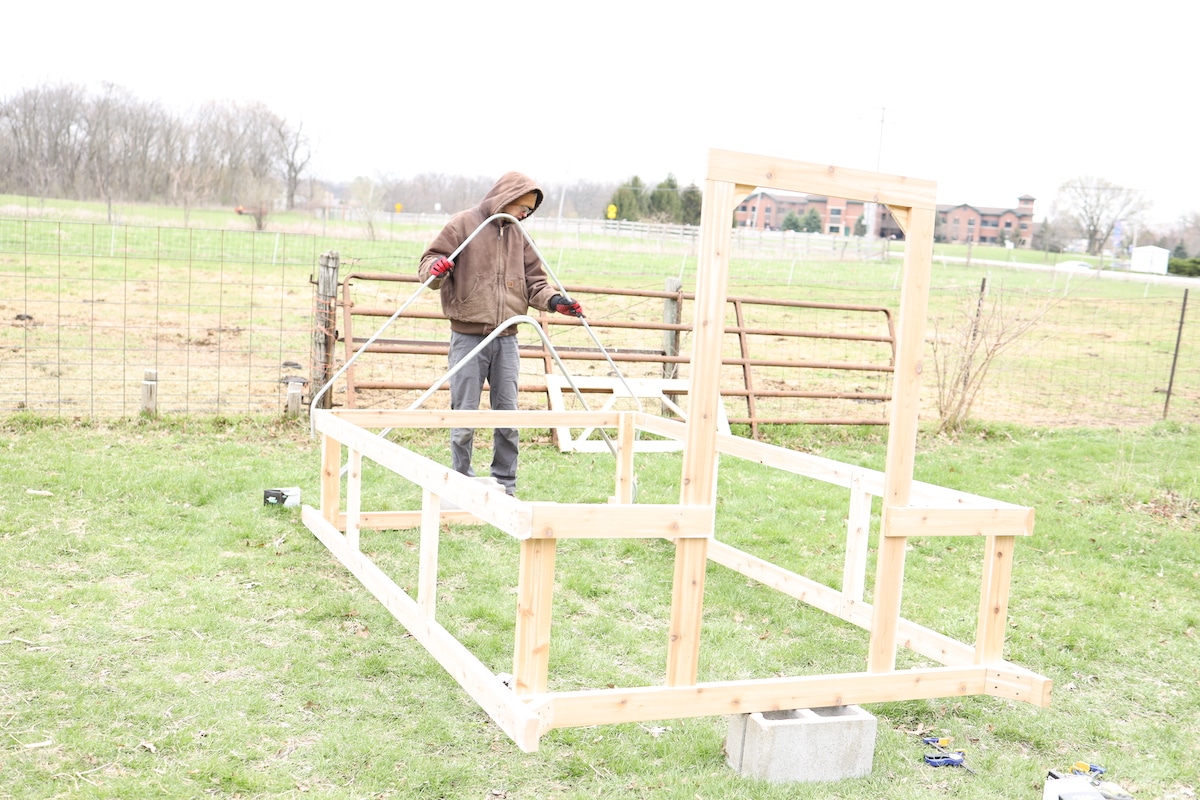
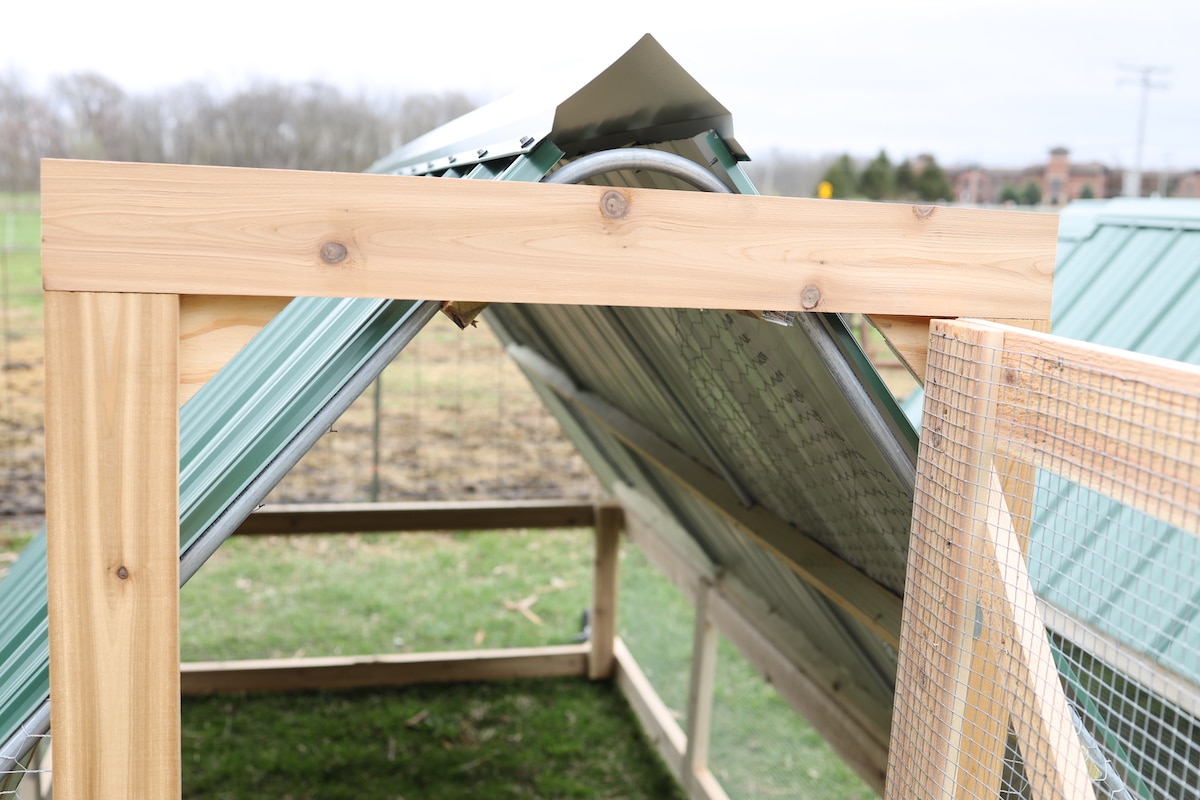
Step 3 – Install Your Horizontal Runners
Pick a side to start and take one of your 2×2’s and clamp it at the top of your metal roof piping on your tractor. Location does not need to exact, but it should sit roughly 5” down from the top 90 deg. bend of the pipe. Note that the notches you made in the 2×2 will be facing up toward the sky so that the metal pipe actually sits on top of the 2×2.
Once level, drill holes through the metal pipe in line with where the 2×2 is located. Do this for all four pipes. Then screw through the top of the pipe into the wood so they are secured together. I used a 2” screw, which was about the right size. You can also use the 2-1/2” screws from the chicken tractor project and just take a pair of pilers and break off the tip of the screw that comes through the wood.
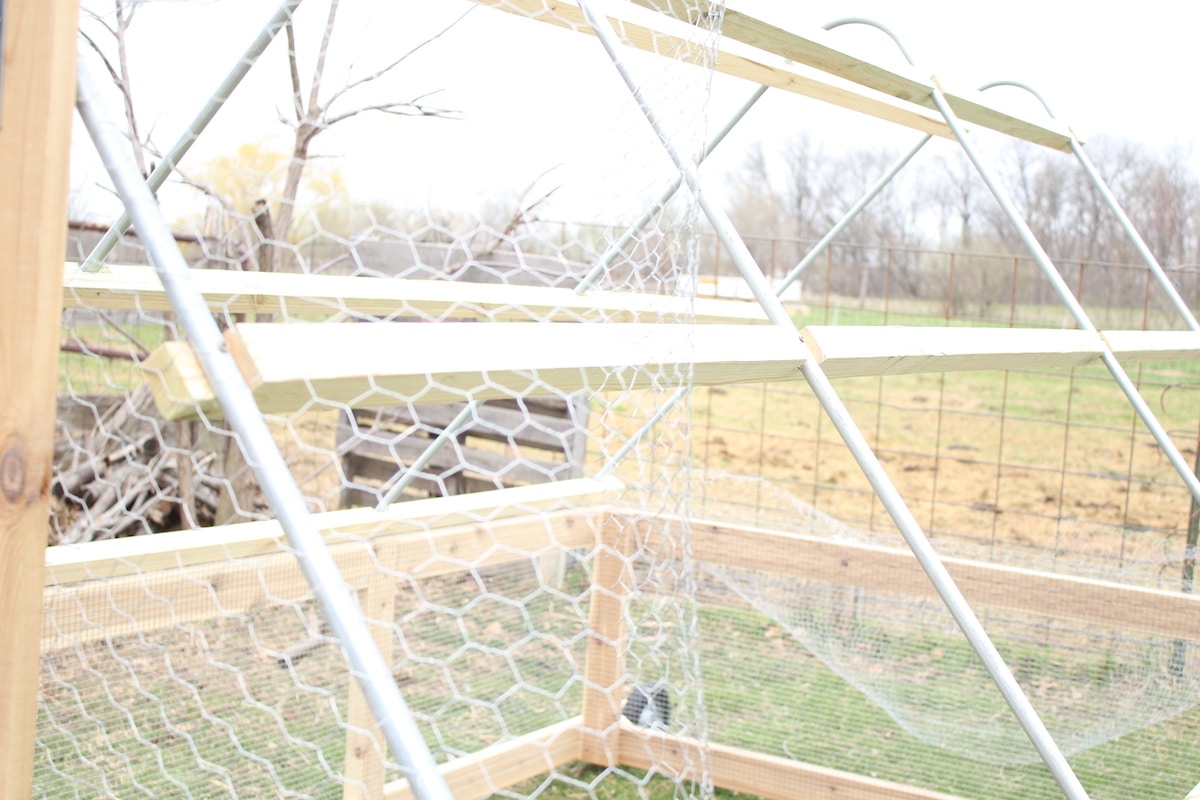
You’ll then repeat that step to add a bottom and middle 2×2. Again, locations don’t need to be exact. I placed the bottom one pretty low to minimize the gap between the bottom 2×2 and the top rail of the chicken tractor frame. The center 2×2 then fell approximately 24” between the top and bottom 2×2.
Repeat installing top, bottom, and middle 2×2’s for the other side.
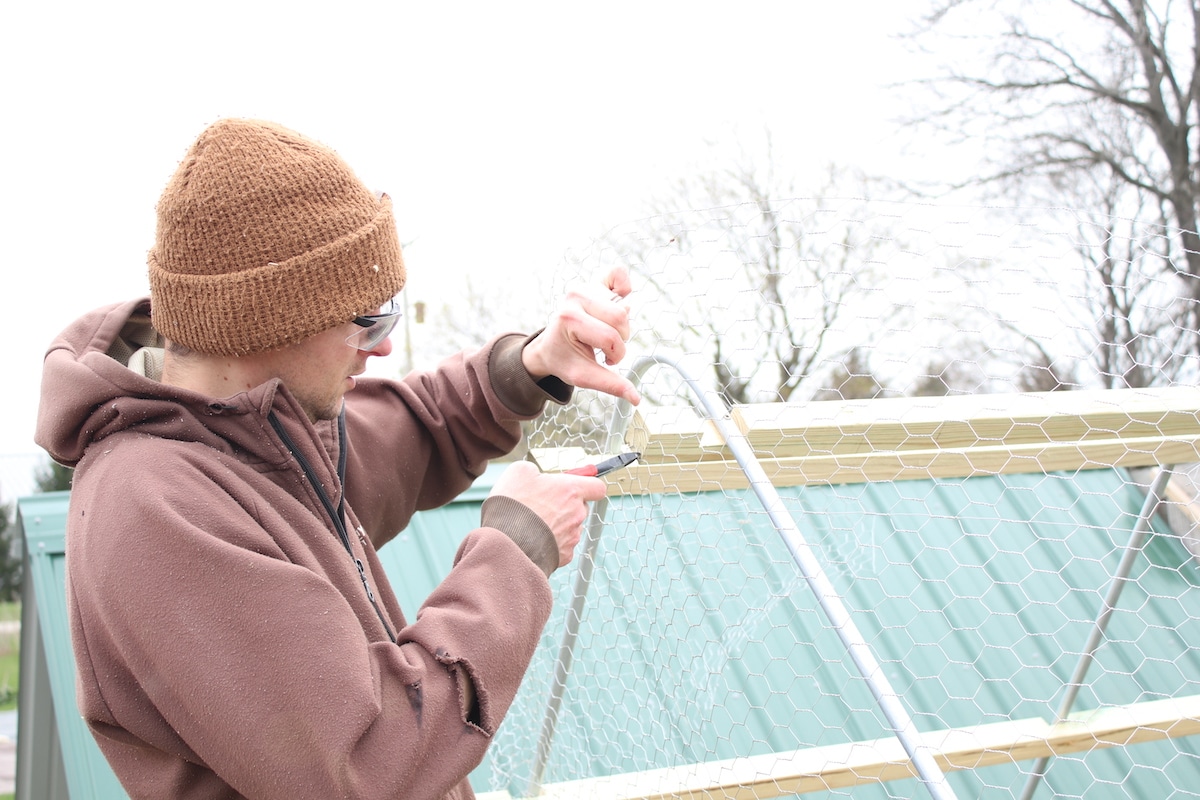
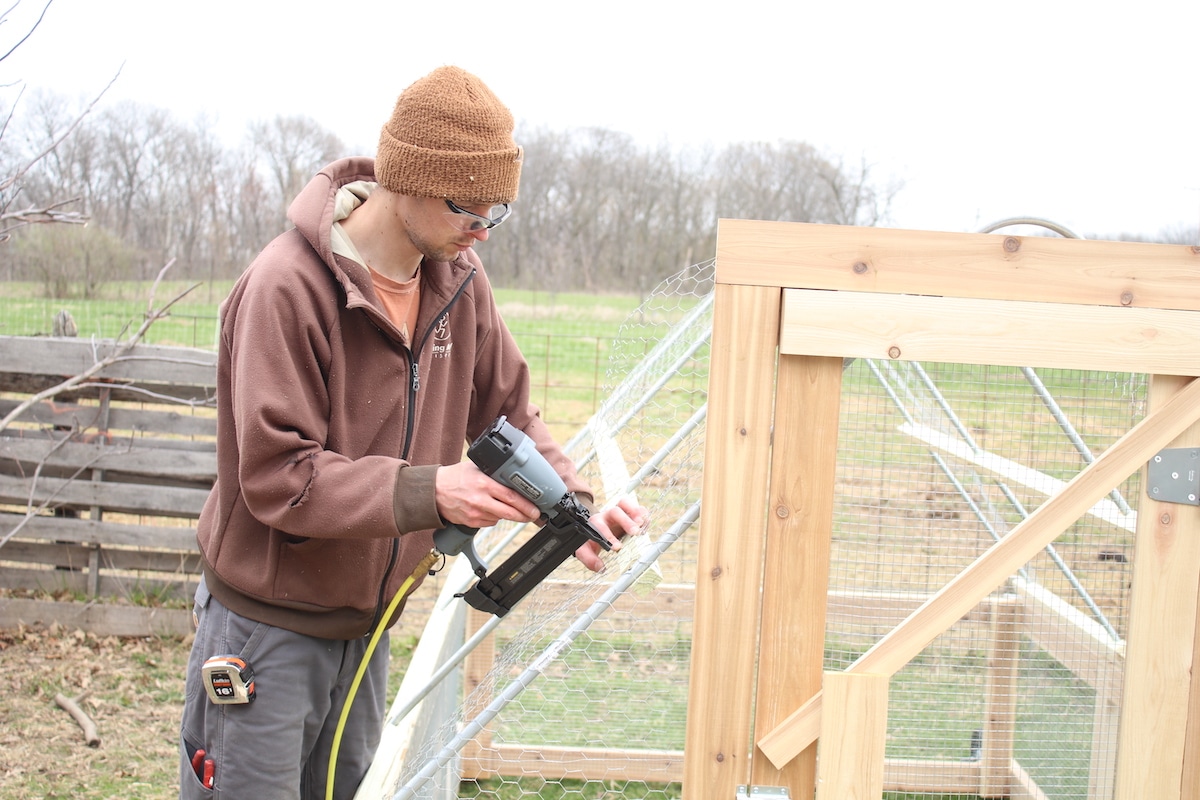
Note that you may need to do some minor trimming of your chicken wire to accommodate the 2×2’s. The front side should be fine since the 2×2’s sit pretty well flush with the front metal pipe. Since the 2×2’s overhang a bit in the back, this is where you’ll likely need to poke them through the chicken wire. I actually left my chicken wire hang loose until the 2×2’s were installed. Then I stapled them to the 2×2’s which eliminated the need for zip ties and makes it very secure.
Step 4 – Cut Metal Roofing
You will cut (7) roof panels to be 4’-6” long. Before cutting, I recommend you double check that measurement based on your tractor. Depending on how you bent and installed the conduit, your panels may need to be slightly longer or shorter. Note that you will have one half sheet of roofing leftover you can use for another project. There will also be a roughly 1’ wide piece from the center of each sheet that will be scrap.
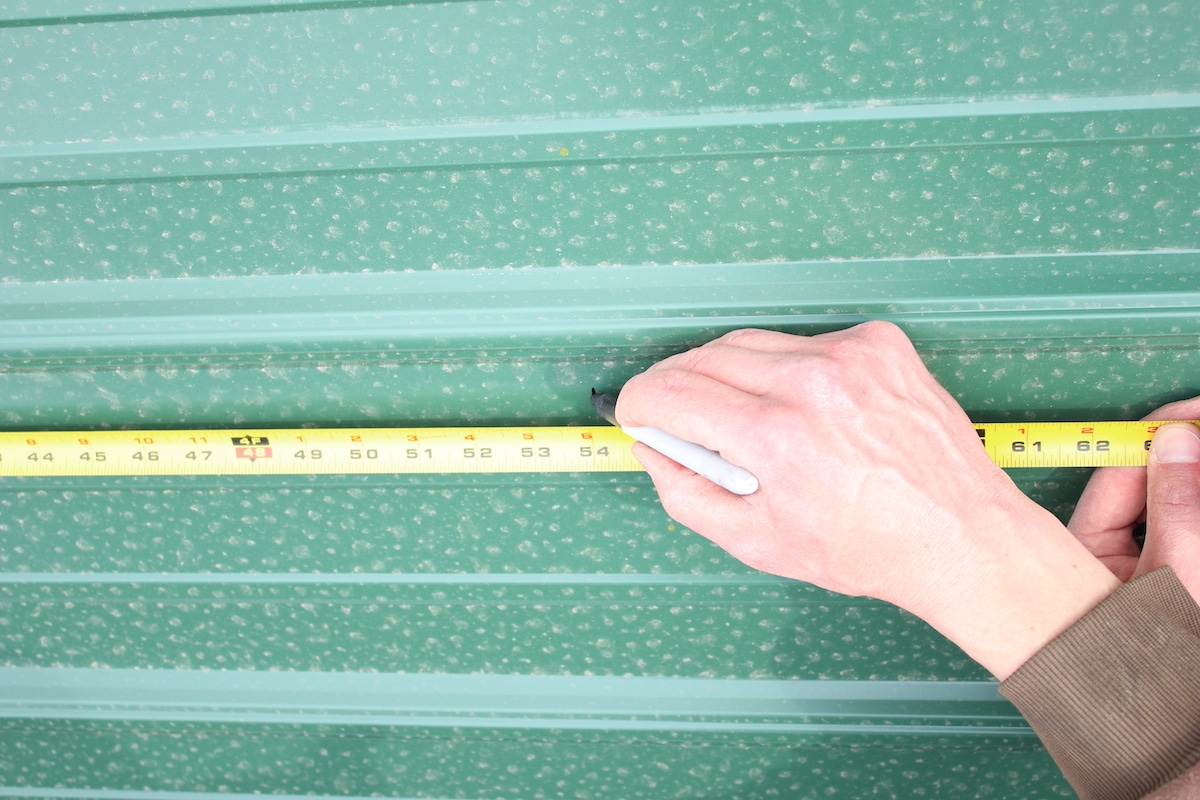
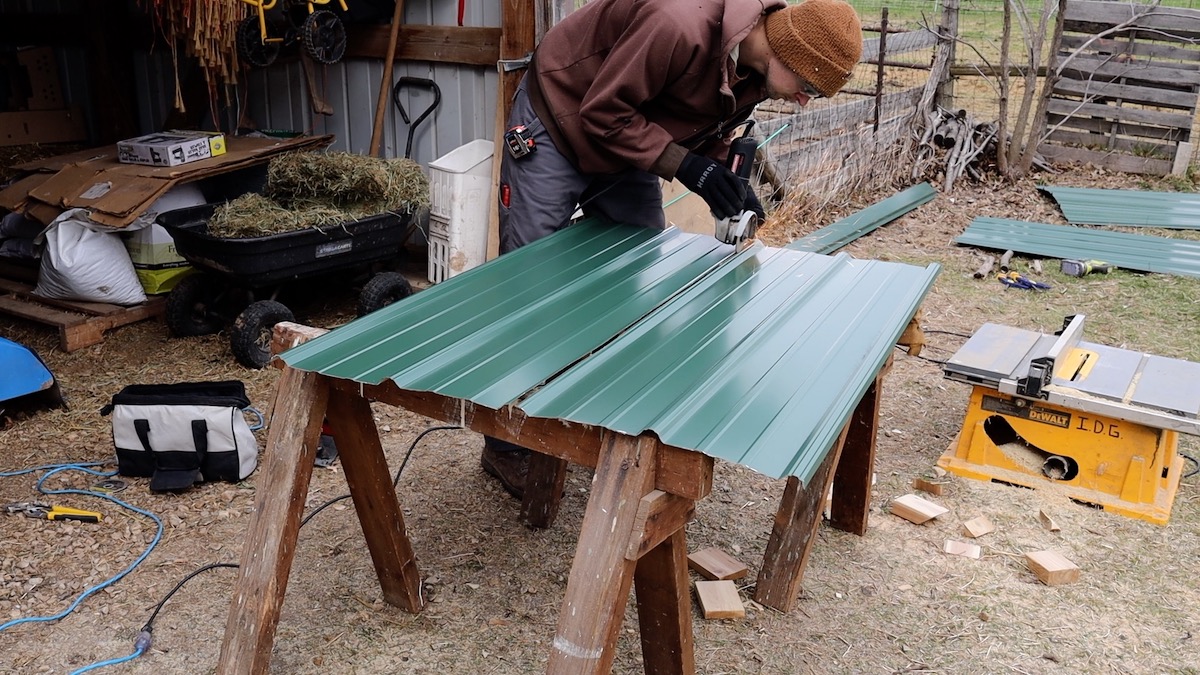
I cut the roofing by making a couple marks measuring from the ends of the sheet in and then tracing a straight line on my marks. Using a Sharpie or marker is best. I then cut along those lines using a metal cutting wheel on an angle grinder. If you don’t have an angle grinder, you will need a good pair of tin snips and good bit of time and patience.
Once your (7) 4’-6” sheets are cut, take one sheet and cut it in half along the center rib. This will be your starting piece of roofing on each side.
Step 5 – Install Metal Roofing
The next thing to do is start adding your metal roof panels on top of your 2×2’s. Start with the half sheet on each side. Make sure the end you cut is facing upward and the rib you cut is facing toward the back of the tractor so it will be covered by the next sheet.
You’ll want to pay close attention to two things here:
(1) Make sure your first roof panel is installed level. This will assure the following roof panels stay at the same height across the whole tractor. You will have very little room for adjustment after the first piece is set. So it’s worth taking the time to make sure you’re starting with a properly aligned panel.
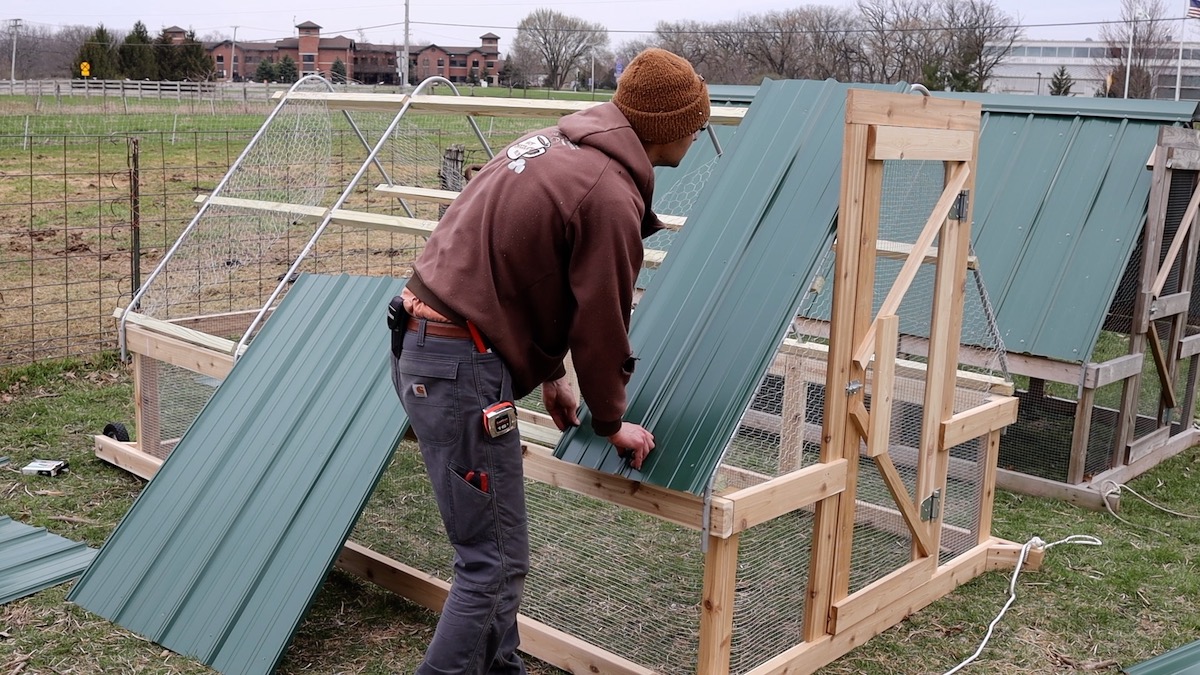
(2) Make sure the roof panel is installed high enough so the corner trim piece will fit on top easily. The roofing pieces will need to sit higher than you may think. And they will only overhang an inch or so at the bottom. Again, it’s worth getting out your corner trim piece at this point. Make sure it fits fine on top of these first two pieces before proceeding.
Screw in your metal roofing panels once you are satisfied with the angles. Use a metal roof screw just next to each rib and at each 2×2. Each full panel should have 12 screws holding it to the 2×2’s.
Once the first metal roof piece is fully fastened, place another metal roof sheet next to it so that the first rib of your next sheet overlaps the last rib of your previous sheet. Fasten the remaining (3) sheets on each side.
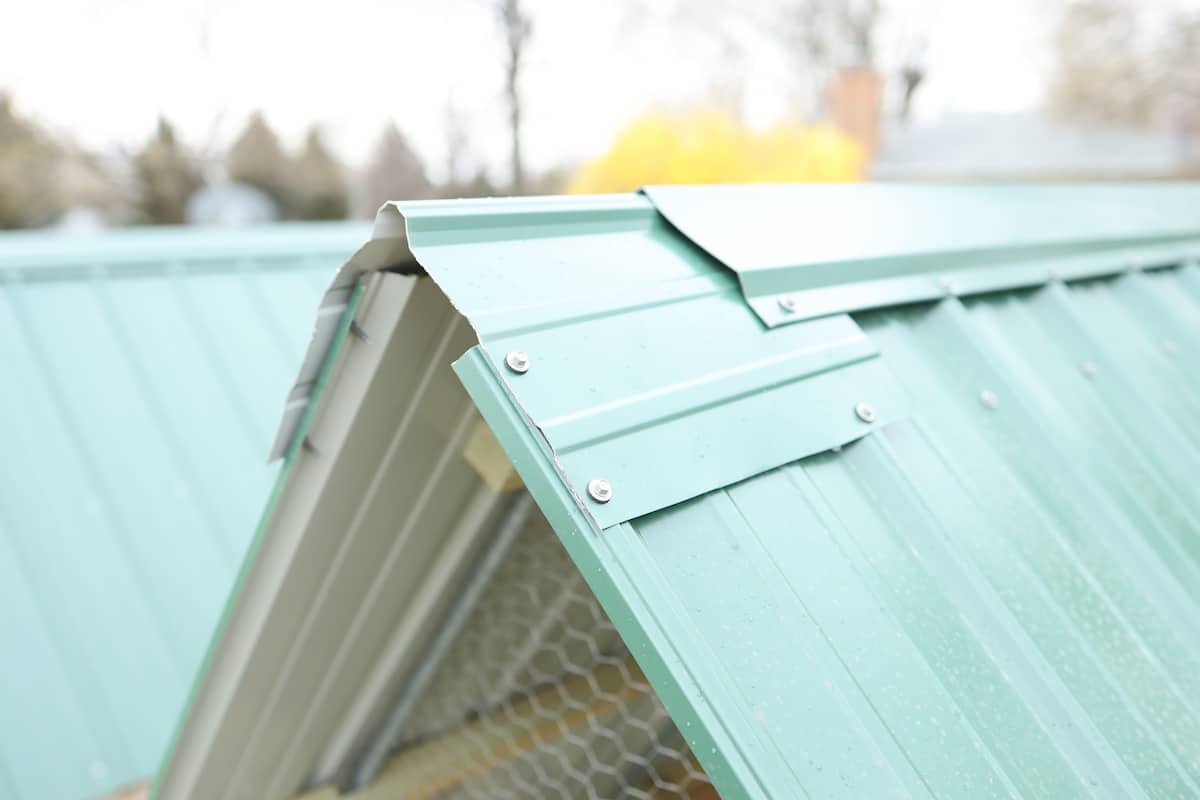
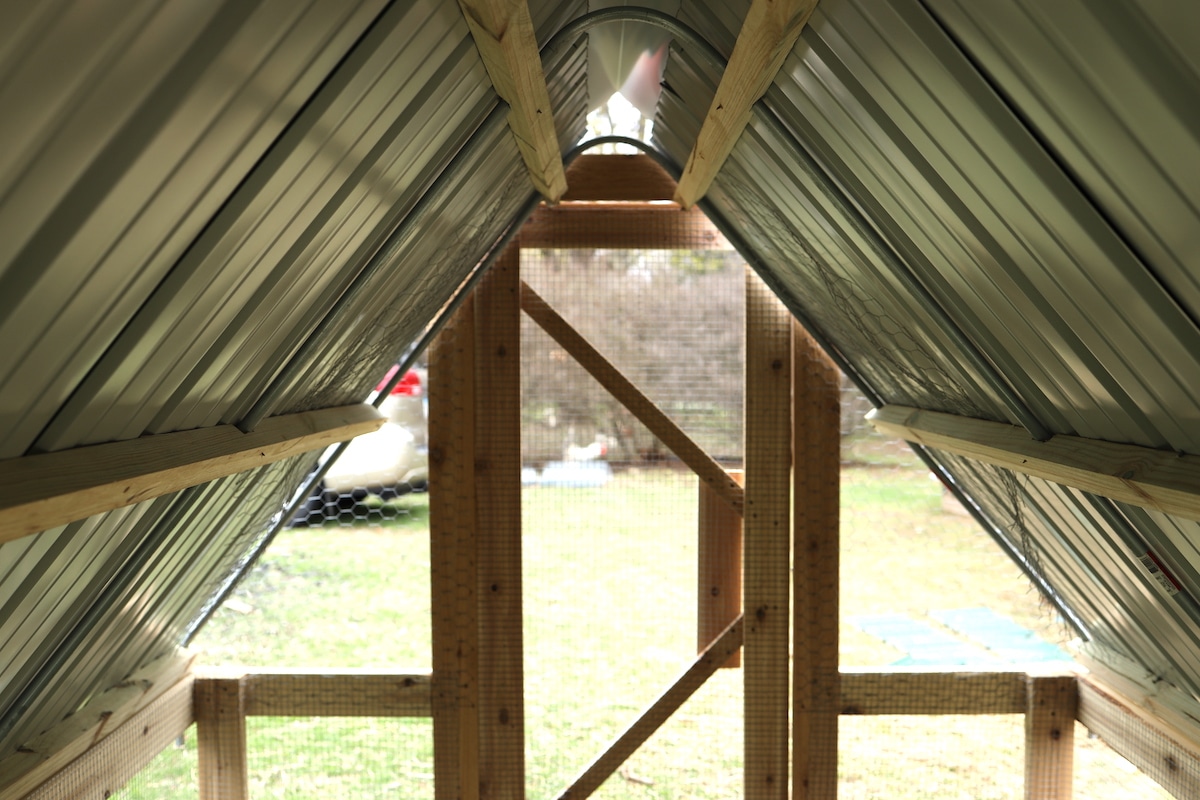
Step 6 – Install the Ridge Cap
Place the 10’ corner trim piece on top of the chicken tractor. The cap can overhang in the front an inch or two. Fasten the bottom lip of the angled trim piece with one screw at each rib of the metal roofing below.
You’ll notice the top cap does not extend the full length of the roof. Take a section of the 1’ wide cut off pieces from before and make a small roof cap for the back side. I chose one of the inner ribs and then cut just along the adjoining rib on either side. Then bend the piece at the center rib so it is somewhat close to 90 deg. Slide this piece on the back side between the roof cap and metal roof sheets. Fasten this piece with 4 screws on each side.
Step 7 – Celebrate!
In true John Suscovich fashion, you should totally step back and admire your new sweet metal roof on your chicken tractor. And celebrate, because you just accomplished something amazing!
Metal Roof FAQ’s
How much does it cost to add a metal roof?
My total materials cost was between $200 – $250. It is not a cheap project, but then you also don’t have the ongoing tarp replacement cost.
How much time does it take to add a metal roof?
It took me a half day or afternoon to add the metal roof.
Can I add a metal roof to an existing Suscovich chicken tractor?
Yes! This metal roof design can work with any existing Suscovich chicken tractor build. You may just need some slight modification where the 2×2’s meet the chicken wire as is covered in the tutorial.
If building a brand new chicken tractor, is there anything I should consider that differs from the design in the book?
(1) You can save a little bit of money and omit the last 10’ metal pipe piece that runs horizontally along the top of the tractor. (2) You can wait to secure the top part of your chicken wire until the horizontal 2×2 runners are installed. This allows you to staple the chicken wire to the 2×2’s and avoid needing to secure them with zip ties.
(3) The last thing I’ll mention is that it might be helpful to be consistent with the direction in which you install the bent metal pipes to accommodate the roofing. I’ve noticed the center 90-degree bend in particular can be slightly irregular one side to the other. This shouldn’t impact the metal roof installation, but if you can bend them to be pretty close to identical and keep all bends facing the same direction, it will go smoothly for you.
What other benefits do you get from a metal roof?
Your chicken tractor will likely be outside 24-7, 365 days a year. Having a roof will also keep the elements off the tractor itself and should extend its life.
Will this design really hold up?
Yes. The fact that the roofing sheets and 2×2’s literally clamp to the metal piping make for a really solid installation. If fact, it should add to the overall structural soundness of the chicken tractor. After a full season and winter, mine looks just a good as the day I built it.
Other Tips for Building Your Suscovich Chicken Tractor
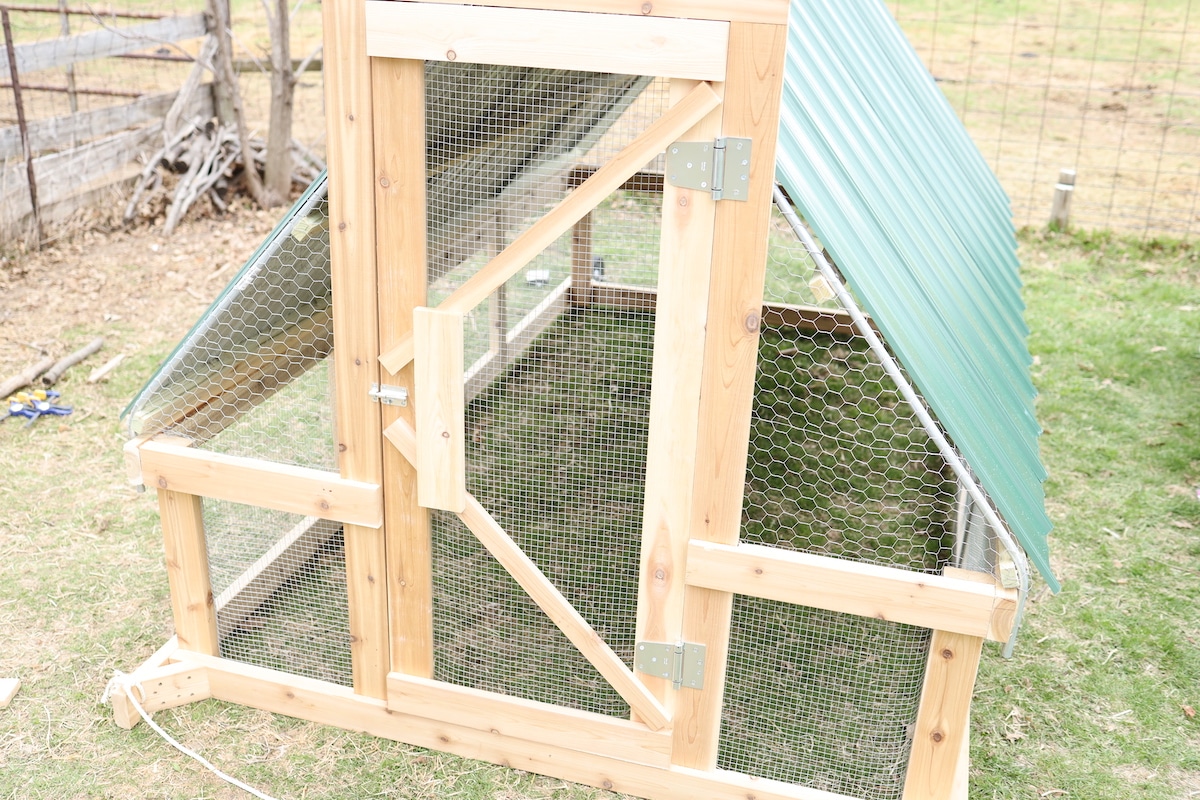
1. Slight door modifications – I would take an extra ¼” off the door length vertically. Wood can swell and the last thing you want is a door not closing properly when it’s loaded up with 25 or so birds you’ve invested in. I also like to use some of the scrap wood from the project to add extra diagonal pieces to the door. Doors sag over time and you want to make sure it stays nice and plumb to fit in the opening. A scrap cut off piece of 1×4” also makes a nice little door handle.
2. Consider using cedar – I have build both of mine out of cedar and been very happy with them. This will definitely add cost, but cedar is so much easier to work with and is lighter! This makes a huge difference when moving your tractors multiple times a day. Plus, then you don’t have to worry about the chemicals from the treated wood seeping out into your soil.
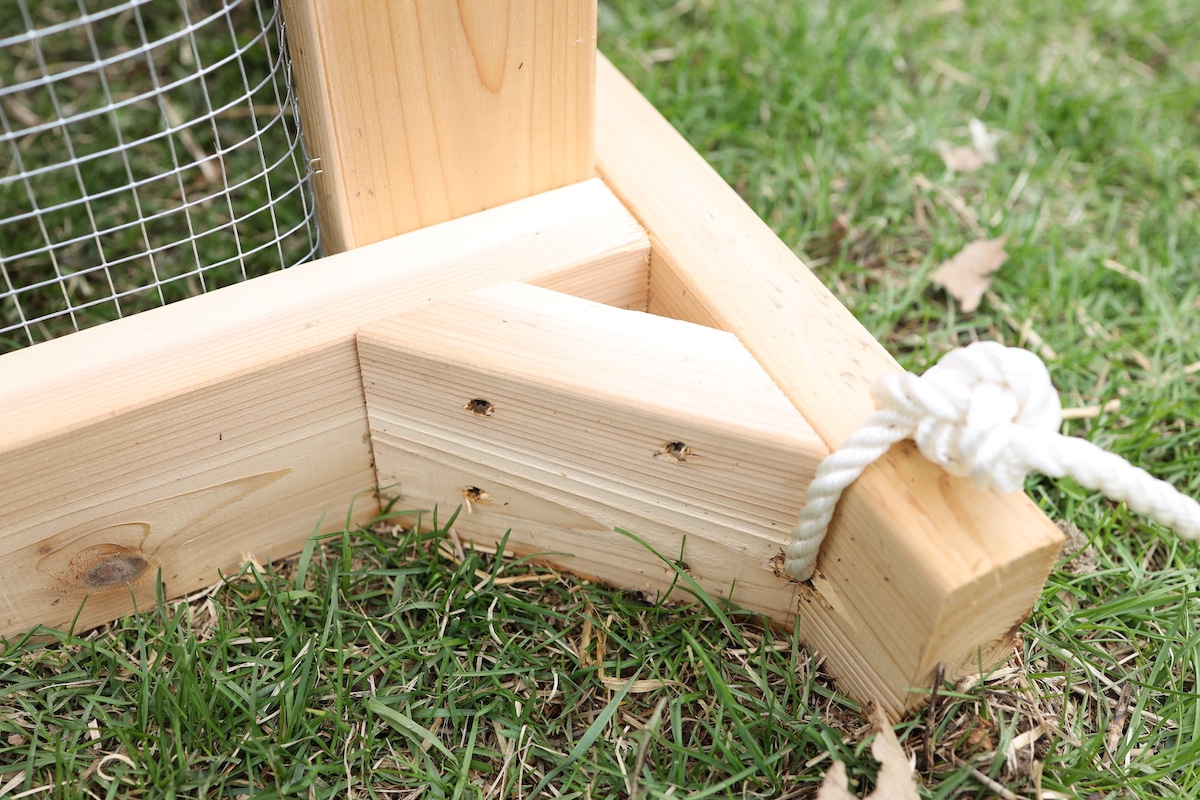
3. Use cut off wood gussets – I always have four pieces of cutoff 2×4 wood left that are the perfect size to make into a gusset. This way you can save a few bucks from buying the metal ones. You’ll need a miter saw, but you can cut two 90-degree angles with the long end being about 5” long. I would predrill holes if you do this, and put 2 long screws at each end of the gusset. Just make sure you install the gussets before installing the wheels!
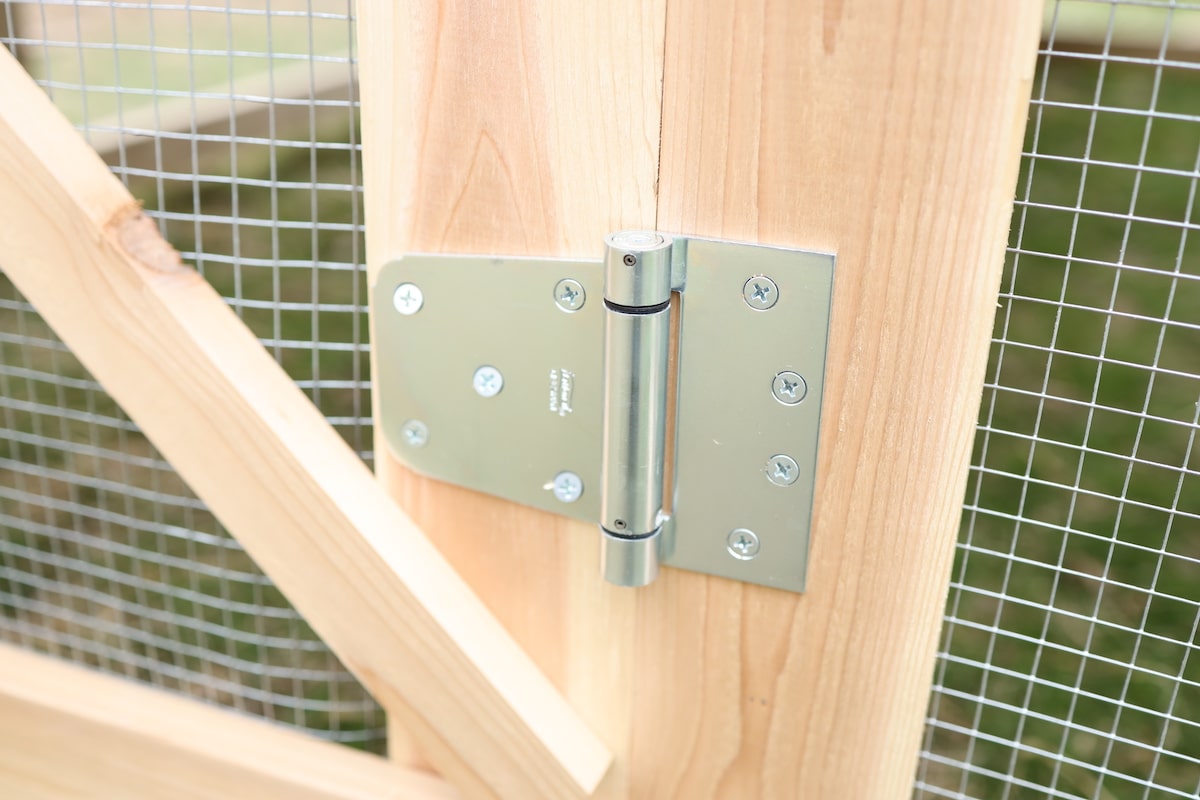
4. Use spring door hinges – I found some spring close gate hinges that are rated for outdoor use and were not that expensive. I found this to be a very helpful upgrade on my tractor last season knowing that the door on the tractor was always closed so my chickens weren’t running wild.
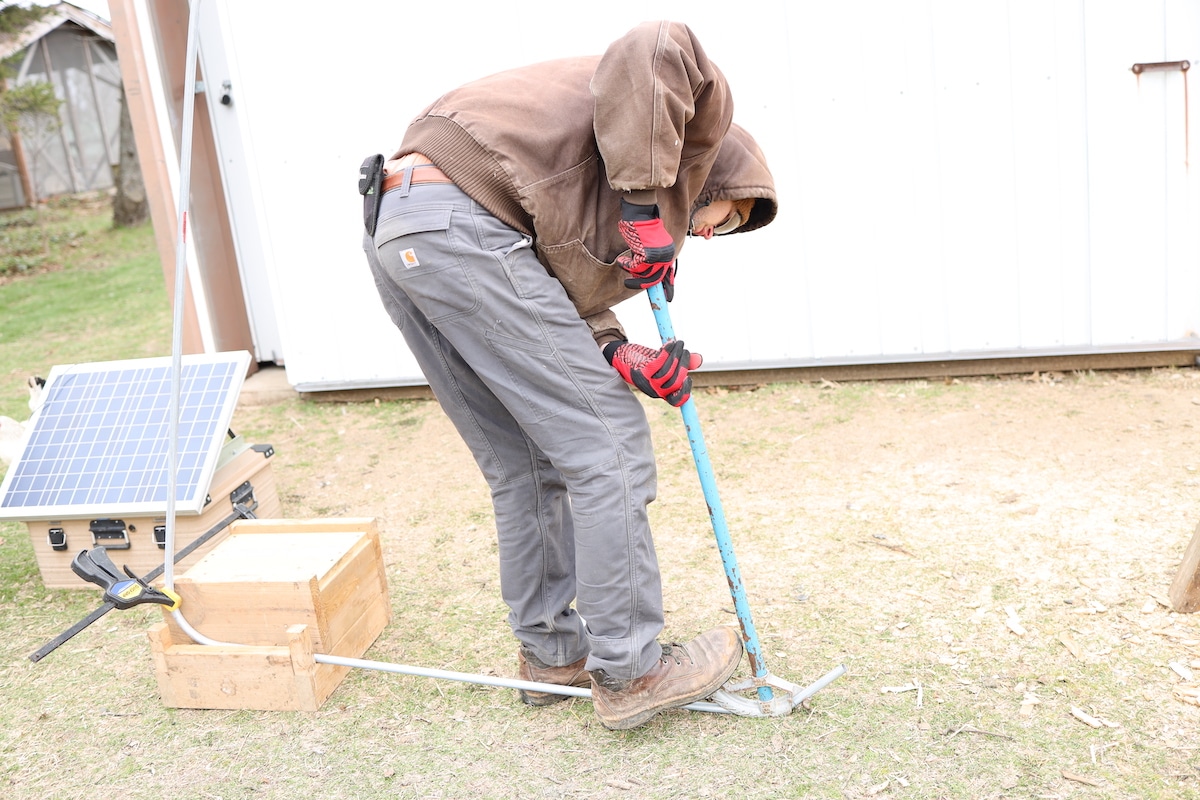
5. Bend pipes right – In my opinion bending the pipes for the roof is the trickiest part of the of the Suscovich chicken tractor build and detail is somewhat lacking in the book. So, here’s my two cents to hopefully save you some headache. The center bend generally needs to go beyond 90 degrees. Work with the first pipe and fit it over the tractor until you feel it’s right and then replicate that on the rest.
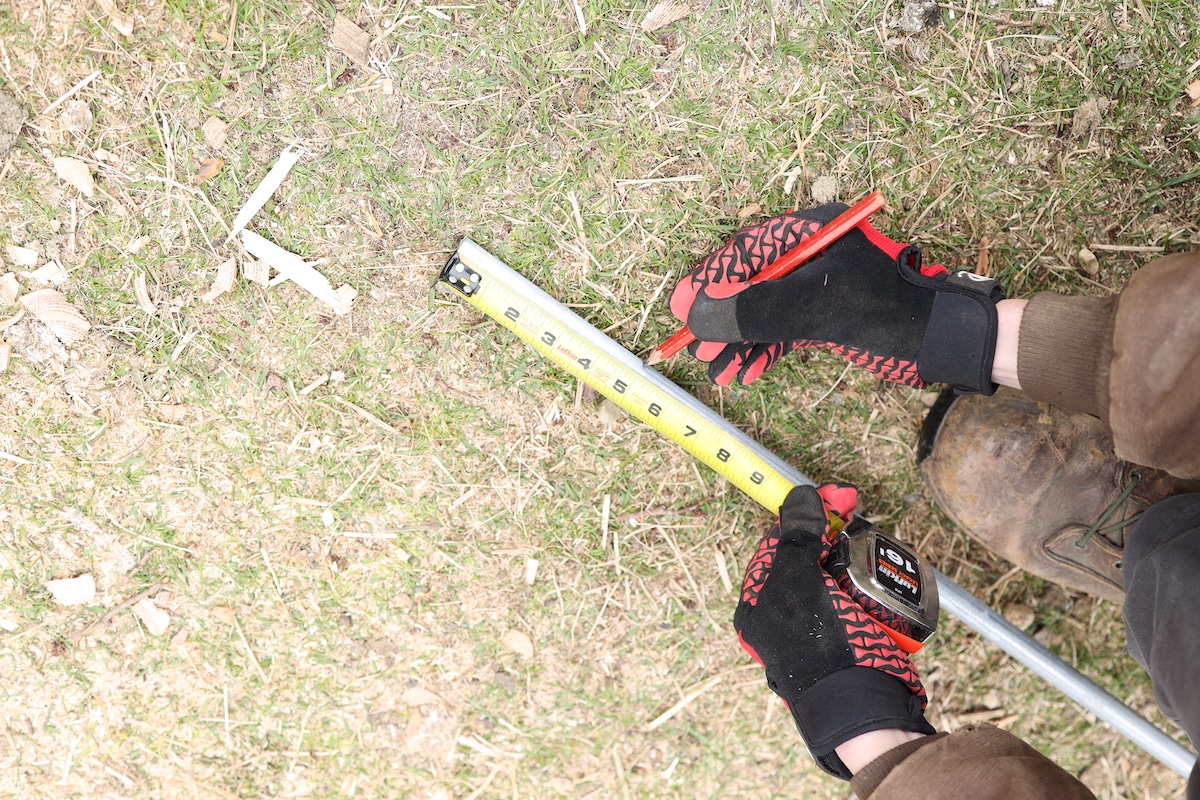
For bending the 45-degree bends on the ends, there is also not a clear measurement given in the book on where to place your bender for those. I make a mark 5” from the end and place the arrow of the bender on that mark. You also want to make sure to not bend this one too far. But 5” has been just right in my opinion. Hopefully I have saved you from having to re-bend a pipe or two, as has been my experience!
And as I mentioned in the FAQ’s, it’s also helpful to bend your pipes consistently and install them all the same direction. You won’t have any issues if they’re slightly off, but the more consistent the pipes are the easier time you’ll have installing a metal roof.
Go Raise Those Chickens On Pasture!
Now the last question remaining is which color will you choose for your metal roof?
I hope this tutorial has been helpful and you enjoy having a metal roof on your chicken tractor for years to come!
If you have questions, drop them in the comments below and I’d be happy to help troubleshoot.
Happy chicken raising!
Some of the above links are affiliate links. This means we earn a small commission on qualifying purchases at no cost to you. We are so appreciative of your support!
Learn more about how to raise chickens on a budget:
- Chicken Roost Designs | Two SImple DIY Ladder Perch Ideas
- Simple DIY Chicken Coop Inside Your Barn
- Simple Outdoor Chicken Brooder Ideas
- Breaking Down The Cost Of Chickens For Eggs
- How To Care For Baby Chicks
Pin it for later!


Did you skip putting wire underneath tin?
Yep, with the tin on top it really eliminates the need for chicken wire at the slanted roof sections. I did still wrap the chicken wire over the conduit on the ends and then I stapled mine to the 2×2 runners. This allows you to pull the chicken wire nice and tight and finish things out nicely.
Where do the chickens roost and nest?
That’s a good question. They really don’t. Being that they’re typically 8-12 weeks old when butchered I haven’t really seen that they’ve developed nesting instincts yet. They’ll definitely dig holes and dust bathe when they have the chance. But I have tried to think of ways to incorporate something for roosting. If you fasten a piece of lumber or something across the tractor it would make moving around inside of it pretty challenging. So you almost need to build some sort of mobile roosting solution that’s not attached to the tractor. If you or anyone else out there has ideas, let me know!
Was your $250 costs for the revamped roof portion only or for the whole build with the metal roof
Yes, that was just the roof cost. I believe the tractor itself cost around $400. It definitely wasn’t cheap. And I think I did build both mine right in the middle of material prices being really inflated. So maybe those cost have come back down some now. I also used cedar over treated which adds cost. John Suscovich in his book says he was able to assemble his for around $200 each. Hope things get back to that level soon!
I added a roost along the length of the tractor. If you go across the width it does hinder movement inside. I use my tractors for egg layers so I do need a roost. For Cornish cross I think it’d be unnecessary.
Awesome! Thanks for sharing.
Is there some reason you just wouldn’t use timber trusses instead of the hassle of bending the metal pipe? Seems if you’re going with a metal roof it would be just as easy to use some 2×3 trusses and 2x1s to fix the metal roof onto?
Yes, you totally can! I’d be curious to look at the weight difference because I think the metal pipe might be lighter. Plus, since so many have already built their Suscovich tractors with the pipe I wanted a design that just built on that. But you’re right, and I don’t think it would be that hard to come up with a solid wood framed roof.
Thanks for sharing this coop plan. I just built 2 – 12′ x 8′ for laying chickens. I used 2×2 material for my trusses and roof frame work and added some wheels. My wife can move it around with no problem.
Awesome! Would love to see pictures! And I’m curious what you did for laying boxes? I’ve thought about moving our layers to our tractors after we’re done with meat chickens for the year but need to come up with a good laying box and roost solution. Enjoy all the eggs!
Love the idea, thank you for sharing
You bet! Glad it was helpful and thanks for stopping by!
I have been delayed and delayed making my tractors! But I keep watching your videos and luckily all of my birds are housed safely… I just want more birds! And my goslings are ready to go outside. Time to finally make my tractors! I’m wondering what you think about extending the roof lower? I was thinking of letting the roof hang over the sides more to protect from wind and rain. Thanks for any advice! I’m also going to attempt to use hardware cloth for the entire thing…no chicken wire. Not sure if this is a stupid idea!! Thank you again. I’m so excited to start!
Hey there, love the enthusiasm! There can be so much to figure out at the start! And totally not a stupid idea. You certainly can take the roof down lower on the sides. It would make cutting the roof panels to size much easier (one cut vs. two). The reason I didn’t do that was because our alleys we pull our tractors through are only about the width of the tractor itself, so there wasn’t much room for overhang. Plus, that metal can be sharp and I didn’t want anything sticking out too far from the tractor… especially with young kids and whatnot. If I was going to add something for protection, I would cut a roof panel to fit on the short vertical wall of the tractor, just below where the roof would end. I’d probably only run it about half the length of tractor so the chickens can either choose protection or sunlight and just screw the panels to the wood on the outside. I’ve thought about doing this and might go for it at some point. Hope that helps! Good luck with all of it!
Thank you so much! I only am seeing this comment now…so sorry for the slow reply. I love your idea about sort of wall protection for half the tractor instead of longer roof coverage. I might just do a slightly longer roof because I’m making mine 6 inches taller. I’m still behind but at least now I have all my materials. I still don’t know about the hardware cloth. It might be too hard to attach that to the conduit. We will see! Thank you again 🙂
How much does your tractor weigh? I want to build a Suscovich tractor with a metal roof, but I want to make sure it’s not going to be too heavy for me, or if I should build it a bit smaller. Thanks.
Great question! I honestly don’t know how much the entire tractor weighs. But my estimate is that the metal roof adds about 80-90 lbs. From my experience with these tractors getting the rope length dialed in for your height is pretty important to move it easily. It’s all in the technique! It pulls fine straight but is a bit tricky to turn. Someone else recommended looking into PVC roof panels which weigh less than the metal panels, so that might be something to look into. Good luck to you!
How’s the durability of these holding up? Considering doing this in northern Minnesota where we get lots of snow during the winter!
Had them for a few years now and really no issues to speak of. I park them outside year-round in northern IL so they’re exposed to everything. The roofing has held very securely to the wood/conduit. The one weak point to mention is the small piece of metal that I use at the back side as a ridge cap. When the wind really picks up, the metal roofing that overhangs the back of the tractor tends to flap and it has worked the screws loose for that small metal cap over time. Easy solution is just to cut a small piece of wood that the screws for that cap sink into, which I’ve done now and seems to be holding fine. Hope that helps!
Thank you! That’s great to hear.
Is the whole thing heavy enough to withstand 40mph winds, even if just using a tarp roof? I have zero wind break and the wind gusts are no joke here in Nebraska. The last thing I’d want is for it to tip over and all my chickens get out in the middle of the night or are exposed to the family of coyotes that live nearby!
Hey there! Totally understand those concerns. The weight of it is pretty substantial (even though it’s not too difficult to pull straight) and I think it would hold up fine to strong winds. We’ve had pretty strong gusts without a ton of windbreaks either and it’s always stayed put. The one thing I might modify is to not overhang the roof on the backside like I did. This is the only area I’ve had to reinforce a bit over the years due to strong winds. Hope that helps!
thanks!!
Hi there, I love the design of this, I’ve added a roosting area to ours with hooks underneath to hang food and water. And have enclosed the back as it gets pretty cold here and am going to use it raise the younger layers. I’m just not sure if there is a trick to installing the wheels, are you able to post a photo of yours? Obviously the wheel placement will affect how easy it is to move. Thanks, Natalie
Hey there! Awesome, love hearing the ideas to convert for layer use! I’ve thought a lot about what would be the ideal configuration for this as well. I’m not sure I have a close pic up of the wheels right now, but here’s a link that shows the backside with wheels from further back: https://fromscratchfarmstead.com/wp-content/uploads/2022/02/homestead-meat-chickens-in-chicken-tractor.jpeg. Your local hardware store should sell replacement wheels for a mower. Then I believe I used a 1/2″ carriage bolt that when through the wood. If you put the wheels on the inside of the tractor then they don’t stick out on the outside. The one thing I’ll mention is to pick up a big bag of 1/2″ washers too. Depending on the style of your wheels, you may need to add a lot of washers to get the spacing right so the wheel is not rubbing against the wood. Hope that helps!
Hello,
I like the John S. design and I do like you metal roof upgrade. I have some used metal roof in my material pile. I am fixin’ to build 2 of these in the next couple of weeks.
Have you tried to pull the tractor without the wheels? I was thinking I’d prefer a skidded tractor, but I wanted to ask, without the wheels, is it not manageable? I could adapt this tractor with 4×4 skids, curved on both ends.
I just can’t find any info on someone who has an existing tractor and tried to pull it without the wheels on. Thanks in advance if you can try and let me know. I am 6′ 230# able bodied.
Hey there! Awesome, hope the building goes great! So, I’ve only had the suscovich tractors with the wheels on. But we did build a previous a-frame tractor that only had skids, no wheels, and I was able to pull that fine. Though I will say it was heavy and bulky. Here’s a link to see what I’m talking about: https://fromscratchfarmstead.com/a-frame-chicken-tractor/. It was built from an old kids playset and used a lot of wood. I think the wheels help but I wouldn’t say they’re completely necessary. Rounding the ends of the skids like you mention would definitely help for smooth dragging. 4×4 might also be overkill. Without wheels, friction will be fighting against you and you’ll have less friction with a 2x than a 4x. I’ve seen some builds recently where people put the wheels on some sort of a hinge or cleat that can fold up when not in use. Might be worth looking into. Good luck to you!
I ended up using the 2×4 for the bottom and cutting a radius into it. I used a 5 gallon bucket lid and started the radius 1-3/4″ down the lower 2×4.
Once the rope length is dialed in, it slides easily. Since I put a radius on both front and back, I am also able to put a shackle on the rope and hook it to our 10 year old 36 volt golf cart and pull it along as well.
I almost always pull the rope with manpower but it is nice to know I have a backup if I was not up to it one day.
I also used 1/2″ hardware cloth over the whole thing. I can now see why the spring loaded hinges would be useful like you suggest. I may upgrade in the future or on the next 2 we build.
Than you for taking the time to make this post. Very profitable post.
Hey! Love that idea of making the bottom rails radiused for smoother pulls. Thanks for sharing! And that’s brilliant to have to have golf cart backup. Take care!