Simple DIY Chicken Coop Inside Your Barn
Already have an existing barn or pole barn on your property? Then you may just have the perfect spot to build your chicken coop! So don’t overthink it. We’ll break down what you need to know about building a chicken coop inside a barn along with the advantages and disadvantages.
Why We Built A Chicken Coop Inside Our Pole Barn
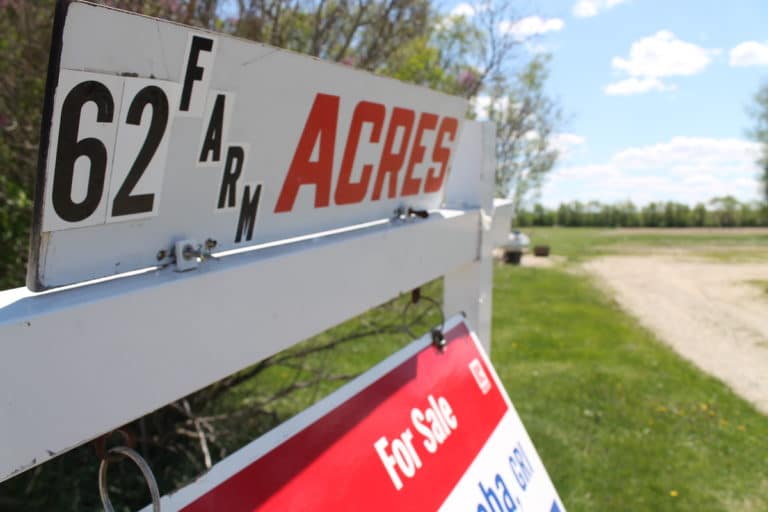
Our first spring on our homestead was ambitious. Starting entirely from scratch we built a brooder, filled it with both broiler and layer chicks, then needed to build both a chicken tractor for the meat chickens and a coop for the layers.
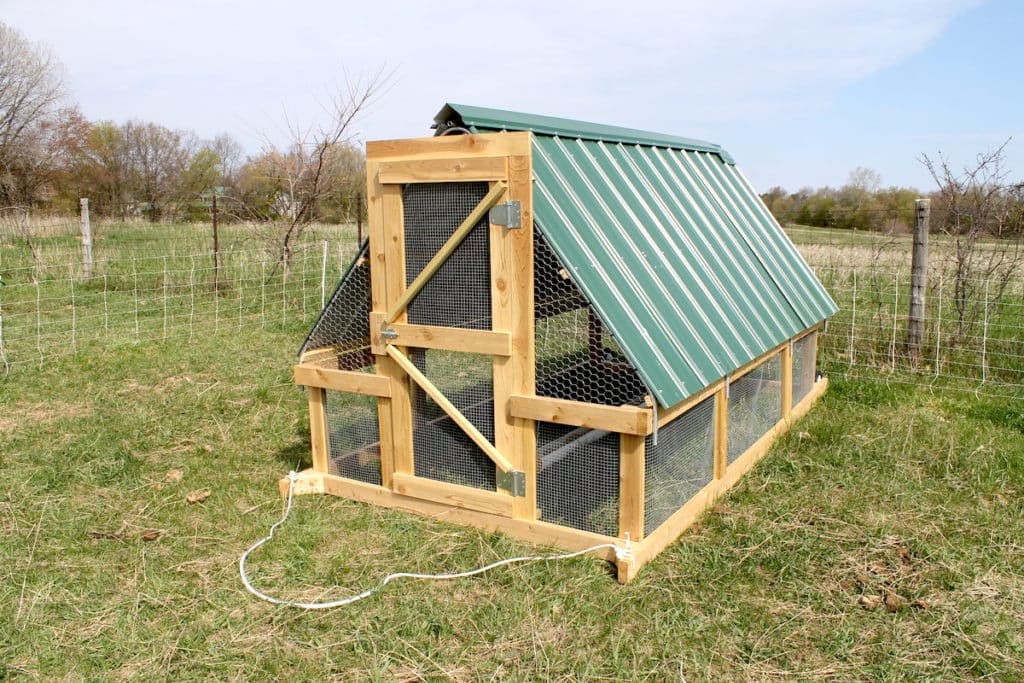
The John Suscovich chicken tractor worked out perfectly for our meat chickens.
But, when it came to a coop for our layers, there were almost too many options and I was getting overwhelmed. Meanwhile, our chicks were getting big and we needed to build something!
I liked the portable egg-mobile concept. The only problems were, 1) we didn’t have a truck or tractor to move it, and 2) it would be a pretty significant project requiring both a trailer and lots of building materials.
Those cute, standalone coops would certainly be nice. But that too was a significant project and I wasn’t quite ready to commit to where would be best to build a permanent structure. And would the county require a permit or extra taxes?
Maybe a chicken tractor with laying boxes that we could pull around? But we had around 25 chickens with plans to expand in the future. We’d need a chicken tractor fleet!
Then I turned to our pole barn. Could I just build our coop inside it?
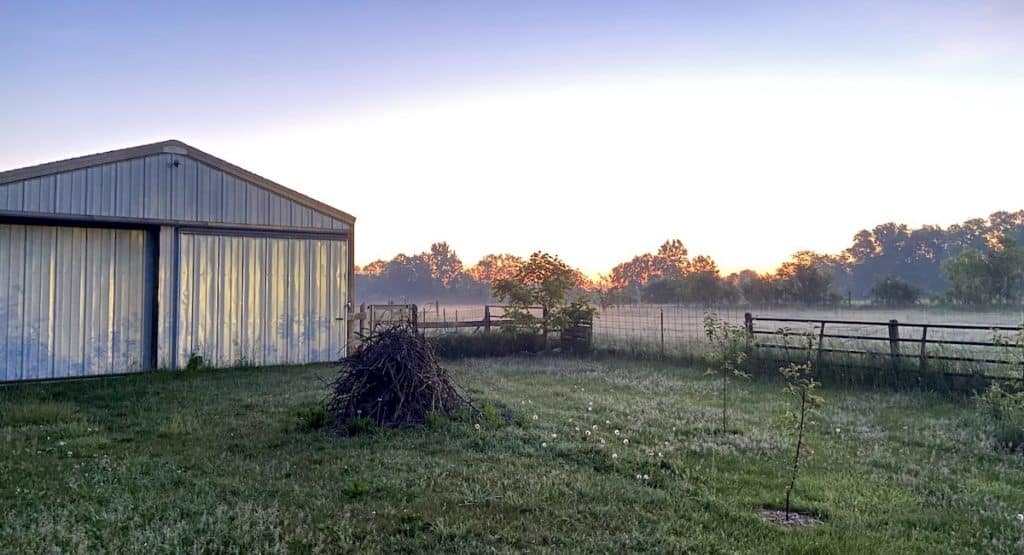
The barn is roughly 50’ x 25’. About 1/3 of it is used as a stall for animals. But there was ample space in the rest of the barn that I mainly used for storage.
So, we went for it and have been so happy with the decision!
Chicken Coop Inside Barn – What to Think Through Before Building
Before we get to the How To, it’s important to plan out your coop so your birds are safe and have everything they need, and you are happy long term with your coop.
Predator Proofing
Predator proofing your coop is always the first thing to think about with any coop design. All 6 sides should be secure: top, bottom, and the four sides. The top is the easiest. You can just use plywood, boards, or metal panels for a solid top.
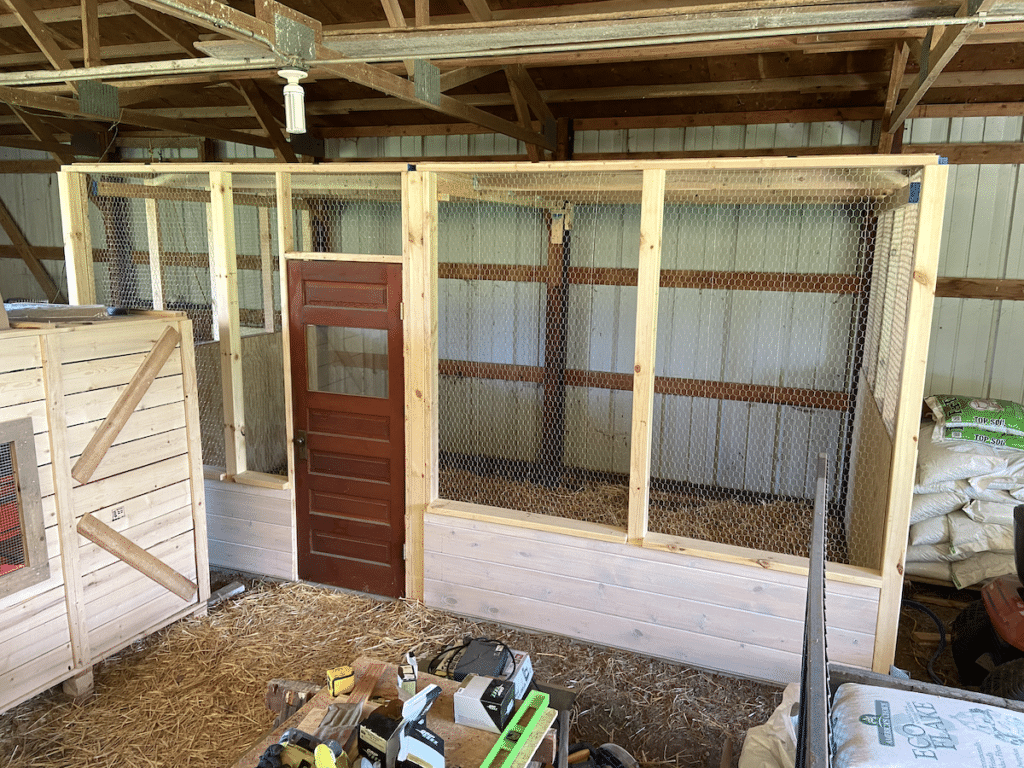
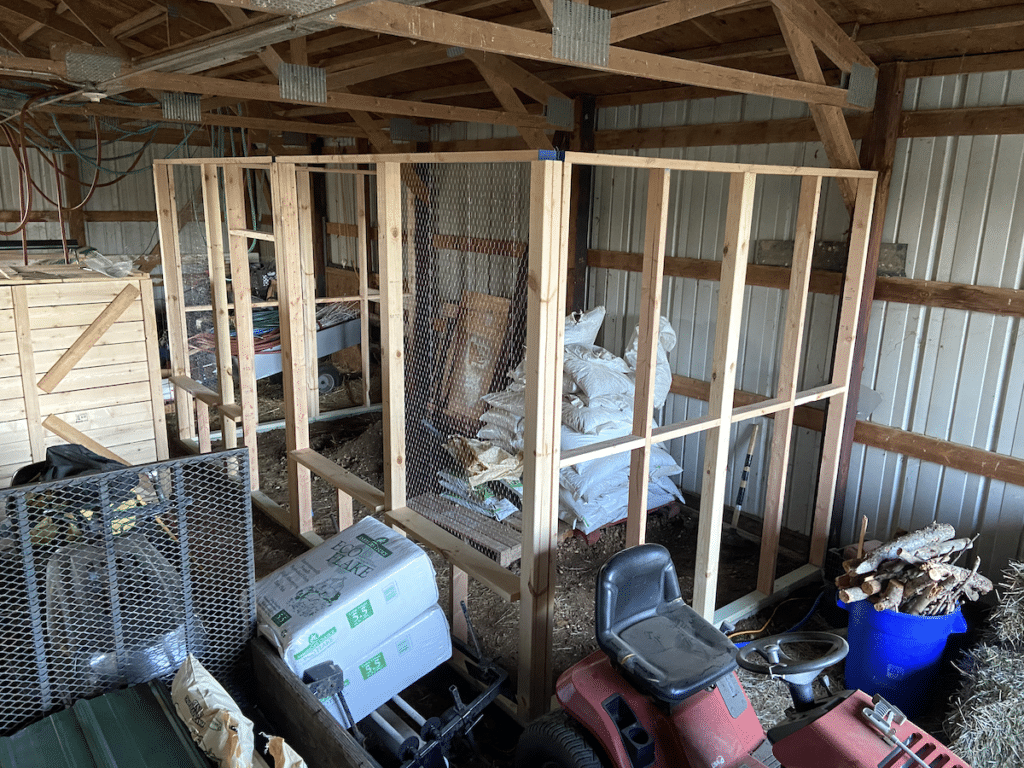
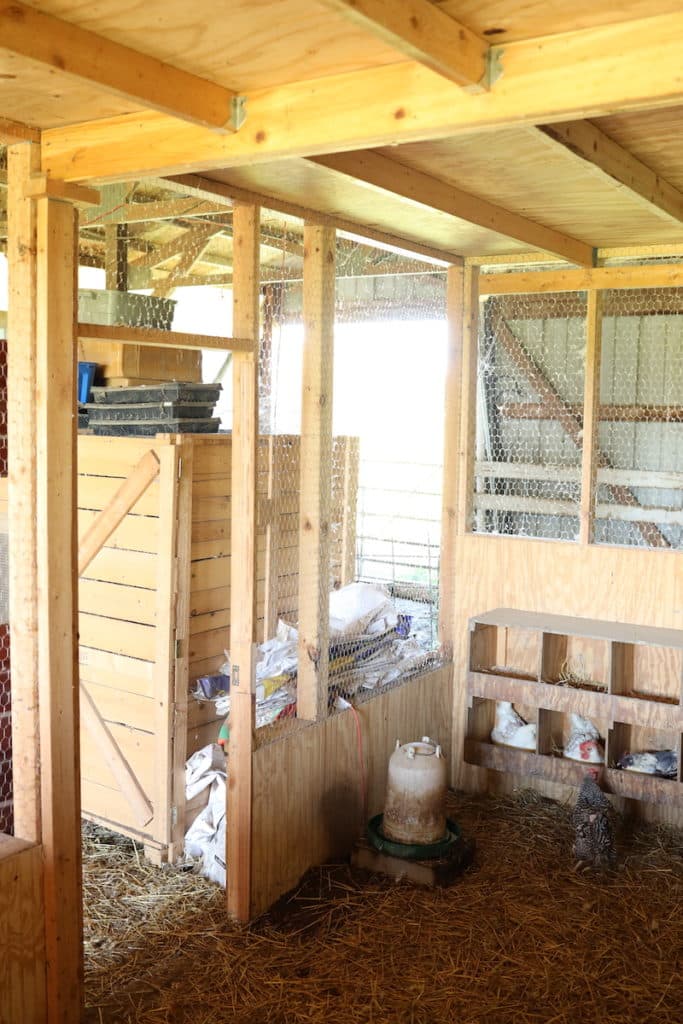
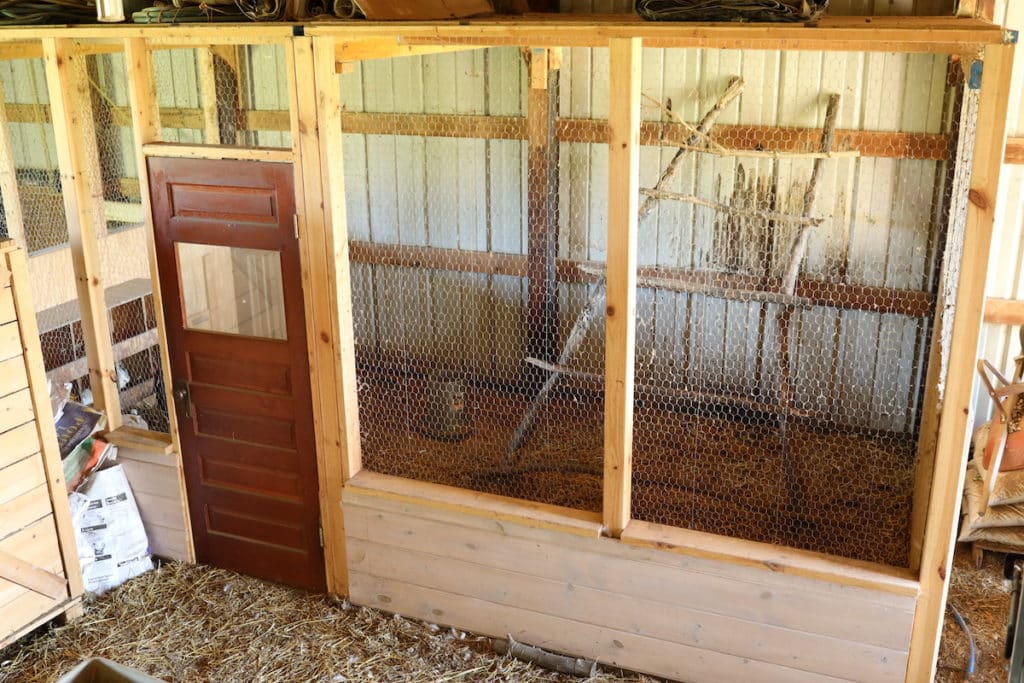
The sides leave you with some options. On my coop, I built a 2’ or 4’ high partial wall covered with plywood and then used chicken wire to secure the walls the rest of the way up to the ceiling. Note that if you do plan to keep your walls open and bring the chicken wire all the way to the ground, you may want to consider hardware cloth in place of chicken wire – at least along the base. Some predators can tear through chicken wire when at ground level.
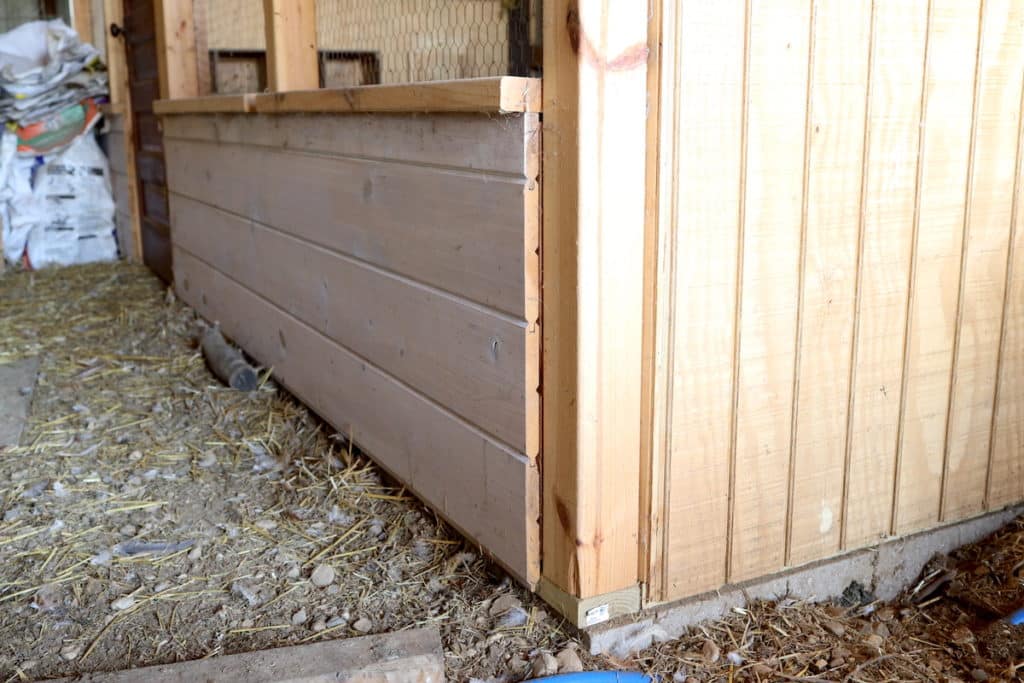
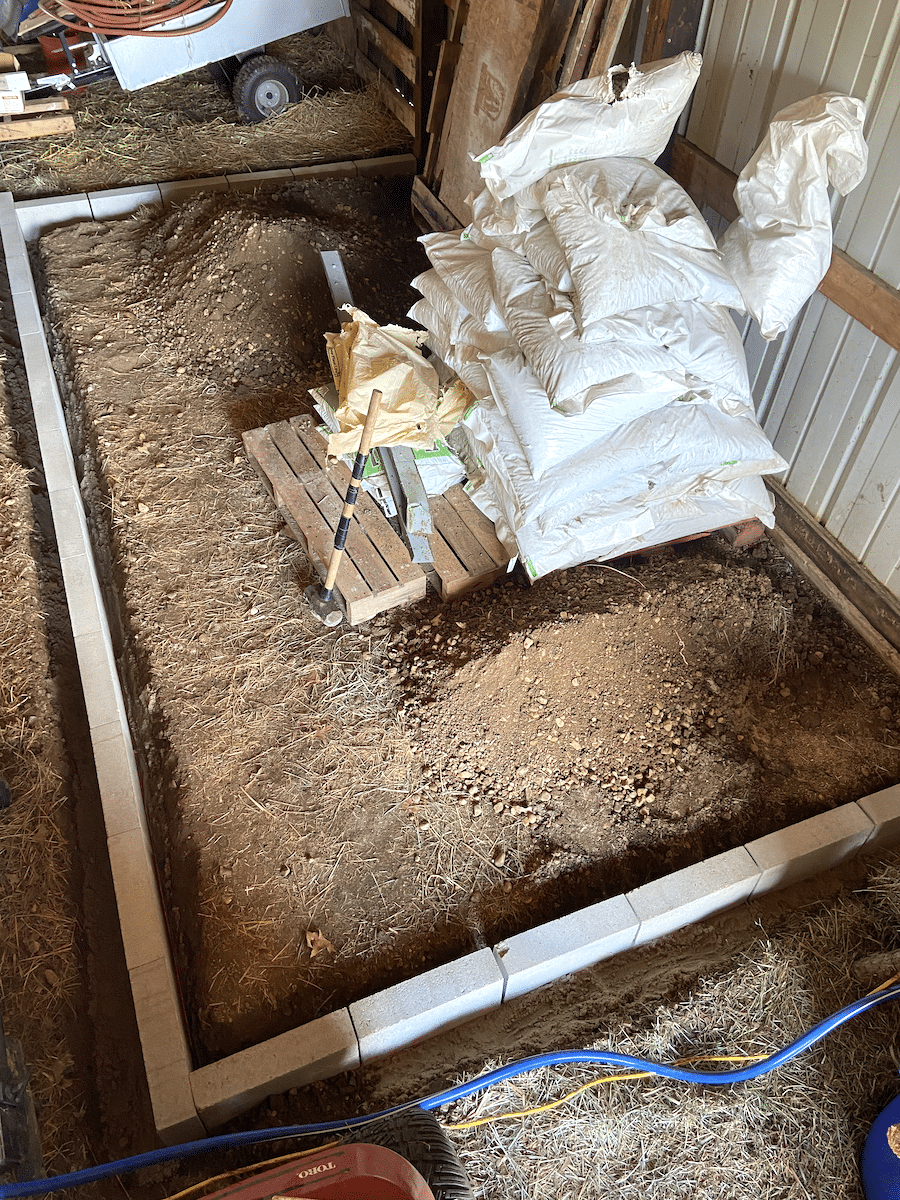
The base is the trickiest. Many predators can dig under the coop and get in. The ideal would be to dig out the entire footprint of the coop about a foot, line the underside with hardware cloth, and then fill back in on top of it. But that’s a big undertaking! What I did was dug a trench where the walls of the coop would sit and lined the trench with concrete blocks. This both acted as a foundation for the coop and has kept predators out!
Location/Layout
Spend time in your barn thinking through and envisioning the best location for your coop and how it will effect the flow of traffic within your barn. How will the coop interact with other activities going on in the barn? What is the warmest spot of the barn? What will my chickens’ access to the outside look like? Will they have sunlight and ventilation? Will I be able to bring materials in and out of the coop?
The inside layout of the coop with nesting boxes, roost, and room for food and water doesn’t need to be set in stone. But other features, like a door to your coop, will be permanent and require some forethought. What’s the best door location to make life simple with daily chores. And don’t forget to size your door wide enough to fit a wheel barrow in to clean out the coop!
Size
Knowing your desired laying flock size and how you will be raising them will determine a lot. Will your chickens free range? If not, do you also need to consider building a run for your chickens outside of the barn so they have access to outdoors and sunlight?
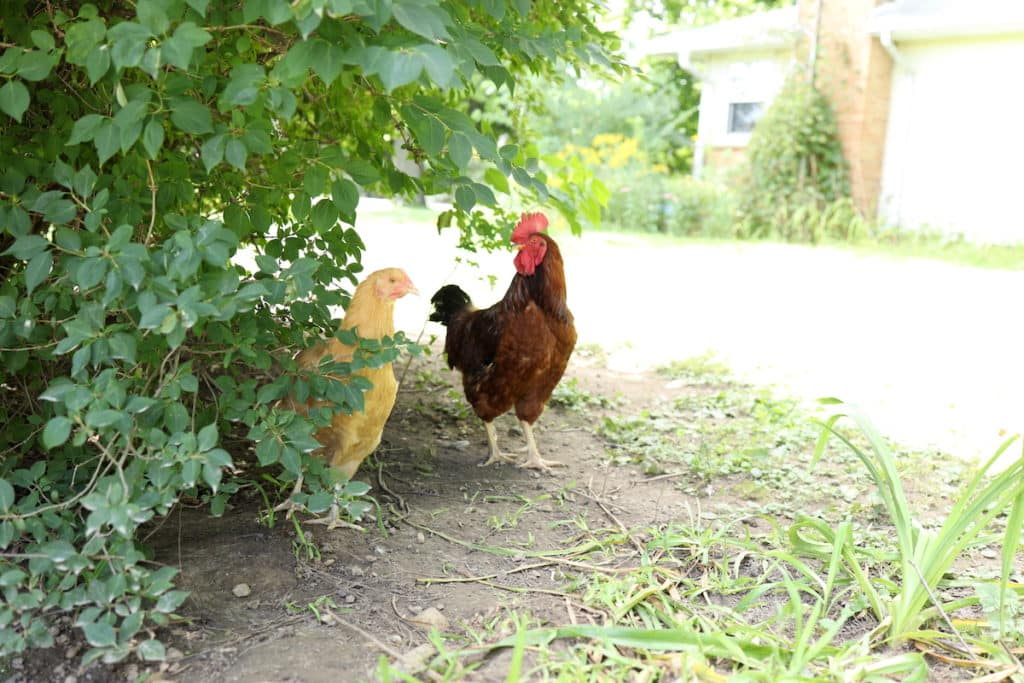
We knew we wanted to free range our chickens. So most of their time is spent outside foraging and dust bathing under bushes. Our 8’ x 16’ coop footprint feels like plenty of space for the 50 or so chickens we currently have considering they’re only in there to sleep, eat, drink, and lay.
But, if you don’t plan to give your chickens access to the outdoors, that same space might feel tight for even 20 chickens. At a minimum, plan for 3-4 square feet per chicken in your coop. I realize we exceed that a bit with 50 chickens, but they have the freedom to roam all throughout the property during the day. And if we ever do need to keep them indoors then we open up the full barn to them.
Design
Most pole barns have poles that make up the exterior walls every 8’ on center. I found it easiest to align the walls of my coop with these poles or posts and work off of those. With sticking to those 8’ dimensions both for the length and width of the coop made buying materials easy and more affordable. Lumber in 8’ lengths is common to come by and 4’x8’ plywood sheets worked great for the walls and ceiling.
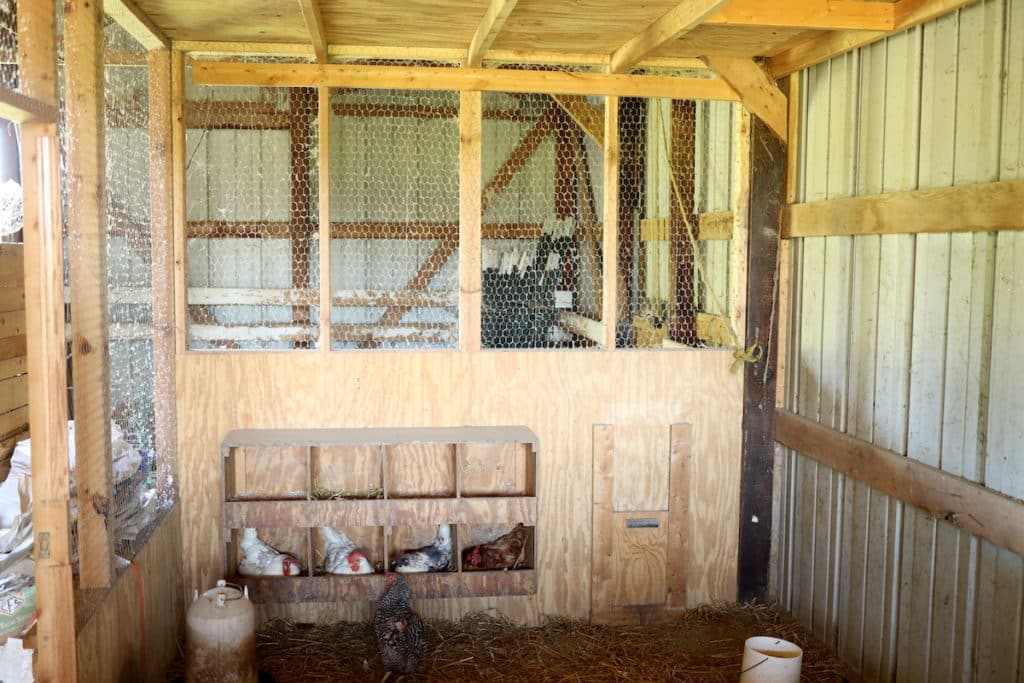
The height of your walls is also a consideration. It’s important 1) for ventilation, and 2) for visibility. I made the front wall of the coop only 2’ high with chicken wire the rest of the way up so kids would easily be able to see into the coop. The side walls I made 4’ high with chicken wire the rest of the way up. This allowed me to easily mount laying boxes onto that side wall.
I’d recommend against building solid walls all the way up. Walls that are 2’ or 4’ high with chicken wire or hardware cloth the rest of the way up provide much needed airflow to ventilate your coop. Barns can get warm in the summer months but we’ve found that with the barn doors open, the chickens get the cross ventilation they need with a more open coop design.
Storage
Depending on the size of your coop and how much room you have in the rest of your barn, you may not want to lose that much space in storage. This was true for us. So instead of building the coop the full height of our barn, I left a couple of feet between the top of the coop and roof trusses. This allows me to store lots of supplies in the off season like electro netting fencing, hoses, drip irrigation, and spare lumber.
To do this, I built the ceiling of the coop strong enough to support some weight and lined it with 1/2” plywood on top. This both sealed it off on top form predators and makes for a nice sturdy storage surface.
Materials
Since this project uses really basic materials, I always recommend using repurposed materials whenever possible. Use an old door you already have lying around. Look on Craigslist or Facebook Marketplace for things like sheets of plywood, lumber, and the concrete blocks. This can be a very affordable coop if you can source most of the materials used. And it will probably add lots of character!
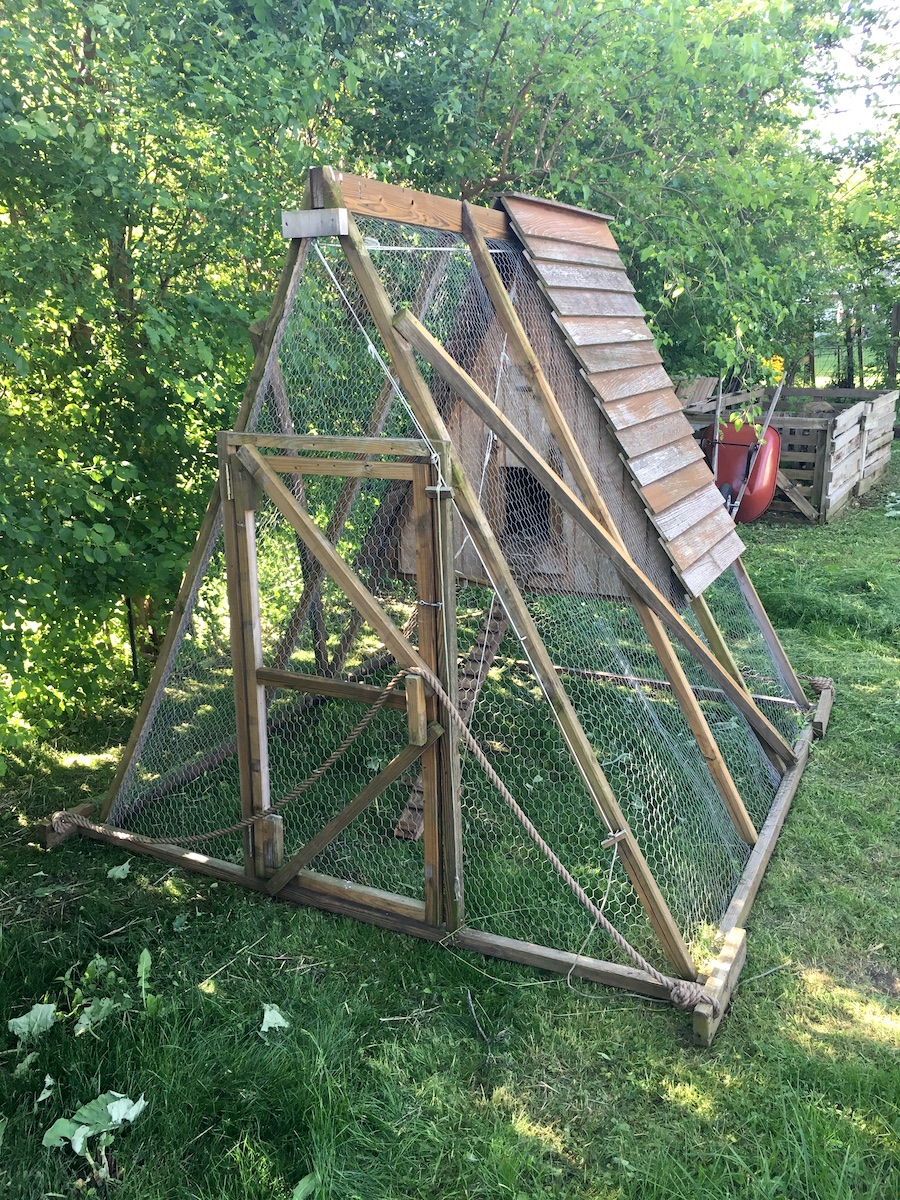
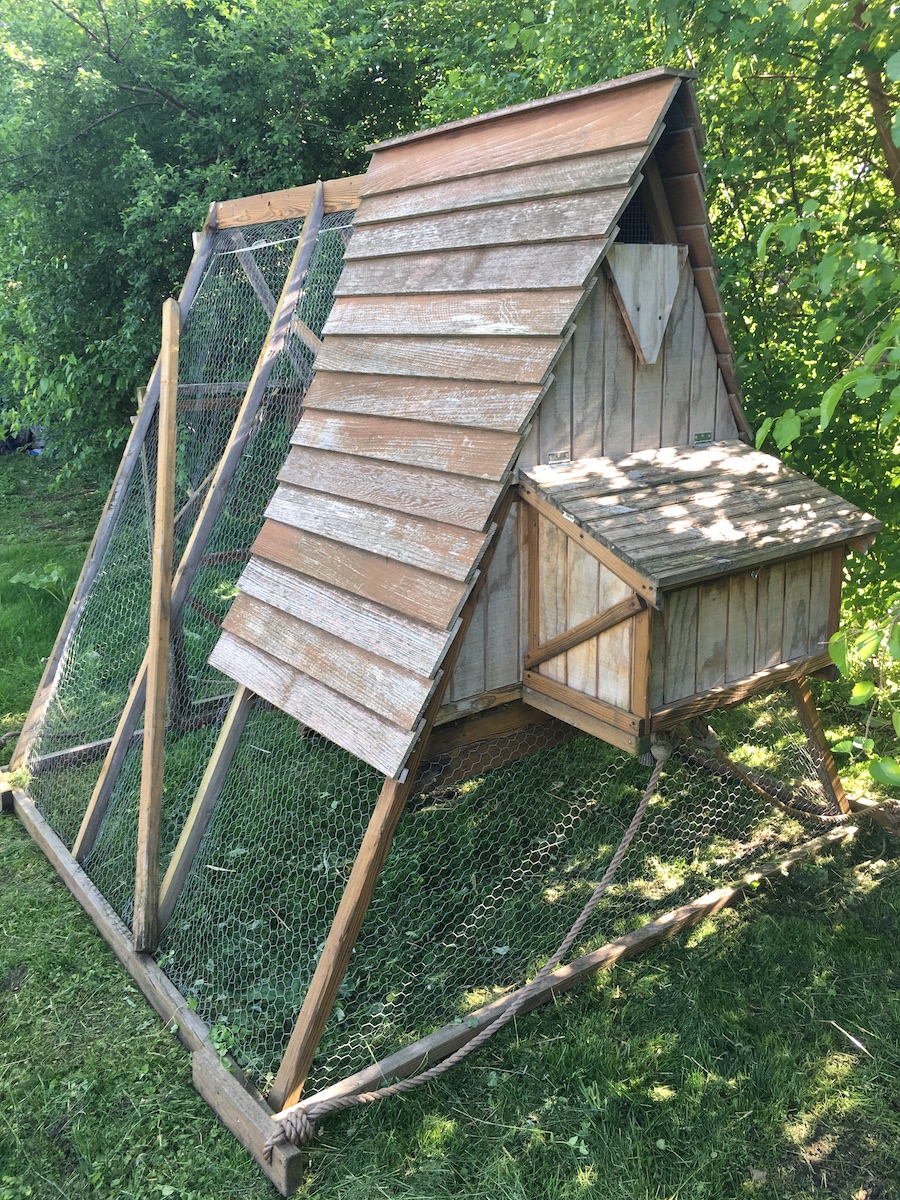
I had the unfortunate timing of building our coop right in the middle of the 2020 lumber shortage. I searched for used lumber for months without any great options. So for this coop I had to buy most of the materials new. But when we lived in the suburbs, I was able to build a smaller portable A-frame coop that we built entirely out of an old wooden kids playset and used fencing.
How To Build a Chicken Coop in an Existing Barn
Every barn and coop design are going to be different. But I’ll walk you through the steps and techniques I used to build our 8’ x 16’ chicken coop inside our barn.
Step 1 – Install your foundation
Unless your barn already has a concrete floor, you’ll need to install a solid foundation to build on. This will also serve to predator proof the bottom side of your cop – see note above.
To start, layout where your walls will sit. Dig a trench in line with your walls deep enough for your concrete blocks to sit leaving 1-2” of the block exposed above ground level. Do this on all four sides.
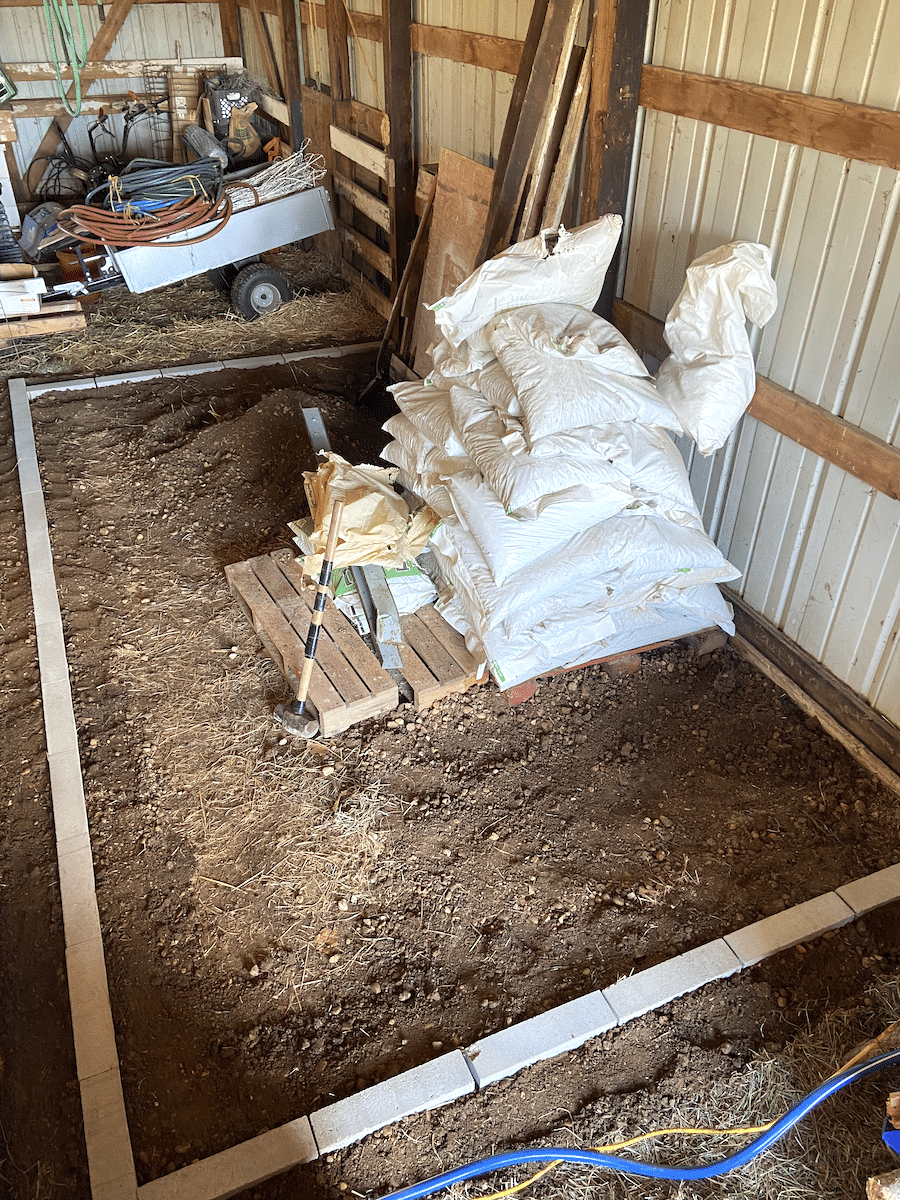
Next, compact the base of the trench as much as possible using either a compaction tool, the head of a sledge hammer, or your foot.
Add about 1” of sand to the bottom of the trench. Install the concrete blocks, leveling them as you go using a 4’ level. In some instances you may want to use a very straight 2×4 vertically oriented with the level on top to span further distances. Add or subtract sand beneath the blocks as needed until your blocks are level throughout.
Note: I used 4”x8”x16” solid concrete blocks. I oriented them horizontally meaning they went down about 7”. We have not had issues with predators digging beneath them, but for additional predator proofing, you can orient the blocks vertically to go 16” down.
Step 2 – Build your walls
This coop uses basic wall construction with a bottom plate, vertical studs, and a top plate.
Our walls were 8’ high and I built them flat on the ground and then moved them into place. The bottom plate should be treated 2×4’s since it will sit directly on the concrete block and likely be exposed to moisture in the ground level of the coop. The rest of the coop can be built with standard construction lumber.
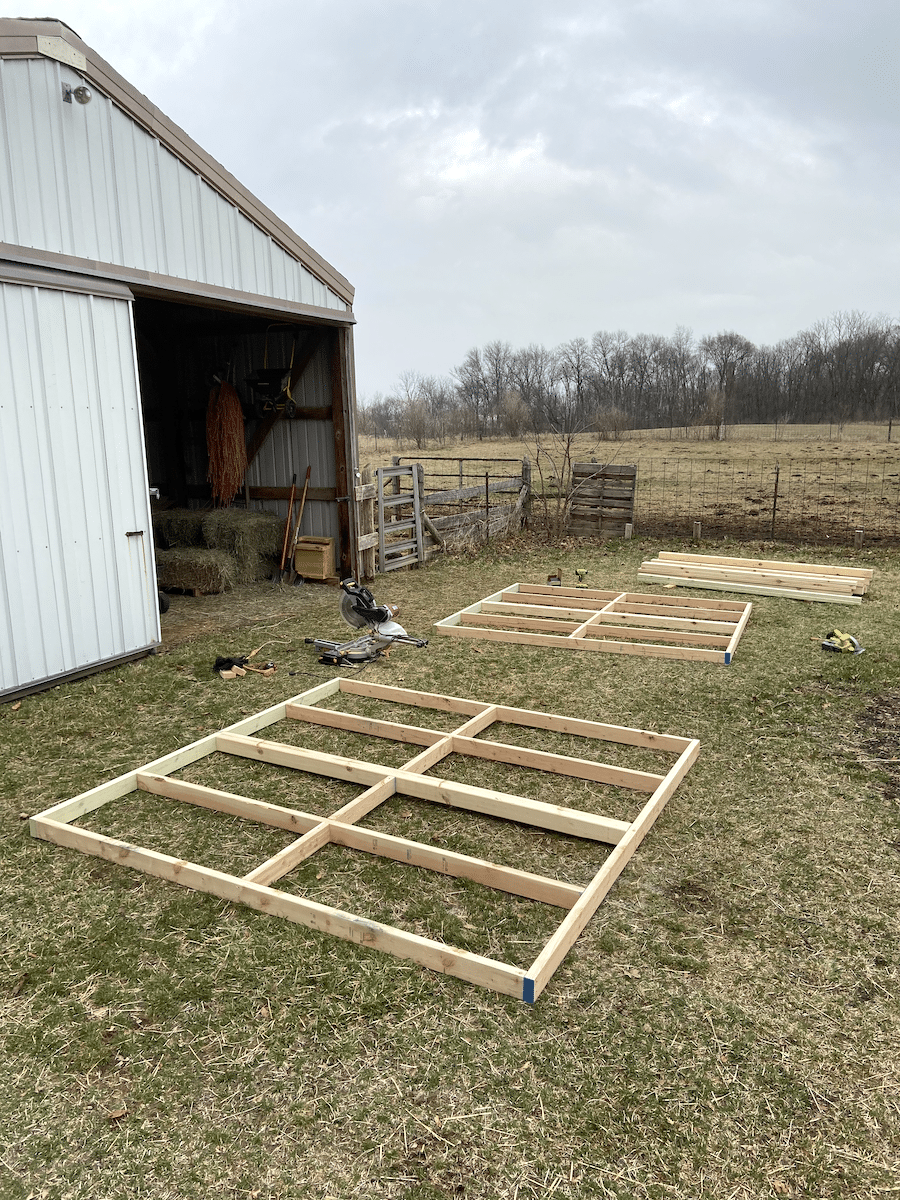
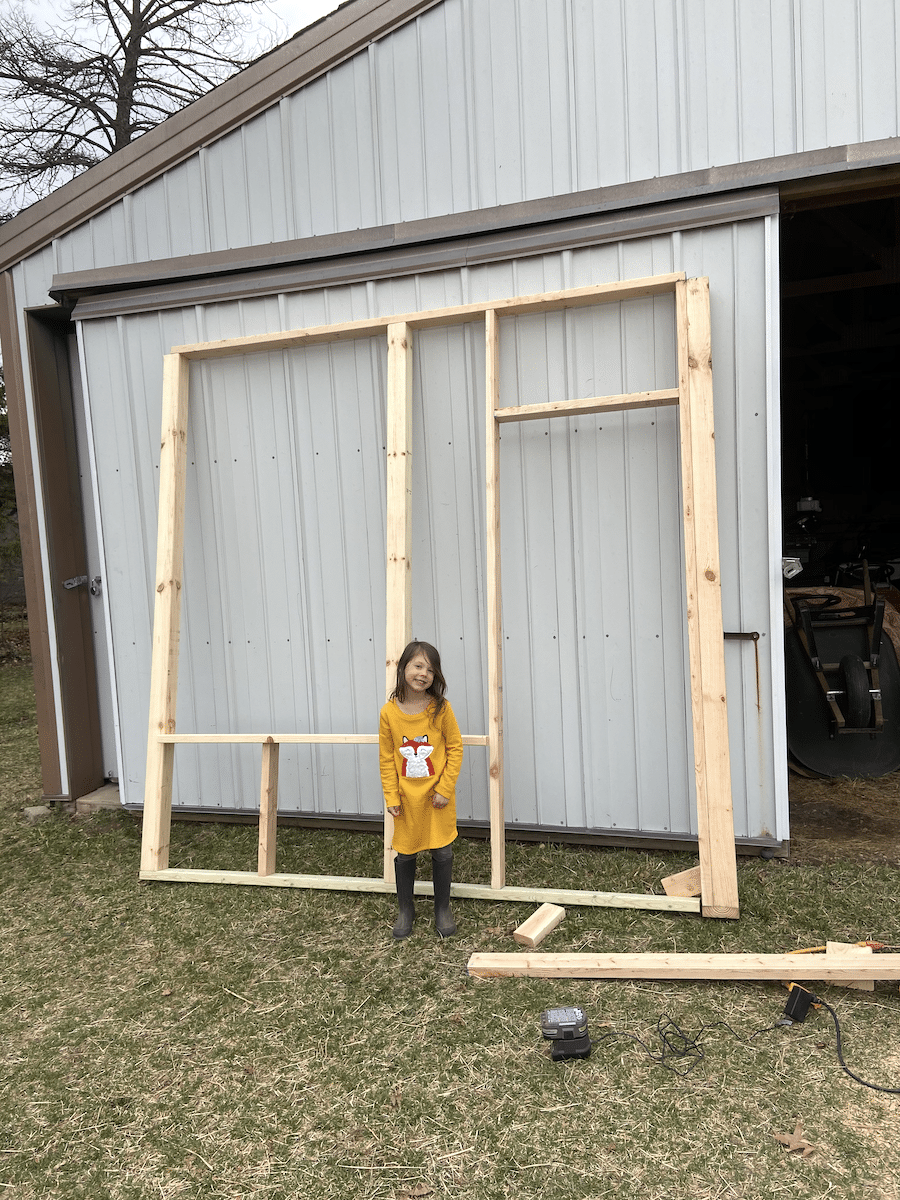
I spaced my studs 24” on center, which is plenty sturdy for a coop. Along the front wall I used 4×4” posts and spaced them 48” on center. This allowed for greater visibility inside the coop.
You will also need to frame out your door(s) at this point.
If you have a preference of fasteners to assemble the walls or own a nail gun, that is great! I use screws when assembling walls. But don’t use just any screws! Standard Philips head screws are outdated, will strip out, and leave you really frustrated. Spend a little extra and buy t-25 star head coated screws. They drive in so easily and the coating will stand up to the moisture of a coop and barn.
Step 3 – Install chicken wire
Yes, I’m recommending you install the chicken wire (or hardware cloth) on the walls before setting them in place! In my experience, getting a nice tight and secure install on chicken wire is so much easier when the walls are laying down versus trying to install it vertically. But, installing the chicken wire after the walls are in place is also an option. I did a mix of both.
I purchased 4’ wide chicken wire. Since each of the wall sections I built were 8’ wide, the 4’ chicken wire worked perfectly.
If you have an air compressor and a brad nailer that will accommodate staples, that will make this step SO much easier. Otherwise, you can also use a mechanical stapler, but your hand will be cramped and worn out by the end!
Staple a straight line of chicken wire on either the top or bottom of your wall panel. Continue stapling the chicken wire along the rest of the wall pulling it tight as you go. Having an extra person helping to keep the chicken wire tight and straight makes the job much easier!
Step 4 – Assemble your walls
Move your walls on top of your foundation. Use a level to make sure the walls are level vertically. Have a couple spare 2×4’s on hand to temporally brace the walls together so they stay level.
Screw the wall panels together every couple feet where they meet so they are secure.
This is optional, but I did drill a couple holes with a masonry bit through the bottom treated plate on each wall section into the concrete blocks and installed a Tapcon screw. These screws are specifically designed to work with masonry. They’ll help to make sure the walls stay in place on the foundation.
Step 5 – Build your ceiling
To build a ceiling to your coop sturdy enough to store materials on top, you’ll want a beam along the center of the coop. I used a double 2×6 beam.
I then hung 2×4 joist off the center beam every 24” on center. The joists spanned from the center beam to the side walls of the coop. On the center beam I supported the joists using a metal joist hanger. On the side walls, I installed a horizontal 2×4 ledger. This is basically a 2×4 that sat 3-1/2 below the height of the wall and was securely screwed to the vertical studs of the wall. The joist then rested on this ledger and were screwed in.
Finish the ceiling with 1/2” plywood sheets on top. Screw or nail the plywood to the joists and wall top plates. Remember to make sure it is secure so no predators can fit through gaps.
Step 6 – Add your finishes
Install the plywood or paneling to finish out the walls of your coop. I found that 4’x8’ sheets of plywood worked perfectly with this coop size since you just need to cut them in half for the 4’ walls and in quarters for the 2’ walls.
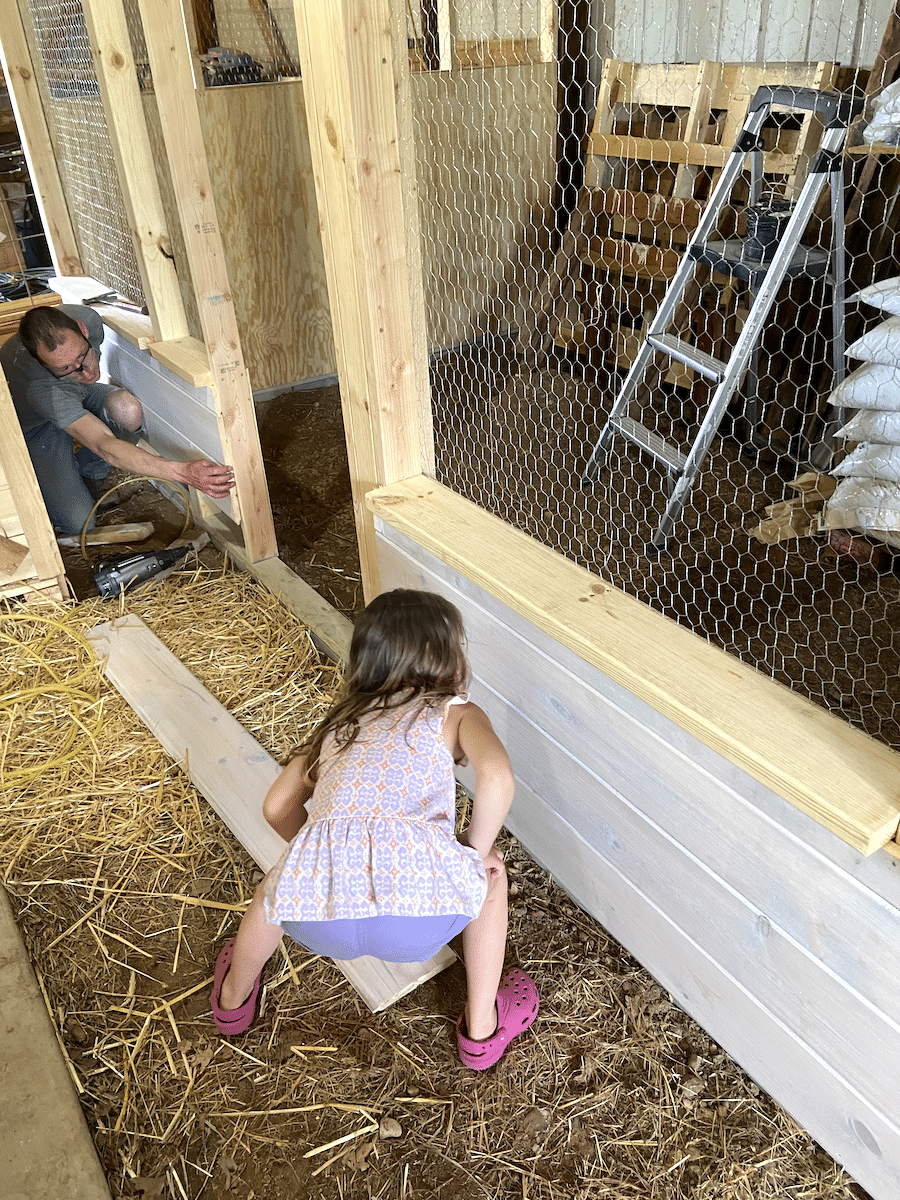
For the exterior walls I used a 3/4” exterior grade plywood with a groove pattern in it. For the interior walls, I used 1/4” plywood with a beadboard pattern. And for the front I used tongue and groove boards I had leftover from a house project. All of these materials are pretty standard at hardware stores.
And finally you can install your door!
Step 7 – Make it chicken friendly!
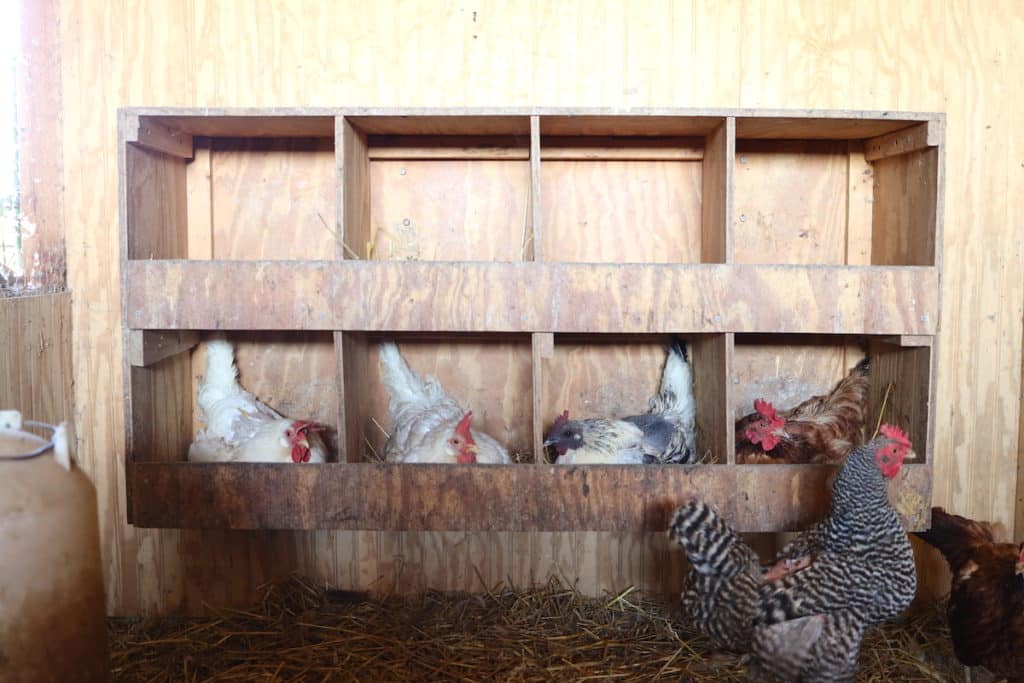
You now have a coop! Now you just need some feathered flock furnishings to finish things off. This should include feeders, waterers, laying boxes, and a roost.
A basic feeder and waterer from your local farm supply store will do the trick. Depending on your flock size, you may consider more than one of each. If you’re concerned with your chickens water freezing during the winter, we came up with this Easy DIY Heated Chicken Waterer design after trying other methods that were either really expensive or didn’t work.
Laying boxes don’t need to be anything fancy. Ours are just constructed out of a sheet of 1/2” plywood. You can also repurpose old drawers from a desk or dresser that add a nice touch and charm!
There are a lot of roost designs and philosophies out there. I figure a bird would typically just roost on a tree branch so that’s the route I went. I collected up some tree branches from around our property, screwed them together to make a ladder and leaned it against the barn wall inside the coop. It’s worked out great!
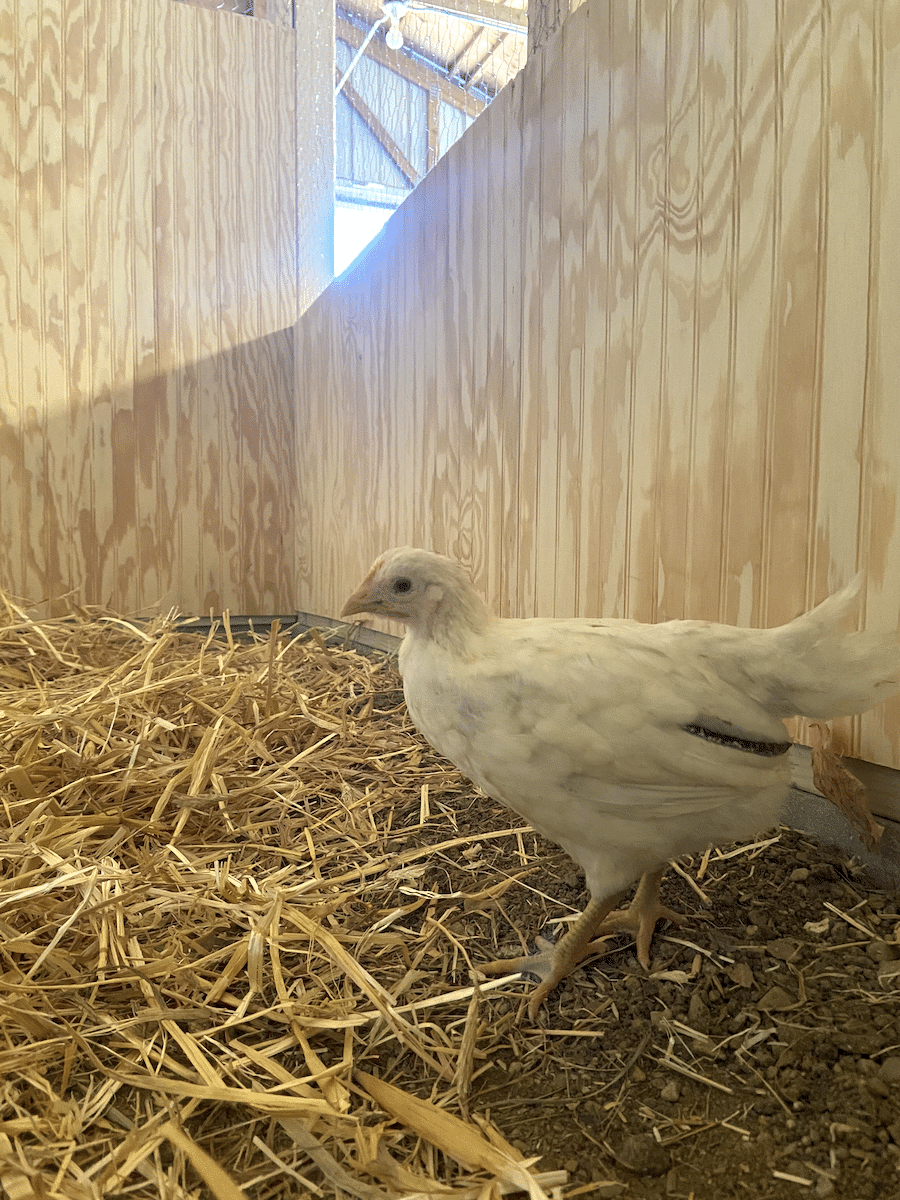
The last thing you’ll need is to line the floor of your coop with straw, wood chips, or wood shavings as a bedding for your birds.
And you’re all set!
Chicken Coop Inside Barn – Advantages & Disadvantages
We have seen a bunch of advantages to having your chickens inside your barn, with just a couple disadvantages. Let’s look at those.
Advantages
Stays dry
Barns already have a solid roof overhead. And most have solid walls too. This allows the construction of your barn coop to stay pretty simple without needing to make it tight from the elements. With regular cleaning, your chickens will stay happy and dry in your barn coop!
Extra protection
Really having a coop within a barn is almost like having an extra layer of protection form predators getting to your chickens. If your barn is sealed up good and you build your coop to keep predators out, you can rest easy at night knowing your gals are safe and secure.
Water and supplies close by
Most barns are already equipped with a water supply, electrical supply, and you can easily add a place to store food. We just use an old refrigerator that stopped working to store bags of feed in! This makes doing chores a breeze instead of needing run hoses long distances or lug buckets of food and water to a coop.
Ventilation in summer
Most barns have large doors that can be opened up or have built in ventilation in the roof. Barns can warm up quickly in the summer heat. We have large doors we open up on both sides of the barn and this provides the perfect cross ventilation to keep the coop comfortable.
Warmth in winter
Barns can also be closed up tight to trap in heat during the cold winter months. I remember when we had smaller standalone coops doing things like running heat lamps and wrapping plastic around the coop to trap heat. That was expensive and just doesn’t look great. The barn has kept our chickens plenty warm without any extra measures needed.
I will note that part of the project I intended to get to but haven’t yet was to frame out the exterior barn wall inside the coop to add paneling and insulation to it. This is the one vulnerable area where cold air enters the coop. An extra wall layer and some insulation would really help keep the cold out.
Disadvantages
Lose barn space
Space in your barn can definitely be a premium. I get that. And you do lose space with a barn coop that you might have other uses for. But with still being able to store supplies on top of our coop, we found the lost space is not as big of an issue as we might have thought initially.
Dust
Chickens stir up dust. It’s what they do. Like, absurd amounts of it. You can clean your barn and come back two days later and find it just as dusty as before. If that’s a big concern for you or you use your barn for other activities that don’t mingle well with dust, then a coop in your barn might not be the right fit.
Poop
It’s definitely possible to add a door directly to the outside and keep the rest of your barn sealed off from chickens getting in. But doing so can be a challenge. Our chickens have free-reign of the whole barn and we all know what that means. Poop. Everywhere. Again, if you don’t have a good plan of how you’d chicken proof the rest of your barn, then you’d better let the poop reality settle in before building your coop.
Sunlight
Some barns are low on sunlight. Ours at least has some clear transom panels that let in light along the walls. Plus we keep the doors open during the day. But it’s still fairly dark in there. When I do frame out that exterior barn wall in the coop I plan to add some windows for extra light and ventilation.
Looking for more chicken raising tips and tricks? Check out these posts:
- Simple Outdoor Chicken Brooder Ideas
- How To Care For Baby Chicks
- Easy DIY Heated Chicken Waterer
- Chicken Tractor Plans for 25 Chickens
Pin it for later!


What are the full dimensions of the barn coop you built? I am looking to do something very similar to this in my pole barn. Thanks for the information you have provided in this blog
It is roughly 8’x16′ by 8′ high. Are you looking for more exact numbers than that? Basically what I did was buy 8′ lumber and just framed it all out as much as possible with the 8′ lengths. The poles in my barn are 8′ o.c. so it worked out really well to build the walls off of those poles. Hope that helps!
Sounds good, thanks for ideas
You bet! Thanks for stopping by!
Exactly the inspiration I was looking for! Thank you!
Awesome, so glad it was helpful! Thanks for stopping by and good luck!
I did this is my barn using 2x4s & chain link with chicken wire also on the bottom 18″ or 24″.
Adding a 2nd coop next to it for chicks made integrating them easier since the adults were able to see the new birds as they were growing. The only problem there was when chicks were hatched in the big coop ad the momma birds wanted to take the purchased chicks under their wing with their own offspring.
My biggest problem was that the birds started getting on top of the coop& sleeping there. I used some cross bracing & welded wire which provided a secure & ventilated coop but allowed those on top to poop on those below. I put plywood over the smaller coop to protect the chicks but it was a disgusting mess trying to clean. After 2 years I gave up trying to clean it & just tore it down.
Since having a concrete pad poured in the barn I simply put up some temporary construction fencing (like you see around construction sites). Some birds still sit atop it but I’ve been waiting for lumber prices to come down before building a new coop. I actually found this article while looking for ideas before making final decisions on my design.
I liked you on FB. I have my Chicken photo album st to public viewing.
I’ll try and check it out!
Thanks for sharing your setup and experience! There’s definitely a ton of variations you can do when building a barn coop. I could see where that would be really annoying with pooping on top of the coop! Our chickens make it on top of ours occasionally but thankfully it hasn’t been much of an issue. Hope the new coop turns out great for you!