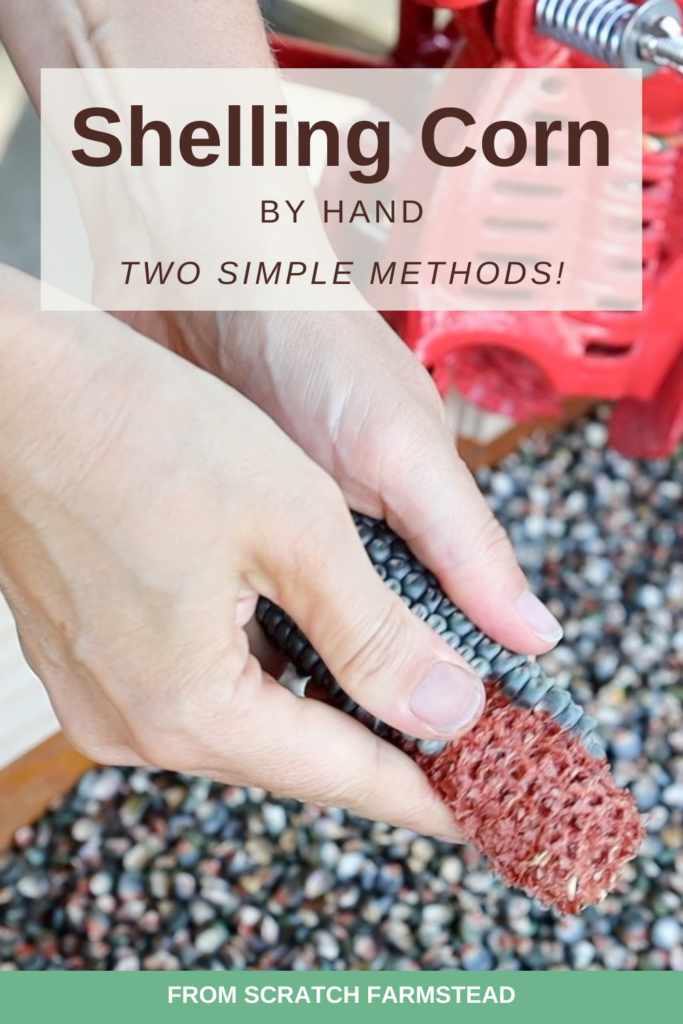
Shelling Corn By Hand (2 Simple Methods)
Growing corn is a great addition to your homestead kitchen! Use it to feed animals. Turn it into many yummy and satisfying recipes. But shelling corn can be a tedious job on a small scale. Let’s look at how to shell corn efficiently—both by hand and using a mechanical corn sheller.
What Is Shelling Corn?
Shelling corn is the act of removing the kernels from the cob. This is not to be confused with shucking, which is removing the husk off the ear of corn. First corn is shucked; then it is shelled.
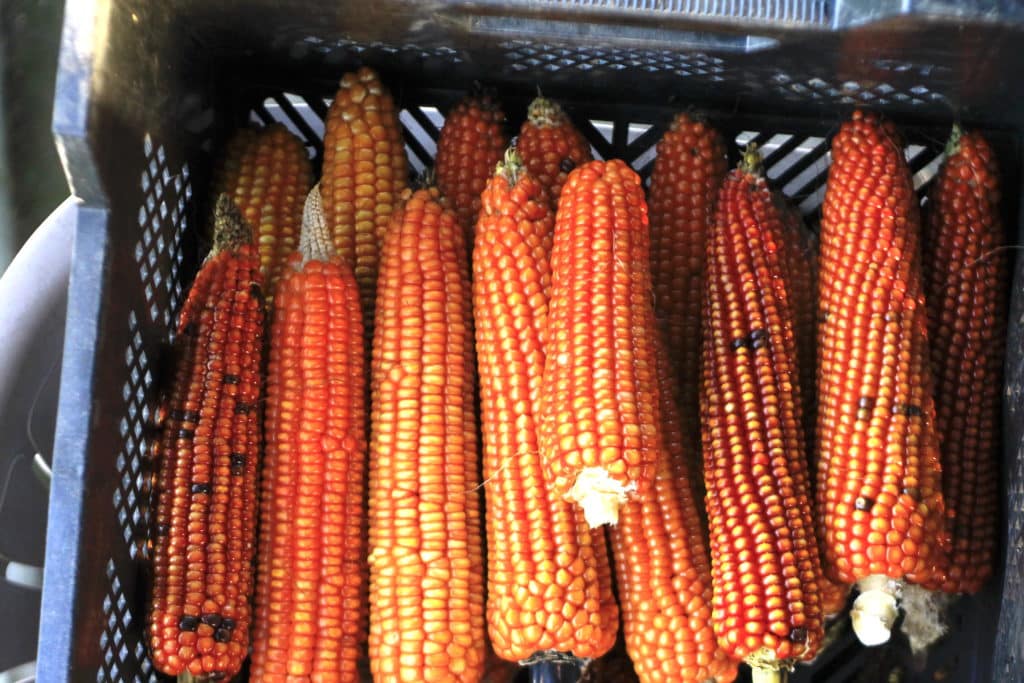
We grow a couple hundred ears of corn every year on our 5 acre homestead. Once the corn stalks turn yellow or brown in late summer or fall, we harvest all the ears of corn from our 3-sisters garden.
The corn needs to dry for a couple months before being shelled and eaten. So, after harvest, we shuck the corn by peeling back and removing all the husks, or leaves that wrap the ear of corn. The shucked corn can then be stored in a cool, dry, and dark place to dry out. We do this in our basement either by hanging it or storing in bins or boxes that allow for airflow.

After 1-3 months, your corn will be completely dried out and ready to shell! We shelled our corn entirely by hand for years. It’s tedious work.
Last year, with worn out thumbs, we thought, “There’s got to be a more efficient method for shelling corn out there!” That’s when we discovered mechanical corn shellers.
We’ll break down both options for shelling corn below!
History of Shelling Corn
For most of history, corn has been shelled by hand. Sometimes called a “shelling bee”, family and friends gathered together to shell corn and fill their buckets. Cobs were tossed in a pile where they had multiple uses including fuel for heating.
It wasn’t until the early 1800’s that mechanical corn shelling came into being. Early shelling machines left the kernel and cob together requiring the operator to manually separate the two. A new design concept was introduced in the 1840’s that had the capability to shoot the cob out the side after the corn was shelled. The Black Hawk Corn Sheller by A. H. Patch was one of the first to utilize this design. These original cast iron corn shellers (and modern replicas like the one featured in this post) are still popular among corn growers today.
John Deere played an important role in pioneering the industrial corn shelling processes we have today. This started in 1915 with their hand cranked No. 1 Corn Sheller unit. Later, Deere mobilized the process with tractor-powered corn shellers.
Today, modern Combine Harvesters have the ability to separate the ears of corn from the stalk, shuck and shell each ear, then spread the remaining plant material back over the field in a single pass.
HOW TO SHELL CORN – 2 WAYS
Many methods and devices exist for shelling corn. Here, we’ll focus on two: shelling corn by hand and using the Pleasant Hill Grain Mechanical Corn Sheller.
1. Shelling Corn By Hand
There’s no need to overcomplicate shelling corn by hand. Your fingers are your tools and you pry, pluck, pop, shoot—whatever means or method it takes—to remove each individual corn kernel from the ear.
Getting started is the hardest part. The kernels are almost locked in place when the ears are full. But once you get started and a row or two of kernels has been removed, it’s much easier to speed up the process and pluck more efficiently.
Here are the steps:
Step 1: Grab a bucket, box, or container to collect your shelled corn kernels into. Hold your ear of corn firmly over it.
Step 2: Start at the bottom, or wider end, of the ear of corn. Pluck the first couple rows of kernels off in a circular pattern. You may need to dig your finger nails in to pry free some of the stubborn kernels that won’t let go. Once released, kernels should pop right off.
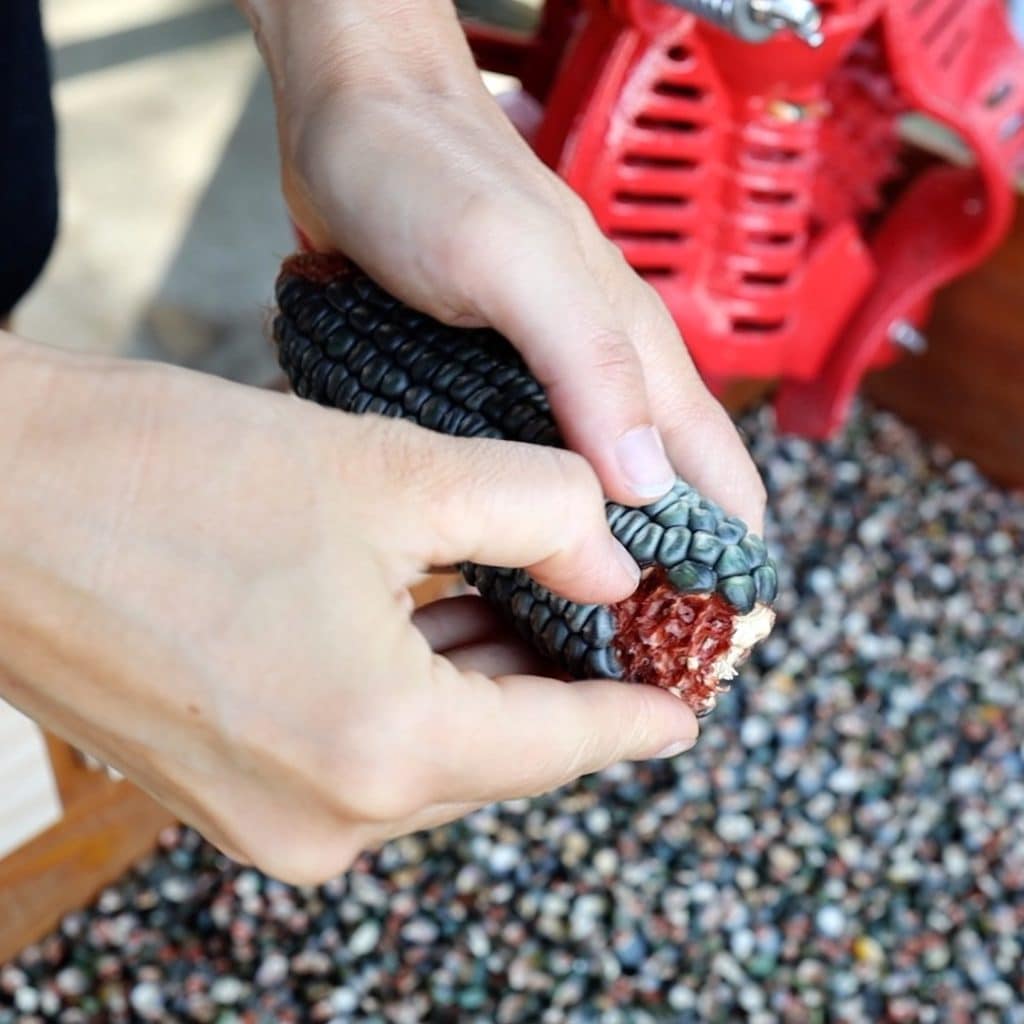
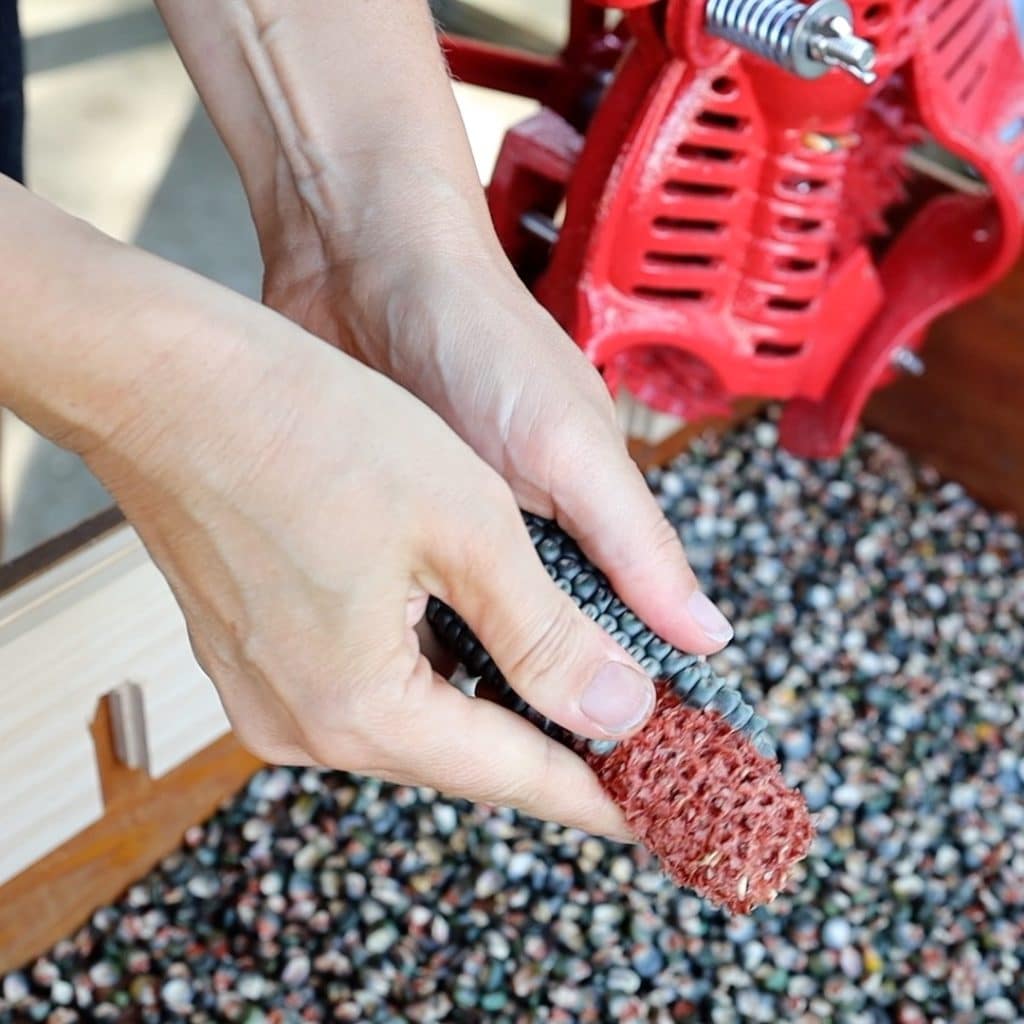
Step 3: Continue prying kernels free in a circular motion moving down the whole ear or corn. We typically use our thumbs. You should find it easier to release larger sections of kernels at time while you go.
Step 4: Pluck all the kernels and you’re done! Collect up the cobs afterward to compost or find other uses for.
Some recommend first removing two rows of kernels the full length of the ear of corn first. Then you pry the rest of the kernels off by by bending them to the side, in a circular motion, where they release more easily. We’ve found that all corn releases differently when hand shelling depending on the breed, size, and shape. Try both methods and see which works best for you!
As you can imagine, shelling corn by hand is a slow process. Each ear of corn can take 1-5 minutes to shell depending on how big and/or stubborn it is. Let’s look at a quicker method using a mechanical corn sheller.
2. Shelling Corn With A Mechanical Corn Sheller
We purchased the Pleasant Hill Grain Corn Sheller in 2022. It’s been a game changer!
We used to shell corn by hand as needed. What this equated to was not eating the corn we grew very often because of how time consuming it all was. Not only did we need to whip something up from scratch, but first we needed to shell however much corn we needed by hand, then mill it into cornmeal using our hand cranked grain mill.
Now, thanks to our mechanical corn sheller, we have corn available to us at any point stored in 5 gallon buckets!
To get going, you will need some basic supplies. Here’s a list:
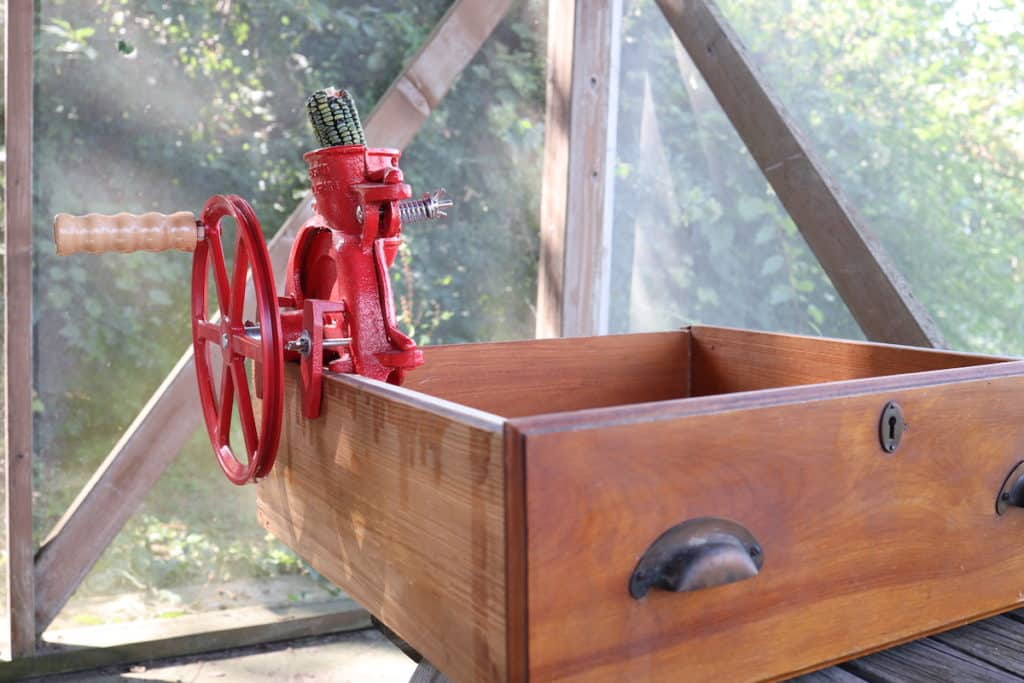
- Pleasant Hill Grain Corn Sheller
- Sturdy Wood Box
- Clamps
- Bucket or Box to collect cobs in
The steps for using your mechanical corn sheller are very simple. Let’s lay them out here along with some considerations.
Step 1 – Setup
Start by setting up your corn shelling station. The flow is to: first, have your bin of corn ready to be shelled; next in line is your corn sheller and the box it is mounted to; then last is your bucket or box to catch the cobs that shoot out of the sheller.
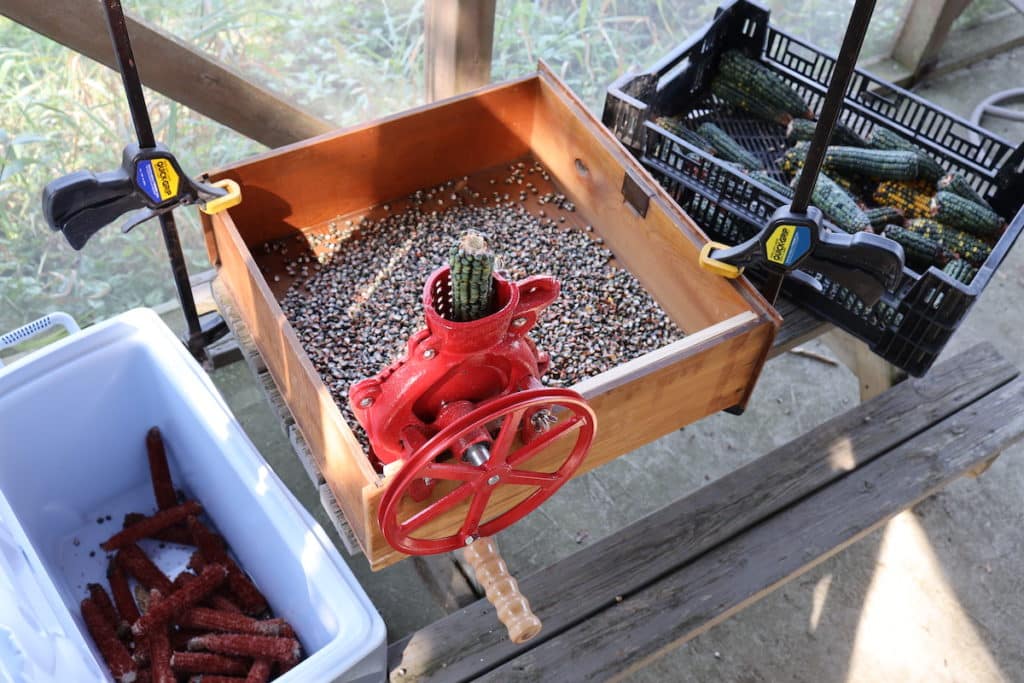
The sheller has two clamps with wing nuts for mounting. Mount the sheller to your wooden box first. Note that the ideal wood box would be about 1-1.5” thick for the mounting brackets. We use an old wood drawer and need some wood shims to add thickness for a secure mount.
Your box will also ideally be at least 12” deep. You lose space in the box as the corn kernels collect. And too shallow of a box will not allow for the cob to pass through correctly to shoot out the side of the sheller.
If your box is not heavy enough to stay in place on it’s own while shelling corn, then clamps may be necessary. I use two quick clamps at opposite ends of the wood box to clamp it securely to the table beneath it.
Once your sheller and box are firmly mounted, setup your bucket or box to collect cobs, bring your corn over, and it’s time to get shelling!
Step 2 – Shelling
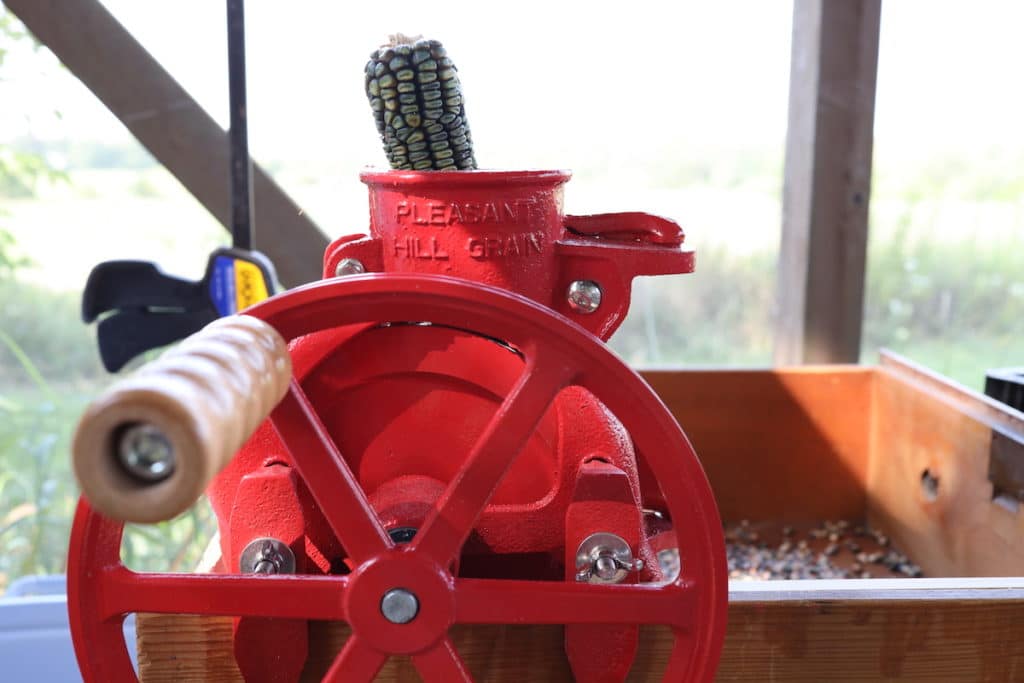
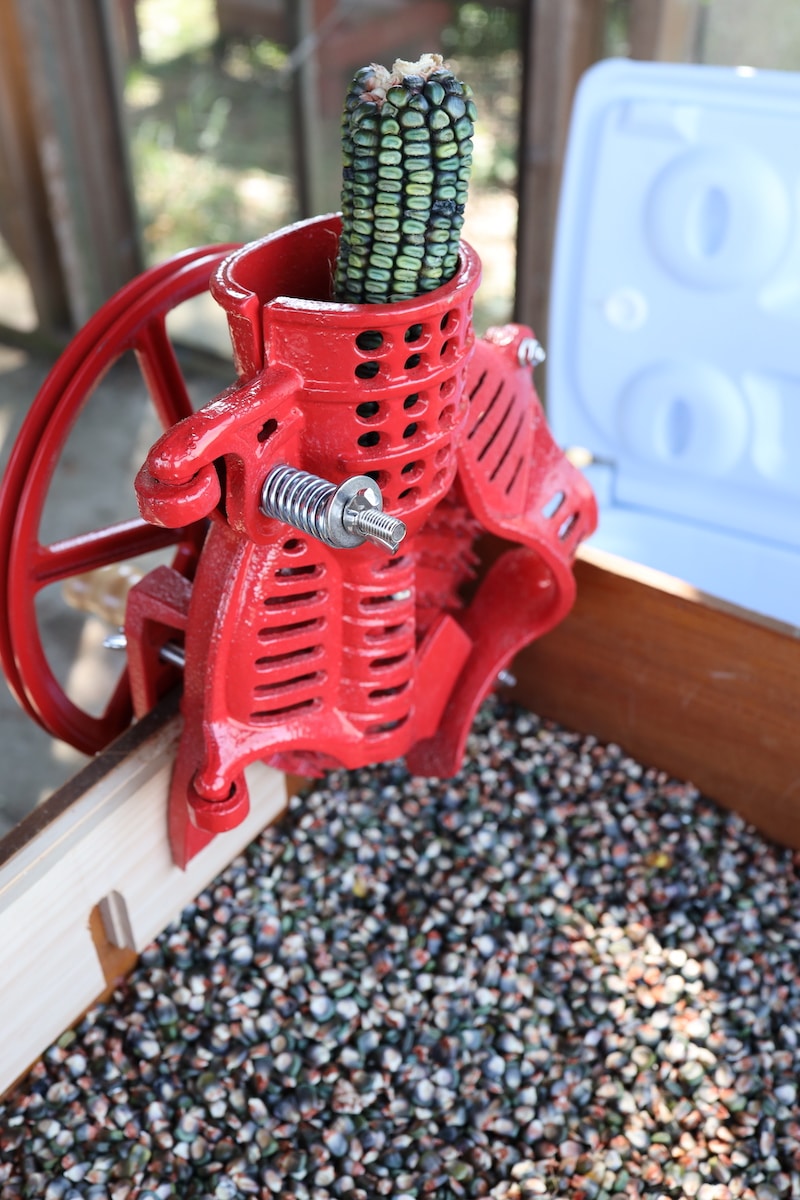
Feed an ear of corn, pointy end down, into the top hole or hopper. Turn the crank handle clockwise. You may need apply a bit of downward pressure with your other hand on the ear of corn until it catches.
As you crank, the ear of corn will spin downward and the spiked plate will strip the kernels from the cob. Once the ear passes all the way through, the plate will pull the cob to the side of the sheller where is ejected into the waiting bucket or box.
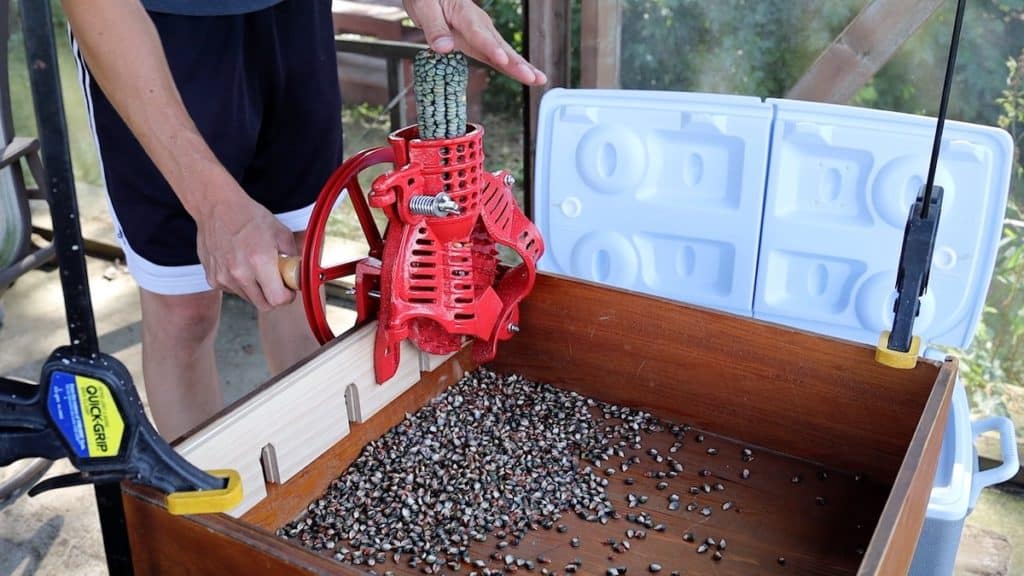
There is an adjusting screw on the spring tensioner that may need to be adjusted as you go—tighter for smaller ears and looser for larger ears. Occasionally, we’ve found that not all the kernels are removed. If there’s just a few kernels left, we pluck those by hand. If many were missed, you can pass the whole ear of corn back through the top of sheller a second time.
It’s all pretty straightforward, but we do find that sometimes you need to help the process along by hand—being sure to turn the handle slowly and safely to not crunch a finger!
Step 3 – Finishing
Once you crank out all your shelled corn, you’re almost there!
We’ve found it’s worth sifting through your box of kernels by hand and looking for any large pieces of the cob that might have broken off and fallen in with the kernels during the mechanical shelling process.
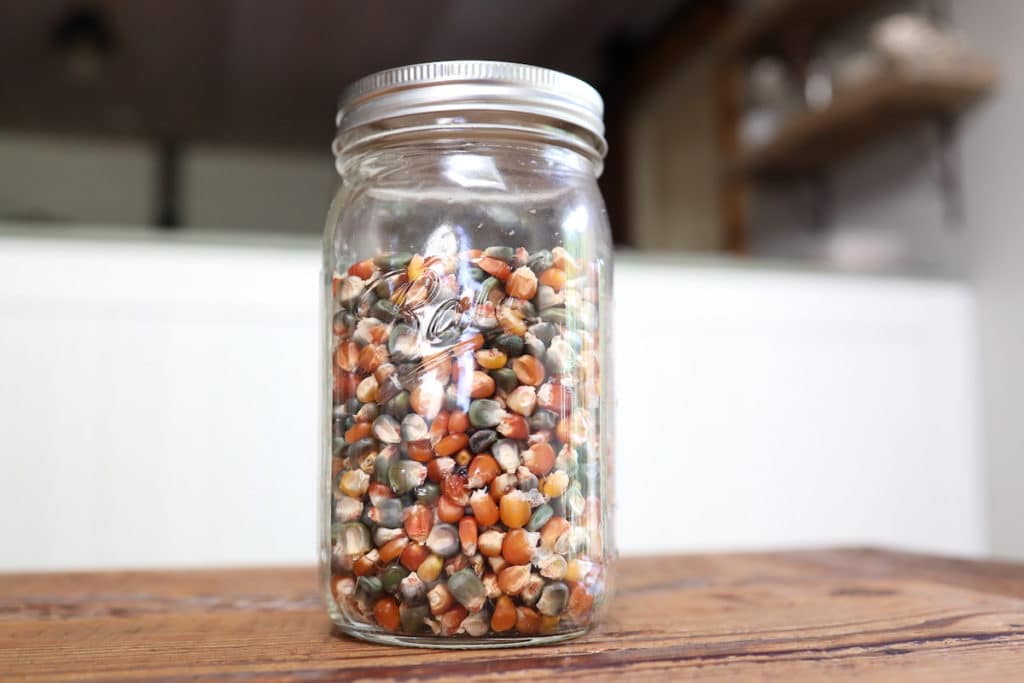
Once you remove those, pour your shelled corn into containers for storage. We like to use food grade 5-gallon buckets. Mason jars or other food safe storage containers are also good options.
And that’s it! You’re stocked up on corn that can feed your family for years to come.
Which method of shelling corn by hand do you recommend?
Choosing to shell corn by hand or invest in a mechanical corn sheller really depends on the quantity of corn you shell each year.
If you are simply shelling one or two dozen ears of corn each year or less, then you’re probably fine to do it by hand.
If you are regularly shelling 50, 100, or more ears of corn every year, then investing in a mechanical corn sheller is definitely worth it! The time you save will pay for the cost of the sheller in no-time.
But even if you’re only doing a few ears of corn and want to upgrade to a mechanical corn sheller, we won’t judge 🙂 It’s a pretty cool contraption to have and fun for the whole family to partake in.
How much time can you save with a mechanical corn sheller?
We did a little friendly competition to test this! One of us shelled an ear of corn by hand while the other saw how many ears of corn we can pass through the mechanical corn sheller in the same time.
The results: 11 ears of corn mechanically versus 1 ear by hand. That’s significant time savings!
And if you’ve really got your mechanical corn shelling process dialed in, you can probably crank out a lot more than 11! It’s advertised as being capable of shelling 10-15 bushels of corn per hour.
Which Mechanical Corn Sheller do you Recommend?
We only have experience using the Pleasant Hill Grain Corn Sheller. We have been very impressed with the quality and performance this corn sheller offers and would definitely recommend it to anyone shelling their own corn.
You can also look for used versions of the original Black Hawk Corn Sheller that are still out there. We’ve heard of others still using these today, which speaks volumes to their design and durability.
What kind of corn can be shelled using a mechanical corn sheller?
This style of mechanical corn sheller can only be used with dry corn. Any high moisture corn, or corn that is not fully dried out, should not be run through it. This includes sweet corn.
We typically use a dried dent corn, although we have used it for other corn varieties. Our favorite is Oaxacan Green Dent Corn.
Are there Cons to using a mechanical corn sheller?
Only very minor cons that can be easily overlooked considering the amount of time you save.
One thing is that some corn kernels can have a tendency to shoot while shelling. For this reason, we like to setup our shelling station outside to minimize cleanup and chasing down loose kernels all over the house.
Also, because of the mechanical churning the cob goes through, there does tend to be more chaff and other parts of the cob that end up in the kernels than you get from shelling strictly by hand. Spend a minute or two removing what you can after shelling and you’re good to go.
How long does shelled corn last?
When stored in a dry, cool place, shelled corn will have no problem lasting a year. Grains stored in their whole form are much better able to stay fresh and preserve their nutritional value. As soon as grains are milled into flour or meal form, the shelf-life is drastically reduced. Many would say that corn stored in its whole kernel form can remain nutritionally viable for years.
Uses For Shelled Corn
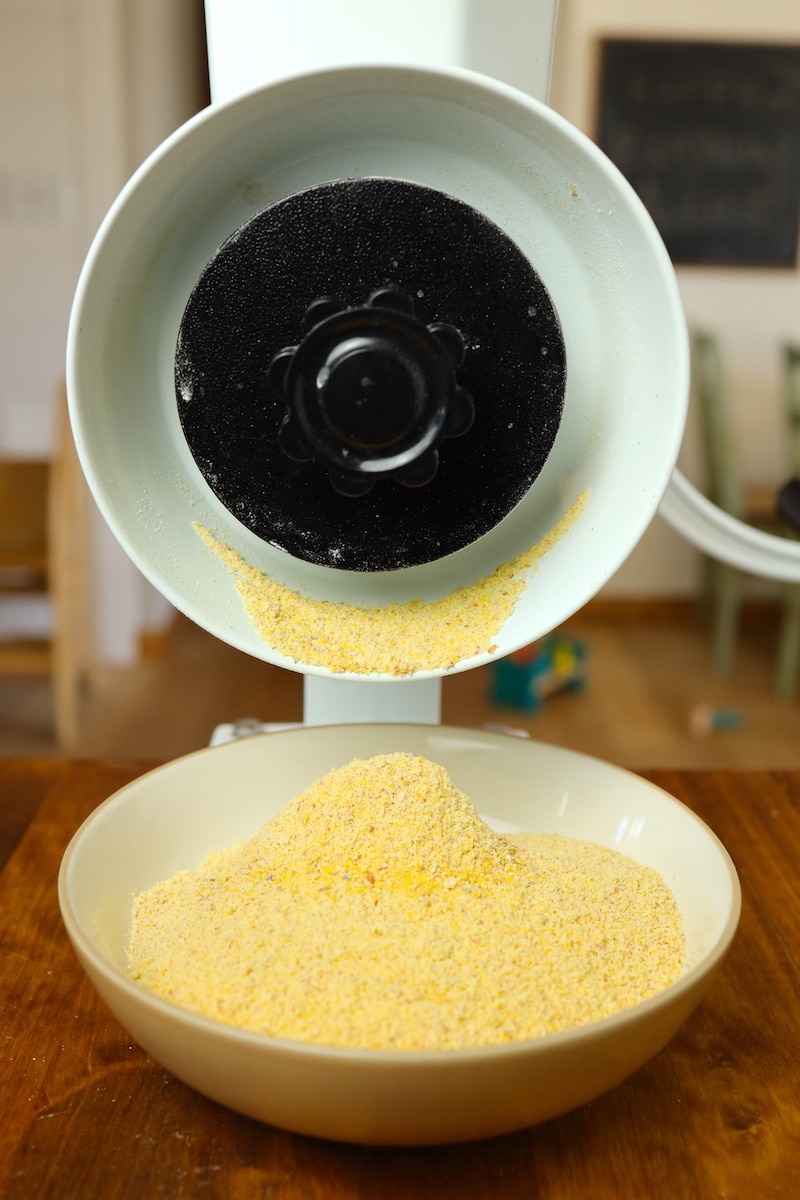
Dried corn is most commonly ground into cornmeal and then used for polenta, porridge, grits, cornbread, and other delicious foods. We use our Wondermill Jr. Deluxe to mill our corn into cornmeal for cooking.
Cracked corn, or corn that has been ground into smaller pieces, can also be used for feeding animals on your farm or homestead.
Keep On Shelling!
If you haven’t yet, we hope you’ll give growing corn a try in your garden! It’s a remarkable, energy rich storage crop with so many uses in the kitchen.
And if you’re flowing in ears of corn like we are and wondering how to shell it all, we hope this has been a helpful guide!
What do you plan to do with your corn? We’d love for you to leave a comment 🙂
Some of the above links are affiliate links. This means we earn a small commission on qualifying purchases at no cost to you. We are so appreciative of your support!
Check more inspiration for your homestead kitchen:
- Cornish Cross vs. Freedom Ranger Chickens
- 14 Frugal Homestead Ideas
- Benefits of Rural Living on a Homestead
- Breaking Down The Cost Of A Family Milk Cow
- Homestead Garden Plan – Year Round Food On 1/4 Acre
Pin it for later!


Hi Jim and Joelle; I liked your video – fun and helpful! I’m thinking of buying one of these shellers from Lehman’s, because as I’ve aged my skin tears now when I shell my corn. But I’m wondering: does a mechanical sheller render the seed no longer viable for germination? Thanks for the video. Brian Reeves
Hi there! That’s a really good question. We don’t actually have personal experience with it yet since we purchased popcorn seed that we planted this year and didn’t plant any of the corn we shelled last year. However, I don’t believe it would make the corn no longer usable as seed just from observing the process and the corn after it is shelled. There’s no visible damage, compression or cracking to the kernels themselves. And no heat is applied in the process. So it should be fine. My guess is that when farmers were using the original version of these 100+ years ago they were then setting aside whatever seed they needed for seed the next year and planting it. So again, no personal experience with the corn germinating, but I see no reason why it shouldn’t. Hope that helps!