From Scratch Farmstead
  • About
  • Homestead How-to’s
    • Family Milk Cow
    • Gardening
    • Chickens
    • Small Scale Farming
    • Buying A Homestead
    • Homestead Living
  • Nourishing Recipes
    • Home Dairy
    • Food Preservation
    • Breakfast
    • Main Course
    • Sides
    • Dessert
    • Sauces & Condiments
  • Natural Living
    • Skin Care
    • Home Essentials
    • Living On A Budget
    • Our Healing Journey
    • Homestead Skills
    • DIY
    • AGA Stove
Tag:

chicken coop

how we made our predator proof chicken coop
ChickensHomestead How-to'sSmall Scale Farming

Predator Proof Chicken Coop Essentials You Need To Know

by From Scratch Farmstead February 11, 2023

The reality of backyard chicken keeping is that predators come with the territory. It’s not a matter of IF, but WHEN. So, there are some must-do steps to make a predator proof chicken coop that every chicken keeper NEEDS to know and implement.

We had never lost a chicken, then…

We’re grateful in our 9+ years of keeping backyard chickens to have a pretty good track record.

This includes about 5 years of raising chickens in our suburban backyard where we never had a predator casualty! We started with free-ranging 6 hens out of a stationary coop and quickly learned two things:

1) Our chickens got more and more adventurous over time.
2) More and more predators took note of our chickens over time.

Hawks, raccoons, skunks, neighbor’s dogs, and even the family of foxes that moved in next door every winter. We ran up against all of it.

When foxes moved next door to our free ranging chickens

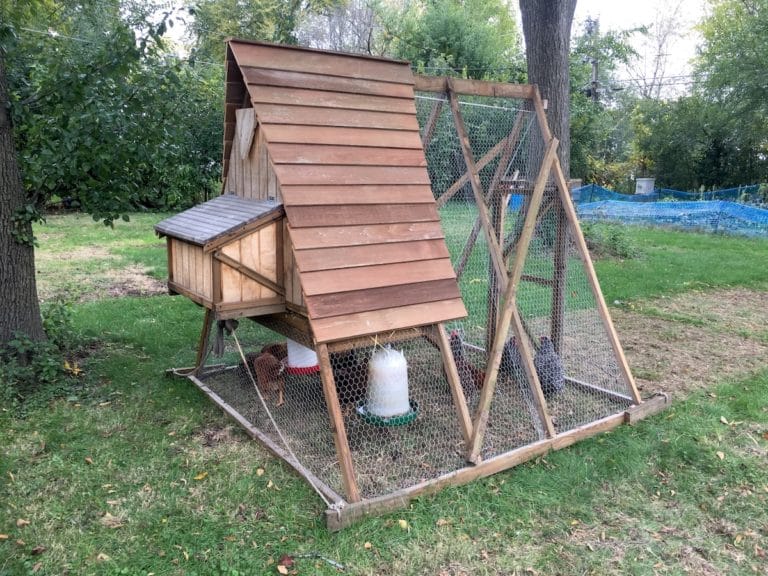
That’s when we discovered mobile coops and built an A-frame chicken tractor out of a used kids swing set. Moving them to fresh grass every day gave us many of the benefits of free-ranging while keeping them protected during the day and night. It worked great!

When we moved to our current 5-acre homestead, we expanded once again to 50+ chickens that roam free all day and sleep in our chicken coop inside our barn at night. That many chickens has come with its own learning curve. And because they free-range all day, predators have proven challenging to manage.

custom a frame chicken tractor in suburban backyard
chicken coop built inside pole barn

After some close calls, we finally lost our first chicken to a predator—a hawk! Another hawk casualty followed. Then, a rooster mysteriously disappeared one day—likely picked off by a fox. But, we’ve taken some measures and not had any incidents since!

Whether you’re on an urban or suburban lot, or out in the country, we’ll share everything we’ve learned about keeping your feathery flock safe all day and all night!

Common Chicken Predators

When it comes to predators, chickens are unfortunately an easy prey.

By day, chickens can be oblivious and flighty. By night, they sleep hard and are entirely immobile and vulnerable. Therefore, the list of predators can be lengthy!

Chicken Predator List:

  • Coyotes
  • Foxes
  • Racoons
  • Skunks
  • Rats
  • Opossums
  • Weasels
  • Bobcats
  • Bears
  • Birds of prey
  • Neighbor’s (or stray) dogs & cats
  • Snakes

Each predator represents different threats and at different times. 

Coyotes, foxes, bobcats, dogs, and birds of prey might result in missing chickens that are taken. Smaller chickens, chicks, or eggs can be taken by smaller predators such as opossums, skunks, rats, cats, and snakes (while still including coyotes, foxes, and birds of prey). Predators like birds of prey and raccoons can also result in missing heads or limbs from chickens.

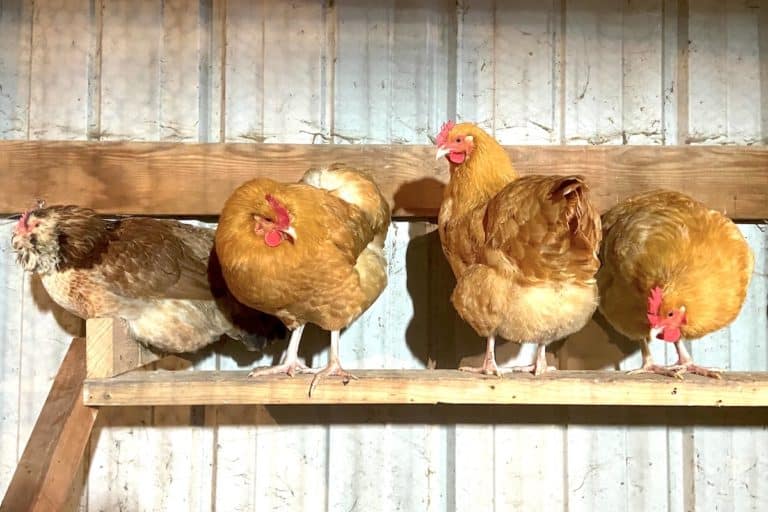
chickens roosting on diy 2x4 ladder roost design

Many predators like foxes and coyotes represent a dual threat during the day and night. Hawks will typically strike during the day while owls might carry off chickens in the evening. Most rodents are on the prowl at night, but could still be active in the early morning or evening hours.

Yes, the threats are many. But keeping your chickens safe is not a lost cause! With some basic measures, you can keep your feathery friends safe and put your mind at ease! Let’s dig in.

Predator Proofing Basics

Any chicken coop is comprised of 6 sides. The four walls of the coop, the top, and the bottom. To keep your chickens safe, all 6 sides must be secure.

If you are thinking your chickens are safe if the coop sits tightly to the ground, you are mistaken. Most of the predators on the above list can easily dig under a coop, even in a single night, to gain access.

stationary backyard chicken coop

And on top, even with a coop and run wrapped tightly in chicken wire or latches on every door, you birds may still be at risk! The materials and methods you use to secure your coop could make all the difference.

So let’s dig deeper into the essentials of a predator safe chicken coop.

5 Predator Proof Chicken Coop Essentials

Long lists of ways to predator proof your chicken coop can get overwhelming. We’ll look at some alternative options later in this post. But for now, let’s look at the simple predator proofing methods that every chicken keeper should implement.

1. Prevent Predators from Digging Under

As discussed above, the bottom side of a chicken coop is often the most under-looked point of entry for predators. Here are some options to address it.

Fully Enclosed Bottom Side

The ideal solution is to fully enclose the bottom side. This option makes the most sense for small sized coops. We did this for our stationary coop when living in the suburbs. I dug out the footprint of the whole coop 8-12” down. Then I lined the underside of the coop with hardware clothe bending the sides up to meet the bottom of the coop to create a continuous bottom barrier. Then, I filled the base of the coop back in with soil on top of the hardware cloth. With this solution, as long as all the doors were securely shut on top, the coop was 100% predator proof from all 6 sides.

chicken coop with hardware cloth bottom

Buried Hardware Cloth

As your coop increases in size, digging out the entire base gets pretty challenging. In this case, you can dig a trench around the base of your coop, and bury hardware cloth vertically at least 12” down. Most predators will try digging down right at the base of your chicken coop and get discouraged by the buried hardware cloth.

Similarly, an alternative is burying a hardware cloth apron around your coop. This involves digging a few inches deep around your coop, burying a horizontal layer of hardware cloth at least 12” wide, and then replacing the soil on top of it. While not as effective as hardware cloth buried vertically, this can be an easier addition to a coop that’s already in place.

Concrete Blocks

Yet another solution is to swap the buried hardware cloth option with either concrete blocks or bricks. This is what we did on our chicken coop inside our barn. The benefit is that the blocks can act as a solid foundation for your coop, especially if it’s on the larger side. Just a note to make sure your blocks still go down at least 12”. Our only went down 8”, and after some rats learned they can dig underneath the blocks this past winter, I’ll be needing to go in and retrofit some hardware cloth in addition.

installing concrete block chicken coop foundation
cmu foundation for chicken coop in barn

2. Use Hardware Cloth (when necessary)

While chicken wire is most commonly associated with chicken coops, it’s easier for predators to penetrate than you may think. And the hole sizes are large enough for some predators to reach through.

freedom ranger chicken in chicken tractor

So, when able, use hardware cloth—chicken wires tougher, more robust cousin. Whereas some predators have been known to break through chicken wire, especially at ground level, hardware cloth will stand up to any common backyard chicken predator.

A few considerations:

1) Correct installation is important! Your hardware cloth is only as secure as the fastener holding it. Shallow staples may not hold tight enough to keep large predators out. When building our chicken coops and tractors, I bought 1/2” staples and used a pneumatic brad nailer to install them. Nothing is ripping those out!

2) Use 1/4” Hardware Cloth. Hardware cloth comes with many sizes of openings. Sticking with 1/4” (1/2″ at most) is your best bet. Larger openings might allow predators to get a claw or mouth through it. And smaller predators, like rats or snakes, might be able to sneak through a larger opening. No predator should be able to do substantial harm through 1/4” hardware cloth.

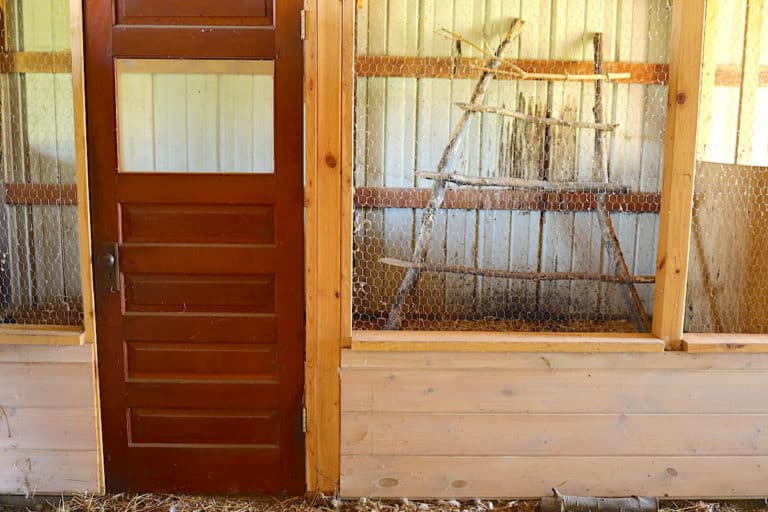
3) Use it if it makes sense. Hardware cloth is expensive! Much more so than chicken wire. This is where the “when necessary” part comes into play. There are times where we’ve opted for chicken wire over hardware cloth and still feel our chickens are safe. For instance, predators are less likely to get through chicken wire when it’s raised off the ground. So, on our barn chicken coop, I built it with solid knee walls at the base, and then installed chicken wire above the walls.

chicken coop in barn with repurposed door

Also, when we built our mobile chicken tractor, I surrounded the run with chicken wire because the enclosed area that the chickens slept in at night was impenetrable. Nothing ever got to them at night and they were protected from aerial predators in the chicken wire run during the day.

3. Make Enclosed Coop Area Impenetrable

The enclosed area of your chicken coop should be able to be 100% sealed tight! This is where your chickens will sleep at night, roost, and lay eggs—the times they’re most vulnerable.

This means that:

  • Solid materials should be used (wood, metal, etc.)
  • No gaps, cracks, or openings should be greater than 1/4”
  • Doors should be able to be closed up completely and latched
  • Any air vents should be covered over with hardware cloth
mobile chicken tractor with laying box
stationary backyard chicken coop with hardware cloth

Chickens will begin to retreat to their roosting location as the daylight fades. This is also when predators become most active. Our strategy has always been to go out each evening and close the door of the enclosed area of the coop so the chickens are locked up safe. This way, even if something manages its way into the run, the chickens will still be protected within the coop.

4. Use Secure Door Latches

Going off of that, any time there is a door or access point in the coop, it’s important you install the right type of latch. Animals are smart—and motivated. Raccoons, for instance, have been known to open up simple hook, pin, or throw latches. 

A 2-step lockable latch is most secure. This includes spring locks and barrel locks. These require more than just a simple and singular motion to unlock and will prove a bothersome task for any furry foe without opposable thumbs.

nestinb box on mobile chicken coop

5. Be Observant and Vigilant Every Day

Perhaps the best defense of all is you! Your eyes and ears will help keep your flock protected when threats arise. 

There have been numerous times we have heard a commotion in the yard and come bolting out the door only to narrowly interrupt a hungry hawk from dealing its deadly blow. Our takeaway has been, DON’T WAIT! When you hear something suspicious, run out there right away, or throw open the nearest window and yell with everything you got. Sometimes, each second matters!

feeder and waterer in a frame chicken tractor

Beyond the extremes of when predators do surface, your role as protector is also important in the mundane daily tasks and chores. Like checking, and then double-checking, that you’ve locked up the coop securely each night. When you’re lying in bed wondering, “Did I close up that latch I opened earlier in the day?”—ALWYAS go out there and check! It’s worth it every time. Even when we doubted, there have been countless times we did indeed leave something open.

And when you’re out doing chores and tending to your chickens each day, check for any signs of predators. Are there tracks around? Was something gnawing or digging? Is something moved or out of place? These things are sure signs predators are about and you should be extra vigilant. Or, you may need to reinforce an area of your coop.

Other Predator Safe Chicken Coop Ideas

Beyond the basics, these are other predator proof chicken coop ideas I have seen successfully implemented in backyard, homesteads, or farms.

Guardian Animals

Many animals or livestock can act as companion animals to help keep chickens safe. This is especially true when chickens are free-ranging and beyond the protection of the coop. 

Here is a list of guardian animals that can protect your flock:

Roosters
Geese
Guineas
Livestock Guardian Dogs
Goats
Donkeys
Llamas
Cows
Pigs

While most urban or suburban settings won’t allow it, a rooster is a likely first candidate to guard your flock. Many roosters take their role of protecting the flock very seriously. Our roosters will accompany our hens when out foraging, keep a watchful eye, and alert them of any threats. Roosters will also stand their ground and may even give their life to protect the flock. We had a rooster mysteriously vanish without a trace, while no hens were harmed—likely from standing up to a predator.

free ranging chickens with roosters on guard

Livestock Guardian Dogs (LGDs) will also ward off predators. Stella, our Maremma LGD on our homestead, takes her role protecting our cows and chickens very seriously. Since getting her, we have rarely seen hawks come anywhere near our chickens where they were under attack almost weekly prior.

Maremma livestock guardian dog on a homestead

Electric Poultry Netting

Electro-netting fencing is a simple way to eliminate ground predator threats for your chickens. Companies like Premier 1 Supplies makes poultry netting setups that can surround your coop and run while also providing boundaries for free ranging.

cows on pasture in electro netting
pulling chicken tractors through garden

We use this system for rotationally grazing our cows. So if it can contain our cows, it can keep chickens in and predators out! We also use it as a perimeter around our meat chickens we raise in Suscovich Chicken Tractors. They even make solar fence energizers that don’t require an electrical connection and are easy to install, connect to your fencing, and move around.

Predator Detterents

There are many simple or low cost predator deterrents that can be setup in your yard. Perhaps the most simple is to install a bright light on a motion sensor. Predators don’t like surprise or when things shift and change. Along those lines, there are sprinklers on motion sensors that you can setup near your coop and turn on when they detect motion. I’ve even seen someone setup one of those inflatable floppy people you see at car dealerships to keep predators away. And supposedly it worked!

Removing Feed

Even if your chickens are snuggled away safely in their coop, predators might still be interested in the feed that is left behind. Taking your chickens feeder away at nighttime and replacing it in the morning may help reduce pesky predators. 

Limit Free Ranging

One tactic we’ve used is to limit free ranging to only when we were at home or outside to keep close watch on things. This can get a little complex, especially if you’re regularly on the go. But we found it to be a happy middle ground for a time when predator pressure was high to still give our chickens the chance to roam free and forage.

Try a Chicken Tractor

As mentioned earlier, our mobile A-frame chicken tractor was the right solution for us to keep our chickens safely contained in the coop and run while still giving them regular access to fresh grass. Check out that post for how we were able to build a custom A-frame chicken tractor from a used kids swing set for hardly any cost!

enclosed area of chicken tractor

When Predators Strike…

DON’T GIVE UP!

Losing a chicken is heartbreaking. And sets you back. We know. 

So, let it be a learning opportunity for next time. Any time a predator breaches your coop they’re revealing areas that can be shored up and reinforced for next time.

What tips and tricks have you found helpful for protecting your feathery friends? Drop us a comment and let us know if you have questions!


Related Posts:

Custom A-Frame Chicken Tractor For (Almost) Free
How To Care For Baby Chicks
Simple Outdoor Chicken Brooder Ideas
How To Care For Chickens In The Winter Basics
Chicken Roost Designs | Two Simple DIY Ladder Perch Ideas
Farm Fresh Eggs | What’s the Difference and How to Use Them Safely

February 11, 2023 8 comments
0 FacebookTwitterPinterestEmail
custom a frame chicken tractor in suburban backyard
ChickensHomestead How-to'sSmall Scale Farming

Custom A-Frame Chicken Tractor For (Almost) Free

by From Scratch Farmstead February 4, 2023

When we wanted to expand our backyard chicken flock beyond our small stationary coop without spending a fortune, it was time to get creative. So, we picked up a used, wooden kids playset for free and transformed it into a mobile A-frame chicken tractor. 

This post talks about the benefits of mobile chicken coops and how to build your own custom A-frame chicken tractor for around $150.

What is a Chicken Tractor?

A chicken tractor is simply a mobile chicken coop that is regularly moved to patches of fresh grass. They come in all shapes and sizes (A-frame, rounded, rectangular) and can be constructed using a variety of materials and methods.

The typical chicken tractor design sits on rails (or skids) at the base with an attached rope, bar, or handles used to pull and maneuver the tractor. Sometimes they have the addition of wheels on one or both ends to make this task easier.

rectangular chicken tractor

Mobile chicken coops have long been used. Here, Laura Ingalls Wilder recounts the moveable coop that Pa had built from Little Town On the Prairie:

“She carried the chicks in her apron, to set them one by one into the coop that Pa had already made. It had a front of laths, to let in air and sun, and a little door with a wooden button to fasten it. It had no floor, but was set on clean grass that the chicks could eat, and when the grass grew trampled and dirty, the coop could be moved to fresh grass.”

Beyond moving chickens regularly onto fresh grass, chicken tractors offer many benefits. Let’s look at those.

Benefits of a Mobile vs. Stationary Chicken Coop

Our homesteading journey began with 6 laying hens in our suburban backyard. We kept them in a stationary coop that was a kit from Costco. It was bare bones. But it worked and allowed us to easily get started as backyard chicken keepers.

stationary backyard chicken coop

A couple years in, we started to see some of the challenges and limitations of that stationary coop:

  • It was tight (for us and chickens!)
  • Needed frequent cleaning.
  • Increased predator pressure while free ranging.
  • Trouble keeping free ranging chickens contained to only our yard.
  • And then the difficulty of trying to wrangle the chickens back into the coop during the day when we needed to run out somewhere.

Our video on stationary vs. mobile coops gives a more thorough breakdown of the pros and cons of each and what we ran up against.

But, because of some of those cons of the stationary coop, we decided to venture into the world of mobile coops, or chicken tractors.

Here’s a quick list of the benefits a chicken tractor can offer:

Fresh grass! Chicken tractors are typically moved onto fresh grass each day giving your gals new forage opportunities.

Large run. Tractors come in all shapes and sizes, but often have a larger footprint offering space for chickens to move about.

Easy access. A-frame chicken tractors are tall making maneuvering inside them for daily chores like food and water more manageable.

a frame chicken tractor with backyard chickens

Safe & secure. Your chickens have many of the benefits of free ranging with less risk of predators getting to them.

Urban friendly. Whether you’re often on the go or have close proximity neighbors, your chickens stay in one place and keep your mind at ease.

Less mowing. My personal favorite—when appropriately moved and managed your chickens will mow down your lawn for you while also fertilizing it!

A-Frame Chicken Tractor FAQ’s

Before we get into how to build your own custom A-frame chicken tractor, you’ll want to make sure it’s the right fit for you, your lot, and your flock. Here are some frequently asked questions:

How much land do I need for a mobile chicken coop?

There are several factors that will play into this including the size of your tractor, how many chickens you have, and your yard space. We had our tractor on our 1/3 acre lot, which felt plenty spacious. The minimum time for grass to regrow is 30 days. And it is typically best to move your tractor onto a fresh patch of grass every day. Based on this, my recommendation would be to size your tractor to allow at least 30 moves through your yard before being brought back to its starting point. 

suburban backyard chickens with moveable coop

How many chickens can I fit in my chicken tractor?

Chickens need anywhere between 4-8 square feet of run space per bird to be happy, healthy layers that aren’t cramped. So, step one is deciding the appropriate size of your backyard flock and then building a chicken tractor to suit. We recommend getting a lesser quantity of chickens to start and increasing as able over time as opposed to maxing out your space right away.

Can I let my chickens free range with a chicken tractor?

Yes, you certainly can! Just because the coop is designed to move while still keeping your chickens contained doesn’t mean the door needs to stay shut. If you’re comfortable with them free ranging and have a good setup to do so, then have at it! We would still let ours free range as much as possible if we were at home and keeping watch on them. But, for many of the reasons already mentioned, keeping the chickens in the tractor most of the time was the perfect option to keep our chickens safe and happy in our suburban backyard.

layers free ranging in yard

What about predators?

We never lost a chicken to a predator in our chicken tractor or our stationary coop. With the stationary coop, we were able to dig down and run hardware cloth underneath it to keep predators from digging under the coop. However, the bottom is obviously exposed in a mobile coop. But, most predator pressure comes at night when the chickens have retreated to the enclosed area of the tractor. This means, if you design the enclosed area to keep predators out and make sure they are securely locked up each night, then your flock will likely stay well protected.

How To Build an A-Frame Chicken Tractor From a Kids Playset

Many stationary coops come as a kit or prebuilt. Mobile chicken tractors, however, are much less common to come by and few plans for them exist. Therefore, you will likely end up building your own custom tractor—like we did!

This post is not an exact A-frame chicken tractor plan to follow. Rather, it can give you the inspiration and general guidance to build your own custom A-frame chicken tractor. And do so at a very low cost. 

Here’s what you’ll need to start.

Materials

Kids Playset – This project gives you the added bonus of up-cycling lumber from a used children’s playset to give it a second life. If you search for playsets on Craigslist or FB Marketplace there are usually TONS of options. And many are free! Look for something simple with an A-frame design for swings and other playset accessories. This will give you enough lumber for the majority of your chicken tractor.

free used a frame kids playset
free used kids playset

Roofing – If the playset doesn’t already have roofing, you’ll need to come up with a material option for roofing. We found used cedar fencing that someone had listed for free, removed the pickets, and lapped them as roofing. You can also use metal or PVC panels, asphalt shingles, or any other waterproof material that will stand up to outdoor use.

used cedar fencing panels
fence panel pickets used for roofing on chicken coop

Siding – Some playsets may give you the siding you need for the enclosed coop section and nesting boxes. Ours did not. So, I picked up a 4×8 sheet of 3/4” exterior plywood that I used for the enclosed coop area and laying boxes.

After tracking down those main materials, you’ll need a few other things.

Here’s a more complete materials list:

Lumber from playset
Roofing
Siding
Chicken wire
Wire cutters
Hinges & latches
Wheels (optional)
Rope
Various sizes of exterior grade construction screws

Tools

Most playsets will be made with 4×4 posts. These are beefy and will be too heavy to construct a mobile coop out of. Therefore, I took those 4×4’s and cut them lengthwise, or ripped them down to smaller sizes. A table saw makes this task so much quicker and easier. But, you can also do it with a circular saw if that is what you have. Likewise, a miter saw will makes some angled cuts easier. But they can also be achieved simply with a circular saw. 

ripping down lumber from 4x4s
used lumber from kids playset

Here’s the tools to have on hand:

Circular Saw
Table Saw (optional)
Miter Saw (optional)
Drill
Impact driver (or drill if that’s what you have)
Stapler
Tape measurer
Speed square
Pencil
Quick clamps (if you have them)
Safety glasses

How To Build a Custom A-Frame Chicken Tractor

Step 1 – Build A-frame

As mentioned above, the 4×4 posts from your playset will need to ripped down to smaller dimensions. I ripped one in half to provide 2×4’s for the two bottom rails or skids the tractor will be pulled on. The rest of the 4×4’s I ripped into quarters (2×2’s) for the remainder of the tractor framing. The top spine of the A-frame was another 2×4 I had ripped down from the original 2×6 atop the playset.

Once the materials were cut to size, I laid out the dimension and footprint of the tractor size I wanted, cut the pieces to the appropriate sizes and angles, and screwed the frame of the tractor together. My tractor was roughly 7’x7’. 

building a frame chicken tractor

To tie a tow rope or add wheels (optional) on the tractor, it’s best to have the bottom rails of the tractor extend 4-8” out from the tractor. You can see I didn’t do this initially and just screwed on some shorter pieces of wood on the front and back. They held up fine.

The front of the tractor will need a door. I built a simple door and door frame out of extra 2×2’s that fit on the front A-section of the tractor.

I also added diagonal 2×2’s spanning the A-frame sections laterally so the tractor had more stability when being pulled. 

Step 2 – Construct Enclosed Coop Area

The goal here is to create a triangle shaped, fully enclosed area where your chickens can roost, sleep, be protected from cold and rain, and go to lay eggs.

Here I was able to repurpose the bridge, or deck, from the playset I found. I spaced the upright A-frame sections from the previous step so the deck would fit between them. This will give your enclosed area a solid base.

a frame chicken tractor being built
adding laying box to a frame chicken tractor

Next, cut your siding to fit on the horizontal sections of your enclosed area and install with screws

building enclosed area on chicken tractor
adding siding to a frame chicken tractor

On the side facing the interior run, you will need to cut out a door that can be closed up tight at night. The easiest way I have found to do this is to make my own vertical rails out of 2×4’s for a door to slide up and down in. Simply notch out one of the corners lengthwise of a 2×4 section, mount them next to your door cutout, and slide a rectangular section of siding into those tracks as a door.

sliding door to keep chickens safe in tractor

The backside of your tractor will fit a nesting box (or laying box). I used spare 2×2’s to build a nesting box frame and then used more of the siding board for the floor and walls of the nesting box. I then built a cover on hinges that can be easily lifted up to check for eggs or access the enclosed portion for cleaning.

nestinb box on mobile chicken coop

And don’t forget ventilation! This is critical to provide airflow on warmer days. A the top of the triangle enclosed areas, I cut off the top of the triangle, put it on hinges, then lined the opening with hardware cloth so I could open and close it for ventilation as needed.

Note, the top of your enclosed area will still be open until roofing is added!

Step 3 – Install Chicken Wire (or Hardware Cloth)

Next, the run of your tractor will be ready for chicken wire! There is no easy way to install chicken wire. I recommend you wear long sleeves, pants, gloves, and eye protection to avoid getting cut up. Also, having a second set of hands makes it much easier.

I bought 4’ wide chicken wire and spaced the A-frame sections appropriately to accommodate. Cut the length you need with wire cutters (leaving a little extra never hurts and can always be cut off at the end). Fasten one side in place with your stapler. Stretch the chicken wire across to the other side and staple in place.

chicken tractor with chicken wire added

You want the staples to be continuous and spaced every 4-6” so the run is secure and nothing can get in or out. The door will also need to be backed with chicken wire. Working with chicken wire can be frustrating and require patience. But stick with it and you’ll get there!

Hardware cloth is chicken wires much stronger and more secure cousin. It’s also more expensive. My theory was that ground predators that could to tear through chicken wire are usually only out in the evening. Therefore, I built the enclosed area to be impenetrable from predators and made sure all our chickens were closed up there securely each night. This allowed me to use chicken wire on the run and save some cost. After a couple years of use, that theory proved true and nothing ever got to the chickens in the run or the enclosed area.

Step 4 – Add Roof

At this point, the only area still open on your A-frame chicken tractor is the top of your enclosed area where roofing needs to be added.

mobile chicken tractor with laying box

I discussed roofing materials above. The simplest and most commonly found solution is probably to use metal roofing sheets and fasten them with roofing screws. Often you can find these tin panels used for cheap or free. I found some cedar fencing that someone had removed and lapped the pickets like shingles.

The bottom line is that whatever you use for roofing, it needs to be fully enclosed and secure so nothing can pry into the enclosed area of your coop at night.

Step 5 – Install Wheels (optional)

I never installed wheels on our A-frame chicken tractor and got by alright. However, they would not be that hard to install and would likely make it significantly easier to move the tractor.

We’ve since built a couple of John Suscovich chicken tractors for raising meat chickens that have wheels and they do pull very nicely. His design involved using lawnmower wheels, 1/2” carriage bolts, locking nuts, and washers to get the spacing of the wheel right.

chicken tractor and three sisters garden

This is where extending the bottom rails comes into play. Drill a 1/2” hole in the rails on the back of the tractor, install your carriage bolts, washers, lock nuts, and wheels, and you’re all set.

Step 6 – Add Finishing Touches

There’s a few extra steps needed to finish off your tractor.

First, drill 1/2” holes where the bottom rails overhang on the front side of your tractor. Tie a section of heavy duty rope through each end. Adjust the rope as needed to get the right fit for pulling your tractor. The thicker rope you buy, the less it will bite into your hands. Note, you might also consider adding a pull rope on the backside of the tractor. I did this, and it helps with maneuvering, especially if space is tight.

a frame chicken tractor made from playset

Second, build a ladder to the entrance of your enclosed area. I used a 2×4 and added small steps for traction. I also put this ladder on a hinge so I could lift it off the ground, tie it up, and keep it out of the way when moving the tractor.

You’ll also want to set them up for food and water. I bought a hanging feeder and waterer, added hooks below the enclosed area, and hung both in the tractor. Having them hanging also makes moving your tractor much simpler.

feeder and waterer in a frame chicken tractor

And finally, add any hinges or latches needed. This includes the doors, nesting box, vent holes, ladder, or anywhere else. Make sure any and all points of entry fasten securely and close up tight!

At this point, you’ve probably got yourself the coolest custom chicken tractor on the block 🙂

Moving and Managing Your A-Frame Chicken Tractor

Managing your chicken tractor will vary a lot based on:

  • The size of your tractor.
  • How many chickens you have.
  • How much land you have.
  • The health of your soil and grass.

Moving your tractor

Most chicken tractors are moved once a day. But you can do this more, or less, depending on your needs. For instance, if you only have a couple chickens, they might be able to stay in one spot for multiple days. If you have lots of chickens, they’ll really appreciate being moved more frequently and will tear up your lawn less. With our Suscovich chicken tractors that we raise 25 birds at a time in, that many chickens will tear through a patch of grass in no time, so I move them twice a day.

chickens mowing down lawn in moveable coop

Chicken tractors in the winter

The question also comes up of what to do with your chickens in the wintertime. Grass stops growing, so is it really necessary to keep moving your tractor?

Our solution has been to park our chicken tractor over our garden area for the winter. We’ll typically utilize the “deep litter method” where we’ll continue to add layers of dry straw as manure builds up. The straw and manure will compost down and give your soil tons of natural fertilizer to plant into for next growing season. Plus, come spring as the ground begins to thaw, your chickens will scratch, dig, and help prep your garden areas for planting!

chicken tractor in suburban backyard during winter

We would move the tractor during the winter to a new spot every couple of weeks to avoid too much buildup in any one area. But it was much less moving than during the growing season.

Dust bathing

Something else that comes up is that chicken tractors generally limit a chickens innate desire to dust bathe, which they use to clean themselves. If not given access to loose soil or sand to dig into and dust bathe in, chickens will get stressed out over time. Or, they’ll start digging holes in your lawn!

To resolve this, we found a bin and filled it with some dirt and sand. The chickens in the tractor took to it instantly and were happy campers afterward! The only tricky part of the bin system was moving it around with the tractor.

bin with dirt and sand for dust bathing

Roosting

Another quick fix for the tractor was figuring out how to best give the chickens roosting space in the enclosed area. I didn’t want anything permanently fixed in there because it would make cleaning out the coop tricky. So I made some really simple portable roosting bars out of 2×4’s and those worked great!

simple portable chicken roost design
moveable roosts in chicken coop

Another A-Frame Option – The Suscovich Chicken Tractor

I’ve referenced the John Suscovich chicken tractor multiple times. It is another great A-frame chicken tractor option. His book, Stress Free Chicken Tractor Plans, gives you the full step-by-step instructions of how to build one. And we also made a supplemental post about how to add a metal roof on top of it.

suscovich chicken tractor with metal roof

Keep in mind this is a big chicken tractor. The footprint is 6’x10’. And it’s designed for raising pastured meat chickens, so some of the elements necessary for laying hens are missing. But, others have gotten creative with the design and figured out to retrofit it for laying hens.

The A-Frame Advantage

Both mobile and stationary chicken coops have their pros and cons. You need to weigh out which chicken coop style is right for you. But hopefully this post has given you an idea of the advantages of a mobile A-frame chicken coop and how they can benefit your chickens, yard, and ultimately you through healthy pastured eggs.

free ranging chickens in a frame chicken tractor

And, we hope you also have the inspiration and guidance you need to build your own chicken tractor—on a shoestring budget at that!

We’d love to hear how your own chicken tractor adventures go and any questions you have in the comments!

Some of the above links are affiliate links. This means we earn a small commission on qualifying purchases at no cost to you. We are so appreciative of your support!


Looking for more on backyard chickens? Check out these posts:

How To Care For Baby Chicks
Simple Outdoor Chicken Brooder Ideas
How To Care For Chickens In The Winter Basics
Chicken Roost Designs | Two Simple DIY Ladder Perch Ideas
Farm Fresh Eggs | What’s the Difference and How to Use Them Safely

February 4, 2023 0 comment
0 FacebookTwitterPinterestEmail
chickens roosting on diy 2x4 ladder roost design
ChickensHomestead How-to's

Chicken Roost Designs | Two Simple DIY Ladder Perch Ideas

by From Scratch Farmstead November 22, 2022

Chickens don’t need much. But a place to roost or perch is a necessity! The goal of this post is to give you an overview of why chicken roosting bars are important and show you two simple chicken roost designs that you can build quickly and easily with leftover materials.

Why our chickens weren’t very happy with us

This past spring we doubled up our chickens on our farmstead!

Our chicken coop inside our barn suddenly went from housing 25 chickens to around 50. There was plenty of room in there to accommodate the population growth – especially since they free-range during the day – but the roost I had built clearly wasn’t cutting it.

Their tree branch ladder roost was pretty good sized. Surely they’ll find a way to nestle in close together and make room for everyone… Uh uhh.

diy ladder chicken roost in barn coop

The pecking order was all out of whack. Chickens were disgruntled. I was nightly chasing down chickens roosting all over the barn. And when I did put them in the coop the huddled cluster of chickens in the corner on the ground told me they needed a new piece of furniture – and fast.

I’ll talk about the two types of chickens roost designs I built for our chicken coop below. They are super simple!

But first, let’s talk through the basics of chicken roost designs and why they’re a necessity!

What is a Chicken Roost or Perch?

Animals are happiest when their domesticated environment matches their wild environment.

Birds in nature roost, or perch, high up in trees on branches. You’ll find them primarily roosting through the night, but they also do so during the day.

Chickens are no different. This innate behavior is how birds keep themselves comfortable and safe from predators, especially while sleeping.

natural branch ladder chicken coop designs

Roosting is also important for the social dynamics within a flock. Since the higher bars of a roost are safer these spots are prized. Chickens higher up in the pecking order will claim those higher spots, leaving the more susceptible lower spots open for chickens that are lower in the pecking order.

Or, you might really be viewed as an outcast if you have no spot at all – as was the case in our coop! Let’s solve that.

Why Chickens Need a Roost

Chickens instinctually roost side-by-side in rows. Huddled close, this helps them keep warm and they also work together on a roosting bar to help keep balance.

Another, almost miraculous, ability chickens have is to shut down one side of their brain while keeping the other side fully alert. This is how chickens keep watch for predators while sleeping. The chickens on the outside of each roosting bar will sleep with one eye open, keeping that side of their brain alert to watch for predators. The other eye is shut and that side of their brain turned off to get much needed rest. They’ll likely even turn around during the night to give each side of their brain a rest!

simple ladder chicken roost designs

It’s clear that chickens feel the most safe and secure when properly roosting. But here are some other ways a roost will benefit your flock:

Foot protection. A properly designed roost will keep a chickens foot in tiptop shape. On freezing nights, their feet tuck warmly under their body reducing risk of frostbite. Also, chickens are deep sleepers. When on the ground, small rodents like rats can nibble at chickens feet, legs, or backs while they sleep unawares. Roosting higher above ground removes that threat.

Keep them healthy. Let’s face it, the ground of a chicken coop gets dirty. Sleeping in those unsanitary conditions can lead to disease over time. What’s more is that ticks, mites, and lice can hide out in the bedding of your coop and come out to feast on your chickens at night.

Prevent anxiety. Without a proper roost or enough roost space your flock will be in turmoil. One, they’ll never feel safe leading to a perpetual lack of sleep. Two, they won’t be able to live out their social order as they desire to. This will stress your chickens out and worsen unwanted behaviors like feather pecking.

There’s no doubt chickens need a suitable roost to accommodate the whole flock. So, let’s start looking at chicken roost design considerations.

Dimensions of Chicken Roost Designs

There are two critical dimensions to any roost design.

  1. The roosting bar height above ground.
  2. The distance between roosting bars.

Most roosts are ladder style where the roosting bars, or rungs of the ladder, get gradually higher. Start with determining the height of the lowest rung. Then, layout the remaining roosting bars from there.

The lowest roosting bar should be at least 12” off the ground, but 18-24” is recommended.

The horizontal spacing between each roosting bar should be 12-18” apart. Any closer, and your birds will be within range of pooping on each other throughout the night!

simple diy 2x4 ladder chicken roost

In terms of the top of the roost, there should be at least 12” between the highest perch bar and the ceiling of the coop for chickens to comfortably access and use the top rung. The top roost bar should also sit a minimum of 12” off the wall to give your wall some poop clearance!

A final consideration is the angle at which your roost or ladder sits. A 45° angle is ideal. You can go steeper, but it will be tricky to achieve the horizontal spacing needed between roosting bars.

Flat vs. Rounded Chicken Roosting Bars

There is conflicting information out there about the proper size and shape of roosting bars.

Many chicken roost designs call for 2×4 roosting bars that are oriented horizontally (flat side up). The claim is that chickens actually prefer a flat perch versus rounded and can better protect their feet during the wintertime on a flatter, wider roost.

The case against horizontal 2×4’s is that chickens can’t properly wrap their toes around them for proper balance. Studies have shown that chickens prefer a roosting bar to be around 2” to 2-1/2” wide for optimal grip and comfort.

brach ladder roost in chicken coop

My philosophy tends to be that farming should follow nature. And I have a hard time visualizing what a chicken would find to perch on in nature that is flat and high enough to keep them safe from predators. My chickens naturally perch on branches in bushes during the day.

That said, I built one of each as an experiment – a round tree branch roost and a horizontal 2×4 roost. I plan to update this post over time with what my chickens tell me about each design.

Materials for Chicken Roost Designs

When it comes to a chicken roost, stick with wood.

Metal gets too cold which can increase chances of frostbite and other foot ailments. And plastic is often slick making it difficult for chickens to maneuver. Wood is the ideal fit.

Regardless of using dimensional lumber or natural branches, make sure your wood is smooth and splinter free to reduce chances of infections like Bumblefoot. Ease any sharp edges with a router, planer, or sandpaper. And select smooth tree branches without sharp corners or protruding knots.

diy 2x4 ladder roost materials
DIY 2×4 ladder roost materials

Building your own chicken roost is the perfect project to use scrap or repurposed materials for. Spare 2×4’s. An old piece of furniture. Pallets that someone left out by the curb. Downed branches around your yard or from a neighbor. As long as there’s sturdy and smooth pieces of wood, about anything will do!

As a side-note, I’d steer clear of pressure treated wood. Except maybe for the ladders side rails or legs that come in contact with the ground. Treated lumber contains harsh chemicals that you don’t want coming in contact with your chickens feet for extended periods.

Two Easy DIY Chicken Roost Designs

Building your own roost is the perfect beginner friendly farm project! Each of these roosts took about a half hour to build and use very basic tools. Here’s a list of what you need:

Circular saw
Impact driver or drill
2-1/2” or 3” screws*
Tape measurer
Speed square
Pencil
Safety glasses

2x4 chicken roost side rail detail

Note that each of these roosts as shown were designed for our coop. But, it is easy to modify the size or design to fit your situation. For example, both of my ladder roosts lean against the wall of the coop. If you need a freestanding roost, simply add legs to each corner of the roost or build an A-frame roost.

As a rule of thumb, one average sized chicken will require about 12” of roosting bar space. So plan out your roosting ladder based on the size of your flock and build to suit.

*My preference are coated screws with a star bit. They are so much easier to use than a standard Philips head screws and since they’re coated they last longer in high moisture applications like chicken coops!

Roost Design #1 – 2×4 Ladder Roost

If you have 5 roughly 8’ spare 2×4’s lying around then you’re in business. That’s all this simple 2×4 ladder roost requires. The video below visually walks you through the build process.

Step one

Measure and cut (5) 2×4’s to 5’ long.

Step two

Take your cutoff pieces and cut (2) 18” pieces and (2) 12” pieces. 

The 18” pieces are the legs of your roost allowing the bottom roosting bar to sit 18” off the ground. The 12” pieces are your standoffs at the top of the roost that lean against the wall of your coop providing 12” of clearance.

Step three

Select (2) 5’ boards as your vertical rails of the ladder. On the first rail, use your speed square to trace three 45° lines – top, middle, bottom – all facing the same direction. Repeat these three 45° lines on the second rail, but mirrored so they angle the opposite direction.

marking angle for chicken roost with speed square

Step four

Align your 18” legs and 12” standoffs with the lines you just traced at the top and bottom of each rail. Fasten together with 2 screws. Note that the legs and standoffs should bend the same direction but at opposite angles.

assembled rails for ladder style chicken roost

Step five

Fasten the (3) 5’ rungs between the rails in line with your 45° marks. The bottom rung will sit flat on the legs and the top rung will press up against the standoffs. Fasten the end of each roosting bar with at least two screws so the bar does not twist or rock when weight is applied.

standoff pieces for 2x4 ladder chicken roost
top rung of diy 2×4 chicken roost
bottom rung of diy 2x4 chicken roost
bottom rung of diy 2×4 chicken roost

Roost Design #2 – Tree Branch Ladder Roost

This tree branch roost is as simple as it gets! Track down some downed tree branches that are sturdy and smooth. The two vertical rails should be longer and thicker – approximately 4-5” in diameter and as long as desired to fit your coop. Look for horizontal roosting bars with a 2-3” diameter at your desired width.

Step one

Lay down your vertical rails in the desired shape. Layout the horizontal roosting bars in the desired locations. Keep in mind the angle your ladder will be set at and the horizontal spacing you want to achieve between each roosting bar.

At this point, either mark and cut the horizontal rungs to the desired length, or leave as-is. Some overhang isn’t a big deal and can actually provide extra roosting space.

how to build a chicken roost ladder

Step two

Screw horizontal roosting bars to the vertical rails. Ideally you’d fit two screws in at the end of each rung, but one secure screw should hold.

And your roost is complete!

Where should you locate your roost in the coop?

Whether you build with 2×4’s, branches, or any other scrap wood you have, you’re ready bring your new ladder style chicken roost into your coop.

But where?

Did you know chickens continue pooping while they sleep? Talk about multitasking!

This means that quite a bit of manure tends to accumulate under a roost.

Therefore, you want to keep your roost well clear of where your chickens have access to food and water. It’s also recommended you keep your roost away from laying boxes.

So find a nice unoccupied area of your coop away from the other coop functions and setup your roost!

If possible, it’s best to secure your ladder to the wall so it doesn’t fall. But, keep it easily moveable so you can clean underneath it!


Looking for other chicken raising info? Check out:

Simple DIY Chicken Coop Inside Your Barn
How To Care For Chickens In The Winter Basics
Simple Outdoor Chicken Brooder Ideas
How To Care For Baby Chicks
Easy DIY Heated Chicken Waterer
Chicken Tractor Plans for 25 Chickens

November 22, 2022 2 comments
0 FacebookTwitterPinterestEmail
soaking chicken with prolapsed vent
ChickensHomestead How-to's

Chicken Prolapsed Vent | Simple Remedies For Natural Recovery

by From Scratch Farmstead October 27, 2022

Chicken prolapsed vent can pop up out of nowhere and is usually traumatic – both for the chicken and keeper. We learned a lot while treating our chicken with a prolapsed vent and will share what we tried to heal her naturally and how it went.

Our Chicken Prolapsed Vent Story

We got home late on a Sunday night after a long, full weekend. Upon going out for evening chores and closing up the chicken coop for the night, I noticed something was not right.

One of our Buff Orpington pullets we raised from a chick that spring was on the bottom rung of the roost, her backend looking wide, and then I saw it.

The bulge.

egg bound and prolapsed buff orpington pullet

It was not a pretty sight. There was blood. Something was protruding out her back end. And was that an egg even?

I brought her into our mudroom, called Joelle for help, and with some quick research we were able to determine she had a prolapsed vent. A bad one at that.

What is a Prolapsed Vent?

A chicken prolapsed vent can also be know as cloacal prolapse, prolapsed oviduct, pickout, or blowout. Prolapse occurs when the hen’s reproductive tract inverts and protrudes outside the body without retracting on its own and returning to normal. If caught early, a chicken with a prolapsed vent can recover. 

severe chicken prolapsed vent

In our case, our hen was simultaneously egg bound, meaning an egg is either stuck inside of her or still attached to her oviduct. When this is the case it’s important to help her release the egg before attempting to treat the inverted vent. Our chickens egg was external at this point and attached to the prolapsed oviduct by the thin membrane.

With the application of some coconut oil as a lubricant we were able to free the egg. Quickly after, we got a surprise that a second egg with an unformed shell slid out once the first egg was released.

We knew this probably wasn’t a good sign – the egg binding had occurred for more than a day. And our fast and furious research was telling us when it came to a prolapsed vent, the sooner the better with treatment.

Chicken Prolapsed Vent Causes

  • Premature egg laying from young chickens
  • Dehydration
  • Calcium deficiency (leading to low muscle tone)
  • Abnormally large eggs
  • Older chickens with too much fat buildup around reproductive organs
  • Constipation

Since these were probably our young chickens first eggs, it’s most likely that she began laying too soon when her reproductive system was not fully developed. While calcium deficiency can be an issue for chickens already established in their egg laying, introducing calcium too soon for young hens can play a role in chickens beginning to produce and lay eggs too early.

Our chickens had free-choice oyster shells for calcium available to them on occasion. This was to make sure our older layers had access to the calcium they needed to stay healthy. After this experience, however, we plan to remove the supplemental calcium all together as our pullets near the age of laying and then reintroduce it once they are established layers.

Steps To Take For Recovery

After researching options we wanted to do everything we could to help our chicken recover and rejoin the laying flock. Here are steps you can take.

1. Separate your chicken

Right away! You need to separate your chicken immediately from the rest of the flock. Other chickens will be drawn to peck at the prolapsed vent and can quickly turn aggressive. The sooner you catch the prolapse the better to prevent wounds from other chickens that could make the situation much more severe.

2. Soak and clean the vent

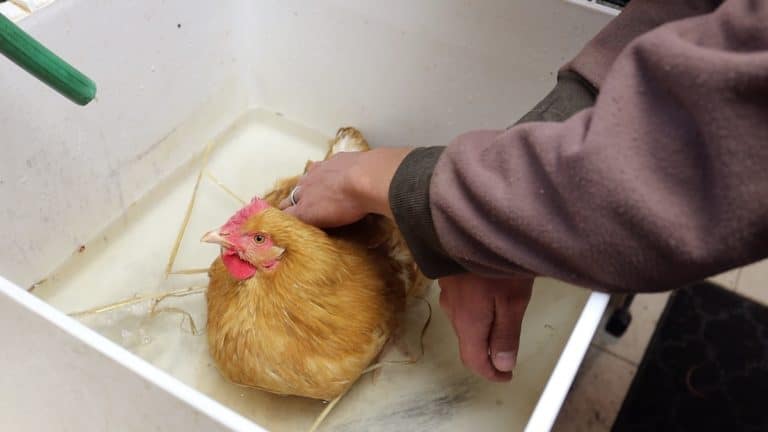
Either running your chickens backside under warm water or placing them in a warm water bath will help clean the vent and relax muscles to give the prolapse the best chance of returning to normal on its own. This may also help a chicken that is egg bound pass an egg. For a water bath fill a tub or utility sink with a few inches of water the same temperature you would take a bath in so the chicken is submerged up to their chest. Keep them in the bath for 30-60 minutes. A towel over the tub to block light can help your chicken relax.

cleaning prolapsed cloacal on chicken

3. Lubricate the vent

Applying a lubricant to your chickens prolapse can aid in both helping the prolapse stay moist and not dry out. This can help the oviduct to properly retract and also help pass future eggs. We used coconut oil since that’s what we had on hand. Petroleum jelly is also commonly used.

4. Dry your chicken

Use a towel or hair dryer to dry her feathers off. We let her roost on the utility sink while using a hair dryer. This is especially necessary before bringing her back outdoors in colder climates.

blow drying chicken with prolapsed vent

5. Treat the prolapse

If your chicken is unable to retract the prolapse on her own, you may need to get involved and help return the prolapsed oviduct inside her. Don’t worry! It’s not as scary as it sounds. Apply gentle pressure to the prolapse and slowly and patiently work it back into its proper internal position. You may feel a fair amount of resistance at first and she may continue to push the prolapse back out. We found that trying to keep her calm and holding the prolapse in place for 10-20 minutes seemed to help keep things properly situated.

replacing prolapsed vent inside chicken

6. Find a temporary home

You will need to continue to separate your chicken from the flock until the risk of prolapse has passed. We moved our chicken to our brooder which was right next to our coop. A small pet cage will also work or fencing off a section of your coop to keep the prolapsed chicken separated. You’ll want to make sure there is no way of the other chickens getting to your sick gal.

7. Get her hydrated

Keeping her hydrated is crucial to helping her prolapse return to normal. We gave her fresh water with some salt and apple cider vinegar so that she had minerals and electrolytes to keep hydrated. She was downing water like crazy when we first gave it to her. 

separating chicken with prolapsed vent

8. Try to prevent egg production

Chicken are most likely to prolapse again when laying an egg. If you can delay egg laying for a period of time you will give them the best odds of recovery. You will want your chicken to eat to keep her energy up. But cut back on her access to standard feed which promotes egg production. We gave her some fresh kale and chunks of apple. Keeping her in a dark location can also help discourage egg production.

9. Monitor your chicken often

The prolapse may reoccur. The sooner you can catch it and help the prolapse revert the better. A prolapsed vent can dry out quickly so you will want the oviduct spending more time in than out. Check on her often and give her the care and attention she needs to recover.

Chicken Prolapsed Vent FAQ’s

Can my chicken live with a prolapsed vent?

If the prolapse is not able to recover and continues to blowout then sadly, no. The prolapse will dry out over time making it difficult to pass eggs or waste leading to infection. Her quality of life will continue to decline.

Is it necessary to call a Vet?

This depends on your attachment to your chickens. We have about 50 chickens on our homestead, and while losing one is sad, we would not choose to have a vet bill to save one chicken. However, when we had only a few backyard chickens while living in the suburbs, I can understand why someone would want veterinary help. Even so, there may not be much a vet can do unless the prolapse is caught early. Antibiotics can help reduce the risk of infection, but they won’t solve the protruding duct if the problem persists. From what we’ve read, many vets will recommend euthanizing the chicken.

chicken prolapsed vent that has been replaced

Will Epsom salts or Magnesium Flakes help?

We received a tip that an epsom salt bath might aid in returning the oviduct to normal. We didn’t have epsom salt, but we did have magnesium flakes, which have a similar effect of relaxing muscles and relieving pain. What we did was add a 1/4 cup of magnesium flakes to her warm water bath and let her soak for over 30 minutes. This seemed to soothe and relax her. It can also help a chicken to release a bound egg. This Spa Treatment for Sick Chickens post is worth a read to see what others ways this can help heal sick chickens.

What if my chicken doesn’t recover?

There are many stories out there of chickens recovering from a prolapsed vent and going on to be happy, healthy layers. After going through the steps above to try and help our chicken recover, it was clear her prolapse was severe and was going to be a recurring ailment. This was sad and we tried to give her every chance we could to recover. She was still otherwise healthy, so instead of allowing her to continue to degrade and suffer, we ended her life and turned her into a stew bird. Euthanizing the chicken is recommended if the chicken might have other health issues or you don’t want to go the route we went.

helping egg bound and prolapsed chicken
helping chicken with prolapsed vent

Can chicken prolapsed vent be prevented?

Since prolapse most commonly occurs with young chickens who start laying too young, the best prevention you can do is to help them develop at an appropriate rate. Measures like limiting or removing access to supplemental calcium or not providing additional light when young can help. And keeping a watchful eye on your flock can be the best prevention. The sooner signs of prolapse are noticed the easier it will be to prevent or treat it. But also know that sometimes things just happen regardless of our best efforts.

Hope For Chicken Keepers… and Chickens!

We wish our chickens story ended on a happier note. But through the process we learned so much and feel much more prepared should this ever pop up again.

And we hope our story and lessons learned have been helpful in your situation.

So please, share your story or what you’ve found helpful in helping your sick gals recover! The more information we can share the better we’ll be able to help 🙂

October 27, 2022 0 comment
0 FacebookTwitterPinterestEmail
snow covered chicken tractor in suburban backyard
ChickensHomestead How-to's

How To Care For Chickens In The Winter Basics

by From Scratch Farmstead October 2, 2022

You have backyard chickens or are thinking about getting them but there’s one BIG question – How to care for chickens in the winter? Don’t fret! It’s much more simple than you may think. We’ll share our top tips for keeping your chickens safe and healthy during those frosty, snowy months.

From Our Suburban Backyard to Our Homestead

We’ve kept chickens for over 7 years now. It began with 6 backyard chickens on our 1/3 acre suburban lot. And now some 50 feathery friends free range about our 5 acre homestead property.

We’ve also had a variety of coop setups.

Our first coop was kit coop form Costco that we received as a gift. When we wanted to expand our suburban flock, we converted a wooden kids playset into an A-frame portable chicken coop.

backyard chicken coop kit from costco
backyard chicken tractor from repurposed materials

Instead of having a standalone coop currently at our homestead, we decided to build a coop inside our pole barn, which has worked out great!

pole barn chicken coop

In all these scenarios and in our northern Illinois winters (which can be harsh!) we’ve never lost a chicken due to winter conditions. That’s not because we never made mistakes or always knew exactly what we were doing. We’ve learned a lot as we went!

But we went for it, troubleshooted as needed, made adjustments, and tried to be more prepared the following year.

You can raise chickens in the wintertime too! Here’s what you need to know.

How To Care For Chickens In The Winter – Top 5 Tips!

Chickens really are hardy birds that are built for the winter. Their full feathery coats and higher than average body temps make them well suited to brave the cold. But there are some basic steps on your part as a chicken keeper to help them thrive.

1. Minimize Drafts In The Coop & Run

Exposure to frigid winds is one of the greatest threats to your chickens in the winter. We’ve all experienced the “feels like” temperatures that drop well below the actual temp due to windchill. Creating a windbreak or even insulating your chicken’s coop and run is a must.

Many coops are already sealed up pretty well. Be sure to close up any vents on the coop without cutting off ventilation completely. It’s important to not have your coop completely sealed off to avoid excess moisture build up, which can lead to frostbite.

Chicken runs, however, are usually open and exposed to wind. There are a couple options. One that we used is to staple thick plastic sheeting around the walls of your run. This is a quick and easy way to seal off your coop. We always used a 4-mil or 6-mil clear plastic sheeting that you can find at a hardware store.

chicken run covered in plastic during the winter
plastic sheeting around the chicken run to keep drafts out

Another alternative to plastic sheeting would either be screwing on plywood or metal panels. Whichever windbreak materials you choose, be sure to apply it to at least 2, if not 3, sides of your run to give your chickens good relief from the wind.

Another option is to stack straw bales around your chicken coop or run. Straw bales can act both as insulation and make an excellent windbreak.

2. Keep It Dry

When temps dip below freezing, a dry hen is much less susceptible to frostbite, disease, and any other wintertime woes that can pop up. Two options exist.

First, you can clean your coop regularly. This is best suited for smaller coops that can’t handle a lot of buildup of bedding and manure. With the kit coop we had that fit 6 chickens, I was able to add a few layers of fresh bedding like wood shavings, mulch, or straw to keep things fresh and dry. But at least once a month the moisture buildup got too intense for the small space and I needed to go in there and do a full clean out and start new.

Your other option is what’s called the Deep Bedding or Deep Litter method. This bedding method is where you continually add fresh layers of carbon on top of manure and leave the layers in place. Carbon can be straw, wood chips, wood shavings, or even leaves that will absorb moisture and give your birds a clean, dry bedding under their feet.

extra bedding in the chicken coop during winter

The key to this method is applying enough carbon. When applied at the right ratio, fresh bedding completely eliminate any odor from manure buildup. Another significant benefit is that the lower layers will eventually begin composting, which naturally produces heat in your coop.

The Deep Bedding or Deep Litter method is best suited for larger coops, runs, or chicken tractors that can handle a buildup of many bedding layers throughout the winter. We’ve had a lot of success applying this method to both our A-frame chicken tractor and barn coop over the years. 

And as a bonus, come springtime you’ll have plenty of compost for your garden when you clean out your coop! Or better yet, put your coop on top of your garden and they’ll till, weed, and fertilize your garden so you’re all set for the spring.

3. Keep Water From Freezing

Chickens always need access to fresh, clean water. This can be a major challenge in the winter. The most common way to prevent water from freezing is to purchase or build a heated base for your chicken waterer.

You can purchase a heated chicken waterer base. This is a fine route to go, but just know that they typically only guarantee the heated bases to work if you pair it with the double-wall insulated metal waterer from the same manufacturer. If you are wanting to save money and go the DIY route, a couple options exist.

One common option is the cookie tin with a lightbulb. After trying this method, I don’t recommend it. A lightbulb trapped in a tight, high moisture area led to many frozen finger lightbulb changing adventures that winter.

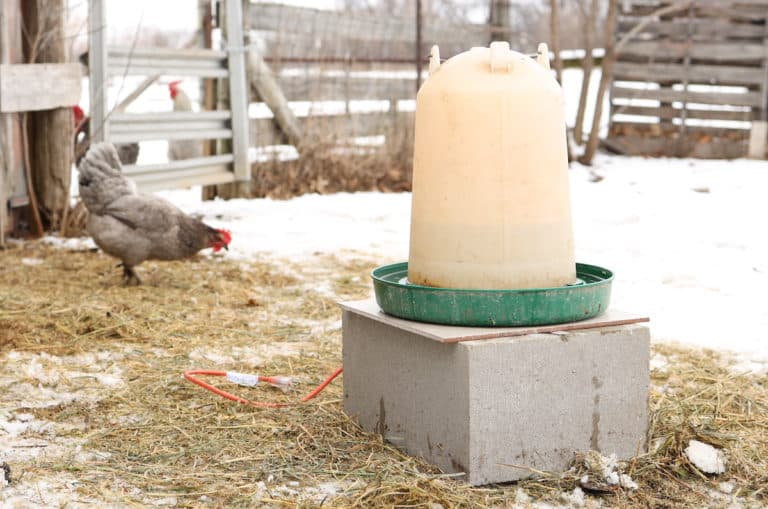
Instead, I came up with an Easy DIY Heated Chicken Waterer base that has worked great. It’s a quick project, uses common parts you can find at any hardware store, and is an overall affordable option.

heated waterer keeping water from freezing in coop

Easy DIY Heated Chicken Waterer

January 2, 2022

4. Have Extra Food On Hand

Chickens, like most mammals, utilize digestion to maintain and control body heat. Making sure they have enough food and the right type of food on hand during the winter is essential.

You are likely already feeding them a layer crumble or pellet. This is fine to continue giving them during the winter. One consideration if you typically only give them a ration of feed in the morning is to also start giving them an extra ration of feed in the evening during the winter months. This will help them keep warm during those long, cold nights.

Adding extra protein or carbohydrates can also help keep your chickens hardier and more robust in the cold. Consider supplementing with extra food along the way like meal worms or cracked corn to help boost your chicken’s energy.

The bottom line is to plan to have extra food around during the winter and don’t skimp on the rations!

5. Prepare In Advance and Observe

As we’ve discovered, the hardest part of keeping any animals is having to troubleshoot and react once problems arise. This is especially true in the dead of winter! Preparing ahead of time and taking time to observe your chickens and react to problems quickly can save a lot of headaches down the road.

Go out and secure that plastic around your chicken run when weather is nice in the fall so you’re not caught off guard when that early winter storm rolls through.

Have electrical run to your coop well in advance so you’re not struggling with frozen fingers to unroll a stiff extension cord to your coop when their water starts freezing.

Stock up on some extra bags of feed or bedding so you don’t run out during that 3-day blizzard!

chicken tractor in suburban backyard during winter

And then spend time out with your chickens and pay attention to their cues. Are there signs of frostbite setting in? Do I need a better windbreak or is there too much moisture in the coop? Will they be happier if I give them more food than I have been? 

Keep watch and act quickly when you notice that something seems off.

Winter Chicken Care – Frequently Asked Questions

Will chickens still lay eggs in the winter?

Yes! Chickens will continue to lay eggs all year. But the frequency that they lay is dependent on the amount of daylight. Chickens like at least 12 hours of daylight, and some breeds like closer to 14 or 16 hours. They will continue laying when daylight dips below these thresholds, but at a reduced rate.

Some chicken keepers leave a light on inside the coop to simulate extra daylight and keep egg production up. We’ve chosen not to do this to honor the chickens’ natural rhythms to slow down and rest during the winter months.

frozen backyard chicken egg in winter

You’ll also want to collect eggs more frequently during the winter. The colder it is the quicker eggs can freeze and crack open. To avoid this check for eggs every few hours, especially when it’s well below freezing.

Should I be worried about frostbite for my chickens?

Frostbite is a concern and will most commonly target your chickens comb and wattle. These areas are vulnerable without feather cover. Keeping your coop dry and draft free is your best prevention against frostbite, which can be caused by excess moisture combined with frosty wind and freezing temps. 

Another preventative measure chicken keepers have used is to spread Vaseline (or a natural alternative) on your chicken’s comb and wattle as an extra barrier against the cold.

rooster in the winter

You’ll want to be observant and try to avoid frostbite as it is rather uncomfortable for your chickens. But if minor frostbite does occur, it’s not the end of the world. Our rooster had some on his comb this past winter, and a month into spring you couldn’t even tell it was there.

Are heat lamps necessary in my chicken coop?

Nope. Chickens are built for winter. And if you take all the steps above to give them a dry, draft free coop with plenty of food and water they’ll be able to rely on their instincts to know what they need beyond that to handle the winter fine.

But it’s also not the end of the world to give them a source of heat. We did have a heat lamp in our coops while living in the suburbs. We mainly pointed it at the waterer to help keep it from freezing since we didn’t yet have our concrete block heated waterer base.

small backyard chicken coop in winter

One thing you’ll want to consider is that heat lamps have a VERY high fire risk! So proceed at your own risk. Other safer options exist like this chicken coop heated pad.

Can my chickens free range in the snow?

You bet! They’ll have just as much fun getting out and scratching around in the snow and cold as they do on a nice spring day. Thick snow cover can limit of prevent their ability to free range.

free ranging chicken in the winter

Consider shoveling out an area or path for your chickens to give them room to roam. Chickens can get stressed and irritated with each other when cooped up. So giving your chickens the chance to roam, even throughout the winter, can help keep your flock happy and calm.

What are the most cold hardy chicken breeds?

Most heritage chicken breeds are well suited for winter conditions. We have had some 10-15 different breeds over the years, which have all done well over the winter. While this list is not exhaustive, some of the main cold hardy winter chicken breeds are:

  • Barred Rock
  • Rhode Island Red
  • Buff Orpington
  • Ameraucana
  • Easter Egger
  • Salmon Faverolle
  • Wyandotte
  • Delaware
  • Brahma
  • Australorp

These breeds tend to have thick coats of feathers and higher body masses. Some even have smaller combs and wattles or feathers on other vulnerable areas like their feet. Even less cold hardy breeds can do fine during the winter if you keep conditions favorable. We have a few White Leghorns that have weathered the winters just fine in our current barn coop setup.

You Can Raise Chickens in the Winter!

Just remember: block the wind, keep it dry, figure out a good wintertime water and food situation, and be proactive.

With just these few basic measures, your chickens will take it from there and handle the winter like they were made for it. Because they are!

So don’t let wintertime hold you back from getting that backyard flock you’ve always wanted. You and your gals got this!

October 2, 2022 0 comment
0 FacebookTwitterPinterestEmail
chicken coop in barn with repurposed door
ChickensHomestead How-to's

Simple DIY Chicken Coop Inside Your Barn

by From Scratch Farmstead September 11, 2022

Already have an existing barn or pole barn on your property? Then you may just have the perfect spot to build your chicken coop! So don’t overthink it. We’ll break down what you need to know about building a chicken coop inside a barn along with the advantages and disadvantages.

Why We Built A Chicken Coop Inside Our Pole Barn

Our first spring on our homestead was ambitious. Starting entirely from scratch we built a brooder, filled it with both broiler and layer chicks, then needed to build both a chicken tractor for the meat chickens and a coop for the layers.

The John Suscovich chicken tractor worked out perfectly for our meat chickens.

sucovich chicken tractor with metal roof

But, when it came to a coop for our layers, there were almost too many options and I was getting overwhelmed. Meanwhile our chicks were getting big and we needed to build something!

I liked the portable egg-mobile concept. The only problems were, 1) we didn’t have a truck or tractor to move it, and 2) it would be a pretty significant project requiring both a trailer and lots of building materials.

Those cute, standalone coops would certainly be nice. But that too was a significant project and I wasn’t quite ready to commit to where would be best to build a permanent structure. And would the county require a permit or extra taxes?

Maybe a chicken tractor with laying boxes that we could pull around? But we had around 25 chickens with plans to expand in the future. We’d need a chicken tractor fleet!

Then I turned to our pole barn. Could I just build our coop inside it? 

sunrise on the farmstead

The barn is roughly 50’ x 25’. About 1/3 of it is used as a stall for animals. But there was ample space in the rest of the barn that I mainly used for storage.

So, we went for it and have been so happy with the decision!

Chicken Coop Inside Barn – What to Think Through Before Building

Before we get to the How To, it’s important to plan out your coop so your birds are safe and have everything they need, and you are happy long term with your coop.

Predator Proofing

Predator proofing your coop is always the first thing to think about with any coop design. All 6 sides should be secure: top, bottom, and the four sides. The top is the easiest. You can just use plywood, boards, or metal panels for a solid top. 

The sides leave you with some options. On my coop, I built a 2’ or 4’ high partial wall covered with plywood and then used chicken wire to secure the walls the rest of the way up to the ceiling. Note that if you do plan to keep your walls open and bring the chicken wire all the way to the ground, you may want to consider hardware cloth in place of chicken wire – at least along the base. Some predators can tear through chicken wire when at ground level.

corner of barn built chicken coop

The base is the trickiest. Many predators can dig under the coop and get in. The ideal would be to dig out the entire footprint of the coop about a foot, line the underside with hardware cloth, then fill back in on top of it. But that’s a big undertaking! What I did was dug a trench where the walls of the coop would sit and lined the trench with concrete blocks. This both acted as a foundation for the coop and has kept predators out!

Location/Layout

Spend time in your barn thinking through and envisioning the best location for your coop and how it will effect the flow of traffic within your barn. How will the coop interact with other activities going on in the barn? What is the warmest spot of the barn? What will my chickens access to outside look like? Will they have sunlight and ventilation? Will I be able to bring materials in and out of the coop?

The inside layout of the coop with nesting boxes, roost, and room for food and water doesn’t need to be set in stone. But other features, like a door to your coop, will be permanent and require some forethought. What’s the best door location to make life simple with daily chores. And don’t forget to size your door wide enough to fit a wheel barrow in to clean out the coop!

Size

Knowing your desired laying flock size and how you will be raising them will determine a lot. Will your chickens free range? If not, do you also need to consider building a run for your chickens outside of the barn so they have access to outdoors and sunlight?

We knew we wanted to free range our chickens. So most of their time is spent outside foraging and dust bathing under bushes. Our 8’ x 16’ coop footprint feels like plenty of space for the 50 or so chickens we currently have considering they’re only in there to sleep, eat, drink, and lay.

free ranging chickens in yard

But, if you don’t plan to give your chickens access to outdoors, that same space might feel tight for even 20 chickens. At a minimum, plan for 3-4 square feet per chicken in your coop. I realize we exceed that a bit with 50 chickens, but they have freedom to roam all throughout the property during the day. And if we ever do need to keep them indoors then we open up the full barn to them.

Design

Most pole barns have poles that make up the exterior walls every 8’ on center. I found it easiest to align the walls of my coop with these poles or posts and work off of those. With sticking to those 8’ dimensions both for the length and width of the coop that made buying materials easy and more affordable. Lumber in 8’ lengths is common to come by and 4’x8’ plywood sheets worked great for the walls and ceiling.

The height of your walls is also a consideration. It’s important 1) for ventilation, and 2) for visibility. I made the front wall of the coop only 2’ high with chicken wire the rest of the way up so kids would easily be able to see into the coop. The side walls I made 4’ high with chicken wire the rest of the way up. This allowed me to easily mount laying boxes onto that side wall.

chicken coop built inside pole barn

I’d recommend against building solid walls all the way up. Walls that are 2’ or 4’ high with chicken wire or hardware cloth the rest of the way up provide much needed air flow to ventilate your coop. Barns can get warm in the summer months but we’ve found that with the barn doors open, the chickens get the cross ventilation they need with a more open coop design.

Storage

Depending on the size of your coop and how much room you have in the rest of your barn, you may not want to lose that much space in storage. This was true for us. So instead of building the coop the full height of our barn, I left a couple feet between the top of the coop and roof trusses. This allows me to store lots of supplies in the off season like electro netting fencing, hoses, drip irrigation, and spare lumber.

To do this, I built the ceiling of the coop strong enough to support some weight and lined it with 1/2” plywood on top. This both sealed it off on top form predators and makes for a nice sturdy storage surface.

Materials

Since this project uses really basic materials, I always recommend using repurposed materials whenever possible. Use an old door you already have lying around. Look on Craigslist or Facebook Marketplace for things like sheets of plywood, lumber, and the concrete blocks. This can be a very affordable coop if you can source most of the materials used. And it will probably add lots of character!

a fram chicken tractor in the suburbs
chicken tractor made with repurposed materials

I had the unfortunate timing of building our coop right in the middle of the 2020 lumber shortage. I searched for used lumber for months without any great options. So for this coop I had to buy most of the materials new. But when we lived in the suburbs, I was able to build a smaller portable A-frame coop that we built entirely out of an old wooden kids playset and used fencing.

How To Build a Chicken Coop in an Existing Barn

Every barn and coop design are going to be different. But I’ll walk you through the steps and techniques I used to build our 8’ x 16’ chicken coop inside our barn.

Step 1 – Install your foundation

Unless your barn already has a concrete floor, you’ll need to install a solid foundation to build on. This will also serve to predator proof the bottom side of your cop – see note above.

To start, layout where your walls will sit. Dig a trench in line with your walls deep enough for your concrete blocks to sit leaving 1-2” of the block exposed above ground level. Do this on all four sides.

installing concrete block chicken coop foundation
cmu foundation for chicken coop in barn

Next, compact the base of the trench as much as possible using either a compaction tool, the head of a sledge hammer, or your foot.

Add about 1” of sand to the bottom of the trench. Install the concrete blocks, leveling them as you go using a 4’ level. In some instances you may want to use a very straight 2×4 vertically oriented with the level on top to span further distances. Add or subtract sand beneath the blocks as needed until your blocks are level throughout.

Note: I used 4”x8”x16” solid concrete blocks. I oriented them horizontally meaning they went down about 7”. We have not had issues with predators digging beneath them, but for additional predator proofing, you can orient the blocks vertically to go 16” down.

Step 2 – Build your walls

This coop uses basic wall construction with a bottom plate, vertical studs, and a top plate.

Our walls were 8’ high and I built them flat on the ground and then moved them into place. The bottom plate should be treated 2×4’s since it will sit directly on the concrete block and likely be exposed to moisture in the ground level of the coop. The rest of the coop can be built with standard construction lumber.

framed wall for barn chicken coop

I spaced my studs 24” on center, which is plenty sturdy for a coop. Along the front wall I used 4×4” posts and spaced them 48” on center. This allowed for greater visibility inside the coop.

You will also need to frame out your door(s) at this point.

If you have a preference of fasteners to assemble the walls or own a nail gun, that is great! I use screws when assembling walls. But don’t use just any screws! Standard Philips head screws are outdated, will strip out, and leave you really frustrated. Spend a little extra and buy t-25 star head coated screws. They drive in so easily and the coating will stand up to the moisture of a coop and barn.

Step 3 – Install chicken wire

Yes, I’m recommending you install the chicken wire (or hardware cloth) on the walls before setting them in place! In my experience, getting a nice tight and secure install on chicken wire is so much easier when the walls are laying down versus trying to install it vertically. But, installing the chicken wire after the walls are in place is also an option. I did a mix of both.

I purchased 4’ wide chicken wire. Since each of the wall sections I built were 8’ wide, the 4’ chicken wire worked perfectly.

If you have an air compressor and a brad nailer that will accommodate staples, that will make this step SO much easier. Otherwise, you can also use a mechanical stapler, but your hand will be cramped and worn out by the end!

Staple a straight line of chicken wire on either the top or bottom of your wall panel. Continue stapling the chicken wire along the rest of the wall pulling it tight as you go. Having an extra person helping to keep the chicken wire tight and straight makes the job much easier!

Step 4 – Assemble your walls

Move your walls on top of your foundation. Use a level to make sure the walls are level vertically. Have a couple spare 2×4’s on hand to temporally brace the walls together so they stay level.

Screw the wall panels together every couple feet where they meet so they are secure.

assembling walls of chicken coop inside barn

This is optional, but I did drill a couple holes with a masonry bit through the bottom treated plate on each wall section into the concrete blocks and installed a Tapcon screw. These screws are specifically designed to work with masonry. They’ll help to make sure the walls stay in place on the foundation.

Step 5 – Build your ceiling

To build a ceiling to your coop sturdy enough to store materials on top, you’ll want a beam along the center of the coop. I used a double 2×6 beam.

I then hung 2×4 joist off the center beam every 24” on center. The joists spanned from the center beam to the side walls of the coop. On the center beam I supported the joists using a metal joist hanger. On the side walls, I installed a horizontal 2×4 ledger. This is basically a 2×4 that sat 3-1/2 below the height of the wall and was securely screwed to the vertical studs of the wall. The joist then rested on this ledger and were screwed in.

chicken coop in pole barn

Finish the ceiling with 1/2” plywood sheets on top. Screw or nail the plywood to the joists and wall top plates. Remember to make sure it is secure so no predators can fit through gaps.

Step 6 – Add your finishes

Install the plywood or paneling to finish out the walls of your coop. I found that 4’x8’ sheets of plywood worked perfectly with this coop size since you just need to cut them in half for the 4’ walls and in quarters for the 2’ walls. 

finishing siding on barn chicken coop
interior walls of chicken coop inside barn

For the exterior walls I used a 3/4” exterior grade plywood with a groove pattern in it. For the interior walls, I used 1/4” plywood with a beadboard pattern. And for the front I used tongue and groove boards I had leftover from a house project. All of these materials are pretty standard at hardware stores.

And finally you can install your door!

Step 7 – Make it chicken friendly!

You now have a coop! Now you just need some feathered flock furnishings to finish things off. This should include feeders, waterers, laying boxes, and a roost. 

A basic feeder and waterer from your local farm supply store will do the trick. Depending on your flock size, you may consider more than one of each. If you’re concerned with your chickens water freezing during the winter, we came up with this Easy DIY Heated Chicken Waterer design after trying other methods that were either really expensive or didn’t work.

Laying boxes don’t need to be anything fancy. Ours are just constructed out of a sheet of 1/2” plywood. You can also repurpose old drawers from a desk or dresser that add a nice touch and charm!

laying boxes inside barn coop

There are a lot of roost designs and philosophies out there. I figure a bird would typically just roost on a tree branch so that’s the route I went. I collected up some tree branches from around our property, screwed them together to make a ladder and leaned it against the barn wall inside the coop. It’s worked out great!

The last thing you’ll need is to line the floor of your coop with straw, wood chips, or wood shavings as a bedding for your birds.

And you’re all set!

Chicken Coop Inside Barn – Advantages & Disadvantages 

We have seen a bunch of advantages to having your chickens inside your barn, with just a couple disadvantages. Let’s look at those.

Advantages

Stays dry

Barns already have a solid roof overhead. And most have solid walls too. This allows the construction of your barn coop to stay pretty simple without needing to make it tight from the elements. With regular cleaning, your chickens will stay happy and dry in your barn coop!

Extra protection

Really having a coop within a barn is almost like having an extra layer of protection form predators getting to your chickens. If your barn is sealed up good and you build your coop to keep predators out, you can rest easy at night knowing your gals are safe and secure.

pole barn chicken coop

Water and supplies close by

Most barns are already equipped with a water supply, electrical supply, and you can easily add a place to store food. We just use an old refrigerator that stopped working to store bags of feed in! This makes doing chores a breeze instead of needing run hoses long distances or lug buckets of food and water to a coop.

Ventilation in summer

Most barns have large doors that can be opened up or have built in ventilation in the roof. Barns can warm up quickly in the summer heat. We have large doors we open up on both sides of the barn and this provides the perfect cross ventilation to keep the coop comfortable.

Warmth in winter

Barns can also be closed up tight to trap in heat during the cold winter months. I remember when we had smaller standalone coops doing things like running heat lamps and wrapping plastic around the coop to trap heat. That was expensive and just doesn’t look great. The barn has kept our chickens plenty warm without any extra measures needed.

I will note that part of the project I intended to get to but haven’t yet was to frame out the exterior barn wall inside the coop to add paneling and insulation to it. This is the one vulnerable area where cold air enters the coop. An extra wall layer and some insulation would really help keep the cold out.

Disadvantages

Lose barn space

Space in your barn can definitely be a premium. I get that. And you do lose space with a barn coop that you might have other uses for. But with still being able to store supplies on top of our coop, we found the lost space is not as big of an issue as we might have thought initially.

chicken coop built inside barn

Dust

Chickens stir up dust. It’s what they do. Like, absurd amounts of it. You can clean your barn and come back two days later and find it just as dusty as before. If that’s a big concern for you or you use your barn for other activities that don’t mingle well with dust, then a coop in your barn might not be the right fit.

Poop

It’s definitely possible to add a door directly to the outside and keep the rest of your barn sealed off from chickens getting in. But doing so can be a challenge. Our chickens have free-reign of the whole barn and we all know what that means. Poop. Everywhere. Again, if you don’t have a good plan of how you’d chicken proof the rest of your barn, then you’d better let the poop reality settle in before building your coop.

Sunlight

Some barns are low on sunlight. Ours at least has some clear transom panels that let in light along the walls. Plus we keep the doors open during the day. But it’s still fairly dark in there. When I do frame out that exterior barn wall in the coop I plan to add some windows for extra light and ventilation.


Looking for more chicken raising tips and tricks? Check out these posts:

Simple Outdoor Chicken Brooder Ideas

How To Care For Baby Chicks

Easy DIY Heated Chicken Waterer

Chicken Tractor Plans for 25 Chickens

September 11, 2022 10 comments
0 FacebookTwitterPinterestEmail
heated waterer keeping water from freezing in coop
ChickensHomestead How-to's

Easy DIY Heated Chicken Waterer

by From Scratch Farmstead January 2, 2022

If you’re looking for a reliable, worry-free water source for your flock this winter, this easy do-it-yourself heated chicken waterer is it. Make it in just 10-15 minutes. Use your existing waterer. It’s simple and it works. Your chickens will love it and you will love not having to worry about frozen water in the dead of winter.

We live in northern Illinois and can have some pretty extreme winters. I knew I was going to need something reliable and I wanted to be ready for our first winter having chickens on our new farm. So, I originally went out to my local Farm n Fleet and picked up a heated chicken waterer base that cost $40. The box told me they wouldn’t guarantee it to work unless you bought their double-walled metal waterer with it. All in, the total was over $100 with tax.

Yikes!

I knew I could do better. So, I returned both items, got my money back, did a little research, and came up with a fool-proof heated chicken waterer design that is super simple.

DIY heated chicken waterer with cover off

Why I don’t recommend a heated waterer with a lightbulb.

In the past I’ve built a different style of heated chicken waterer that you commonly see out there. It’s a large cookie tin with a lightbulb socket and incandescent bulb as the heat source inside the tin.

I built one a few years back for our backyard coop while living in the suburbs. There were a lot of pros; everyone has an old cookie tin lying around the house and its pretty simple and cheap to rig up a bulb socket inside of one.

However, what it didn’t account for is moisture. Water spills. Rain and snow. General moisture from chicken doo-doo. Moisture creeps into your cookie tin over time and incandescent bulbs just don’t hold up to moisture. I found myself replacing bulbs monthly, if not weekly.

Climbing into a tight coop in 0-degree weather trying to pop open a frozen cookie tin is not fun! We have a larger coop now and I needed something our 20+ birds can rely on.

heated cable inside concrete block for chicken waterer

What makes this the best heated chicken waterer design?

First off, it’s easy. If projects aren’t your thing, you CAN build this! The steps are simple, it doesn’t require a lot of tools, and it will only take about 10-15 minutes to build.

I also believe in replaceable parts. If a product or brand doesn’t have replaceable parts for what they sell I generally won’t support it. That’s a big reason why I returned the waterer from the store. When the heating element goes bad, which it will, I don’t like the idea of tossing the entire thing and starting over when only one part went bad.

This heated chicken waterer base will cost less than $35 and I use very basic, readily available materials that can all be swapped out quickly and easily.

What I used

12’ Electric Heat Cable (~$28) – These flexible heat elements can be found in the plumbing department of your local hardware store and are relatively affordable, or buy it here. This one came with a built-in thermostat. The thermostat turns on the heating element automatically when there is a risk of water freezing. This is a fantastic feature so you don’t need to worry about wasting energy or turning your waterer on and off constantly. A 12’ cable has worked fine inside our coop here in northern Illinois, but if you need more heat, simply get a longer heat cable for only a few dollars more.

Note: This installation does go against the manufacturers recommended installation guidelines to not have the heat cable coiled or touching itself. I have not had issues with the cable overheating but you should read the instructions yourself. This alternative heat cable assures it will not short or burnout when overlapped, but it does not have a built in thermostat.

Concrete Block (~$2) – I used a 12” x 16” concrete block (or CMU) that is 8” high. You want a sturdy base under your waterer and something heavy enough that your chickens won’t knock over. Concrete is also a great insulator, so it traps a lot of heat within the hollow chambers of the block. I did purchase this one but I am also a big fan of reusing, and concrete blocks are something you can almost always find for free on Craigslist or Marketplace.

taping heat cable inside block of chicken waterer

Tile (~$1) – I used one, 13-1/2” x 13-1/2” flooring tile. Your tile needs to accomplish two things: 1) Be large enough to fully cover the chambers of the concrete block to trap heat, and 2) Be thin enough to effectively transfer heat. They sell thin concrete blocks that would have fit nicely and certainly been more robust, but they are over an inch thick and I wasn’t sure heat would transfer well through them. Go with the tile. Mine has held up well and always stays plenty warm.

Electrical Tape – You probably already have some one hand, but if not pick up a role of electrical tape. Cheaper tape may not stick well to the block, so I’ll save you the hassle upfront and recommend you spend a few dollars more for the name brand tape.

Thermostat Alternative – Some heat tapes don’t come with a built-in thermostat. In this case, you can buy a super handy plug called a Thermo-Cube which has the same affect. In fact, going this route would probably have been my preference if my local hardware store carried just a basic heat cable. It’s cheaper to buy one with out a thermostat and generally it’s the electric heat element that goes bad and not the thermostat.

Tools List:

  • Angle Grinder w/ Masonry Grinding Blade (or a hammer and chisel)
  • Safety Glasses
  • Sharp knife to cut electrical tape
  • pencil

Step-by-step Guide to Building your Heated Waterer Base

Step One: Mark out where you want your heat cable to enter the block. With an angle grinder and masonry grinding blade (wear safety glasses while using), grind a notch at your make large enough for the heat tape to sit in so the tile can lay flush on top of the block. Next, make two similar notches on the top of the center divider between the two chambers. These notches allow your heat cable to transfer from one chamber to the other and also help hold the heat tape in place.

Note – If you don’t have an angle grinder, now worries! Grab a hammer and a chisel and you can chisel out your own notches. It might take a little extra time and not be as precise, but your chickens will never know the difference!

grinding notches in block for heater chicken waterer

Step Two: Run your heat cable through the entry notch and tape it in place. Make sure the thermostat hangs outside the block about 6-8” so that it can get accurate readings. Coil up about half the tape in the first chamber, tape the coil so it holds together, then tape it to the block so it stays near the top. Bring your heat cable to the other chamber through one of your center notches, coil up and tape the rest. I left a tail at the end of the second coil to bring through my second center notch. Apply as much tape as needed at the end to hold it all in place.

closeup of heat cable in notch in heated chicken waterer

Step Three: Place the block in your chicken coop where you want it and make sure it is level.

Step Four: Plug in the tape, put your tile on top making sure the chambers of the block are fully covered, and place your chicken waterer on top.

heat tape inside block on heated chicken waterer

That’s it!

We couldn’t be happier with the results. We’ve had multiple nights in the negatives and woken up each morning to fresh, unfrozen water for our ladies to drink from. Give this one a try and you’ll have a long-lasting, worry-free water supply for your own flock! 

We’re excited to hear what you think in the comments below and let us know if you have questions.

Some of the above links are affiliate links. This means we earn a small commission on qualifying purchases at no cost to you.

January 2, 2022 14 comments
1 FacebookTwitterPinterestEmail

About Us

About Us

So Glad You're Here!

Hi! We are Jim and Joelle. We love sharing homestead how-to’s, from scratch recipes, and natural do-it-yourself projects to help you nourish your family. To learn about our story, click the image above!

Stay Up-To-Date

Popular Posts

  • How Many Cows Per Acre On A Small Farm

    May 26, 2022
  • Chicken Tractor Plans for 25 Chickens

    May 1, 2022
  • Predator Proof Chicken Coop Essentials You Need To Know

    February 11, 2023
  • Easy Farmhouse Cheddar Hard Cheese Recipe

    July 17, 2022
  • How Eating Liver Changed My Life

    March 31, 2022

Follow Along!

  • Email
  • Facebook
  • Instagram
  • YouTube

Instagram

  • Facebook
  • Instagram
  • Youtube
  • Email
  • About
  • Privacy Policy

© 2021-2023 From Scratch Farmstead | As an Amazon Associate we earn from qualifying purchases.


Back To Top
From Scratch Farmstead
  • About
  • Homestead How-to’s
    • Family Milk Cow
    • Gardening
    • Chickens
    • Small Scale Farming
    • Buying A Homestead
    • Homestead Living
  • Nourishing Recipes
    • Home Dairy
    • Food Preservation
    • Breakfast
    • Main Course
    • Sides
    • Dessert
    • Sauces & Condiments
  • Natural Living
    • Skin Care
    • Home Essentials
    • Living On A Budget
    • Our Healing Journey
    • Homestead Skills
    • DIY
    • AGA Stove