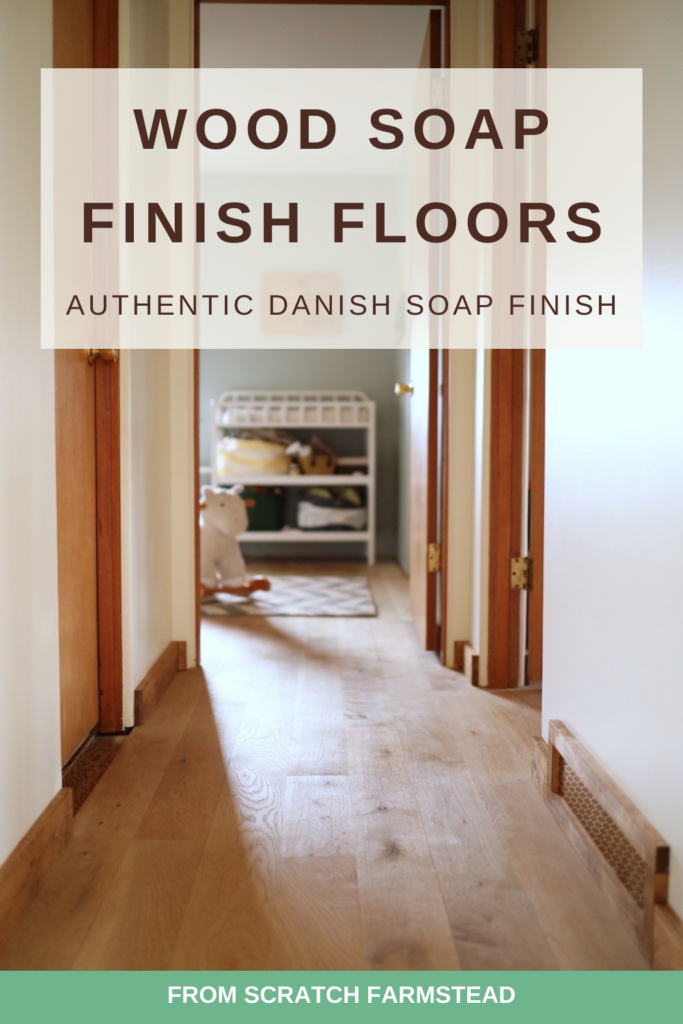
Wood Soap Finish Floors (Authentic Danish Soap Finish)
Perhaps you recall reading about Almanzo Wilder scrubbing their wood floors with lye. Perhaps you’ve seen the white wood “Nordic look” floors featured in a magazine. Or, perhaps you’re looking for the most natural and safest wood floor finish option for you family. Whatever your reason, we’ll talk all about how to apply a wood soap finish on floors along with the pros and cons we’ve seen after 2+ years of use.
Why We Chose to Soap Finish our Wood Floors
It was an exciting day.
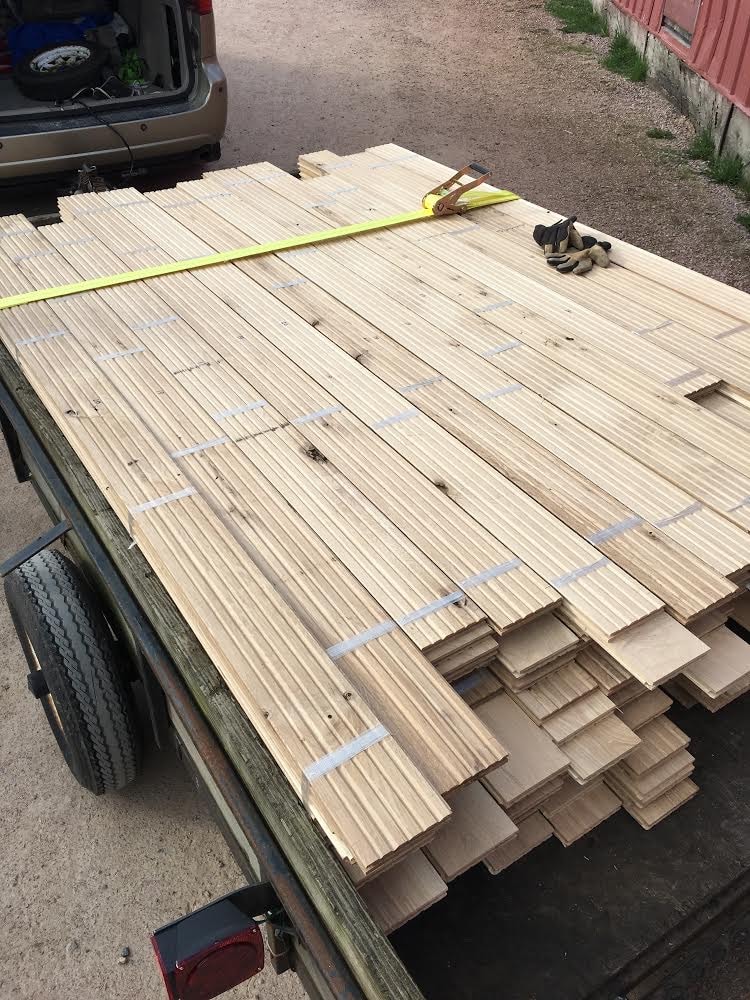
I sat down with Felte as he worked out the totals—entirely by hand—of our white oak wood flooring purchase.
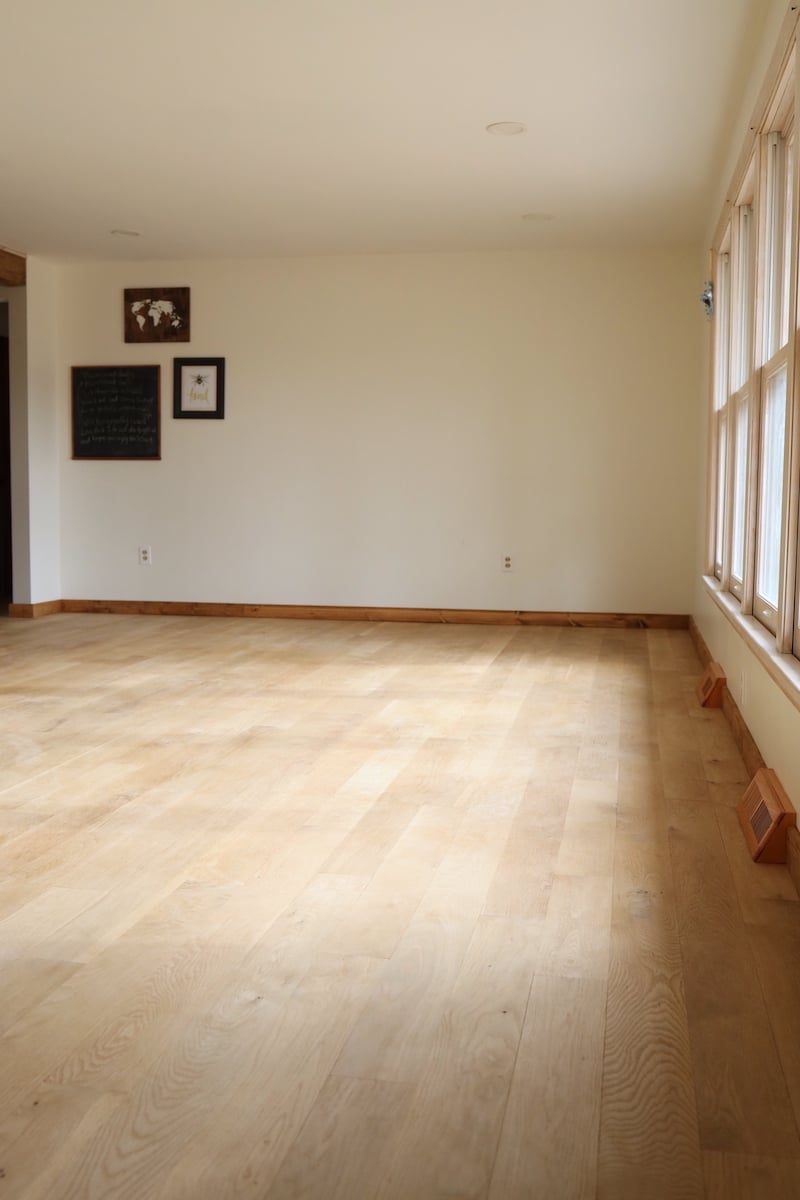
Felte ran the Amish sawmill where we currently lived in central Wisconsin. The foreclosed, 5-acre homestead property we had just purchased back in our home state of Illinois was missing a key ingredient—floors!
So before moving back, we knew the Amish mill would be our best bet for the old-growth hardwood floors we were after.
The question that loomed on our minds, however, was how we would finish them?
We wanted something safe for our growing family. No VOC’s. No off-gassing.
Going the industry standard route and coating these Amish-sawn wood floors in plastic with polyurethane just didn’t seem right. And we couldn’t find another finish option out there that was both budget friendly and preserved the natural white tones of the wood without turning it yellow.
Digging deep, we came across SOAP FINISH.
Soap finish? What in the world is that?
If you’re frustrated with a lack of information out there on soap finished wood floors, we were right there with you.
But, as we’ve discovered time and time again, learning new skills and choosing the unconventional path in life often leads to the greatest joy and fulfillment.
So, in 2019 we soap finished our floors! This meant scrounging together whatever little info and advice we could gather for wood soap finish floors and going to work on all 1,700 sq. ft. of our ranch home.
The results?… Stunningly beautiful!
The practicality?… Keeping them that way is a lot of work!
The verdict?… We’ll let you come to your own conclusions.
Regardless, we’re glad we went for it. This time-tested, traditional wood finish method has added beauty, warmth, and truly safe, eco-friendly flooring to our world.
Are We Soap Finish Flooring Experts?
Before digging in much deeper on the topic, it’s best to make something clear: We are NOT necessarily experts on soap finished floors!
If you’ve researched this topic you know that information is few and far between – especially in English! There’s tutorials on soap finish for furniture, but very little exists on using it for floors.
We have had to gather as much information as we could, make some assumptions along the way, learn from mistakes, learn from more mistakes, and forge our own path.
But, being over two years in now, we feel we’ve learned enough to share our knowledge and experience so far. As we keep learning, we’ll update this post to make it as helpful as possible to anyone else considering soap finishing their floors!
If you are an expert or have experience, please share your advice!
If you’re researching wood soap finish floors, let us know your questions!
Alright, now let’s talk wood soap finish!
What is a Traditional Wood Soap Finish?
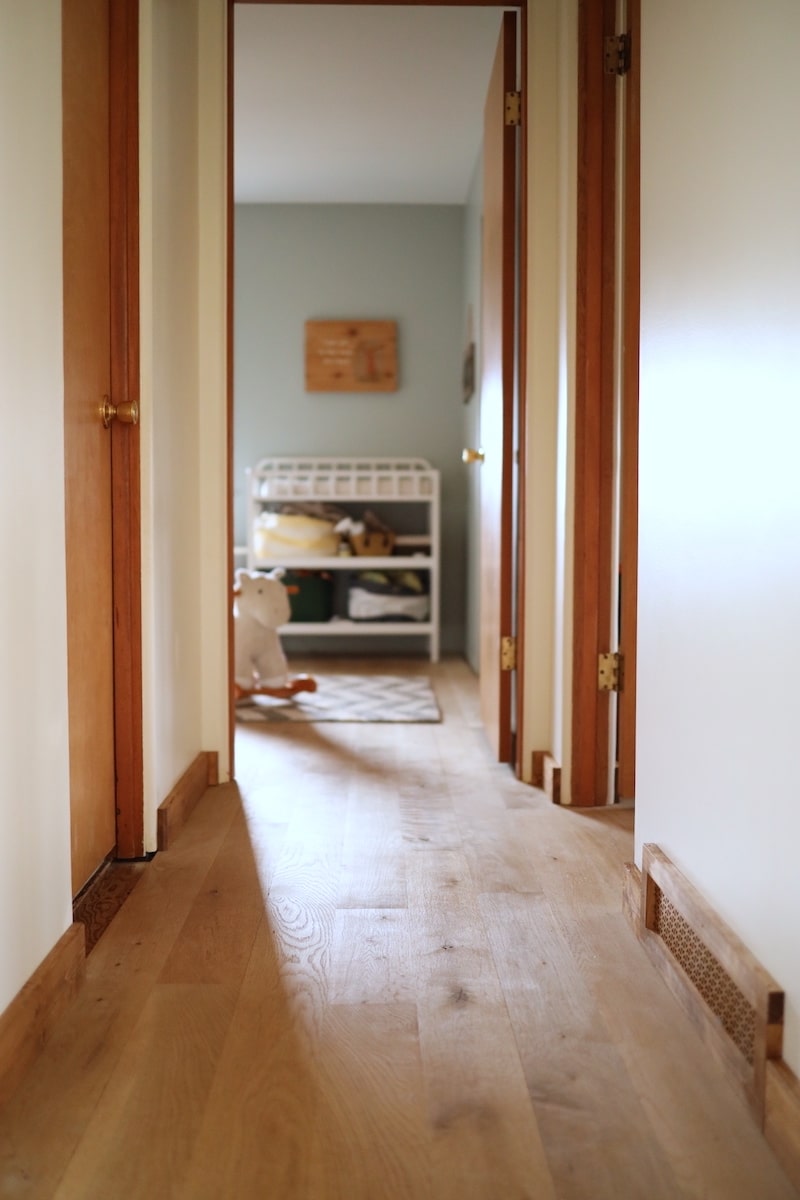
Soap finish, or Danish soap finish, is a traditional Nordic or Scandinavian wood finish method. In countries like Denmark, Norway, and Sweden, you will commonly find light wood floors finished with soap. These countries also use soap finish extensively in furniture making.
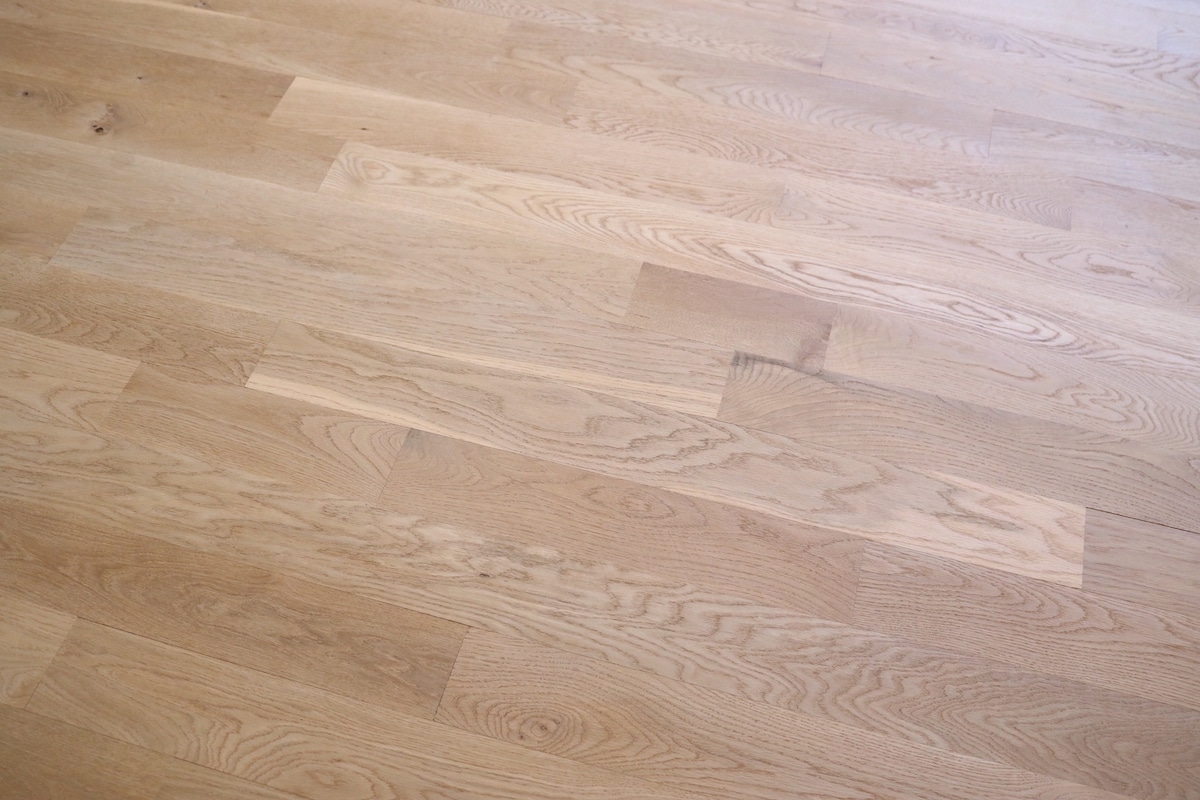
Some of the main characteristics of soap finished wood floors are the warm, organic, and smooth wood grain feel they offer, paired with a low-sheen or matte finish.
Perhaps the most standout attribute of wood soap finish is the ability to preserve, or even enhance, the beauty and character of light colored woods. Lye, a key ingredient in soap, has a whitening effect that keeps light woods from darkening or yellowing over time.
Soap acts to clog or fill the pores on wood surfaces keeping dirt and oils out. Because of the degreasing nature of soap, when reapplied it also acts to remove or release buildup of oil, dirt, and other stains on the surface.
On soap finished floors in particular, a regular reapplication of soap is required to keep the wood conditioned, resistant, and clean. Reapplying soap finish gives wood a stabilizing benefit by slowing the woods transfer of moisture with the surrounding environment.
The whitening that soap offers, combined with the buildup of soap finish layers over time, are known to produce an attractive patina to your wood floors that improves with age.
History of Soap Finished Floors
Traditional soap finish has been used on wood floors in Denmark and other Scandinavian countries for hundreds of years. Early settlers from these countries brought this tradition to the Americas and soap finished floors became common in farmhouses.
Laura Ingalls Wilder’s book, Farmer Boy, documents this trend in the mid-19th century:
”The kitchen was bright with the glitter of snow outside. The floor and tables were scrubbed bone white with lye and sand. The tin saucepans glittered silver, and the copper pots gleamed gold on the walls, the teakettle hummed, and the geraniums on the window-sill were redder than mother’s red dress.”
Our ancestors discovered soapmaking by pouring tallow (beef fat) over the ashes of wood from a fire, making wood-ash soap.
The process of making soap today is much the same; mixing lye (sodium hydroxide) with an oil. When combined, the oil neutralizes the alkali lye in a process called saponification making the resulting soap 100% safe.
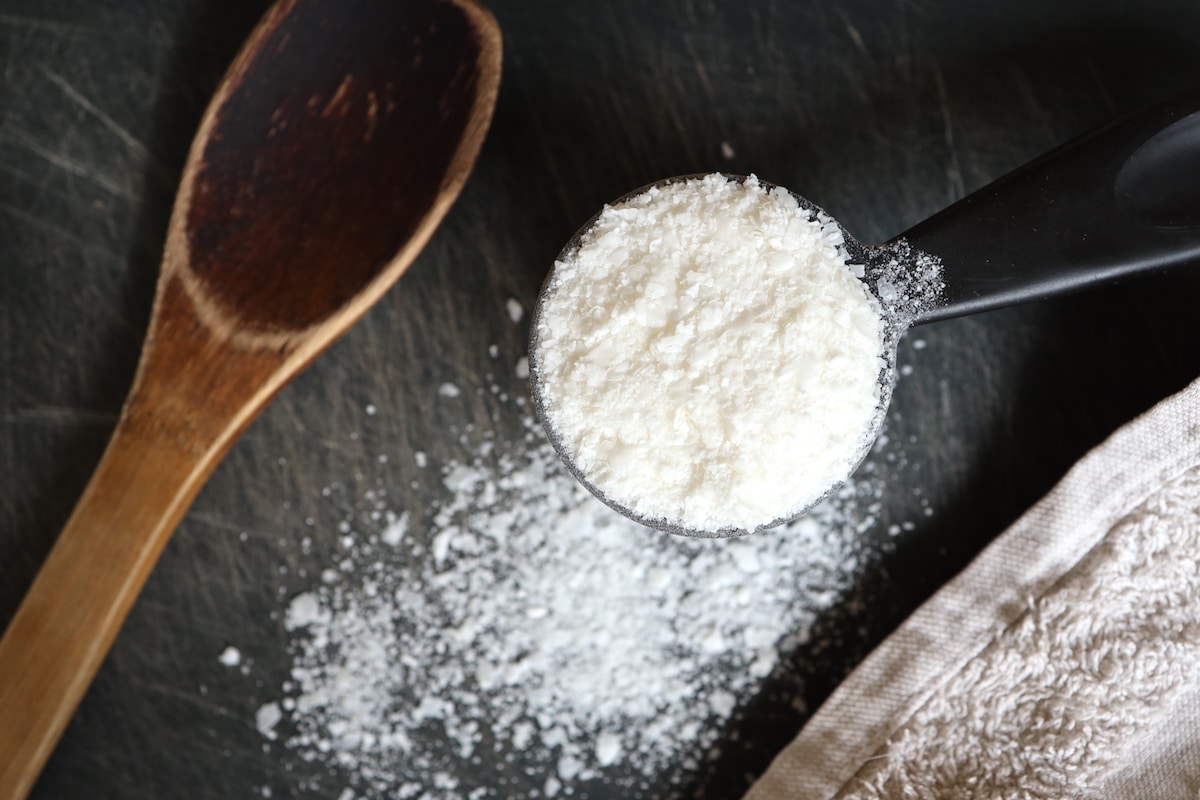
Today, lye based soap can be purchased as soap flakes, which is ideal for mixing as soap finish. Your Grandma or Great-Grandma likely would have used Ivory Soap Flakes made with vegetable or plant based oils. Many soap flakes that are currently available come in the form of Sodium Tallowate, or lye mixed with tallow. This is most similar to the the traditional method and what we use for soap finish.
While soap finished floors are a rarity in the US today, traditional soap finish is making somewhat of a resurgence in woodworking as a natural wood finish option and among home designers to achieve the sought after “Nordic look.”
What Type of Soap is Best for Making Soap Finish?
There are a decent amount of Sodium Tallowate soap flake options out there. You want soap flakes that are pure with no added preservatives, chemicals, or fragrances.
After researching the options, we landed on purchasing our soap flakes from Earthborn Elements. They offer a variety of sizes depending on your needs and square footage of wood flooring you have. A 1 gallon bucket might be a good place to start, or we purchased the 5 gallon bucket and should be set for life!

Another good soap flake option we’ve come across is from Pure Organic Ingredients.
What Type Of Wood is Best For Using Soap Finish?
Light colored woods, both hard and soft, are an ideal fit for a soap finish.
Hard wood species can include: white oak, white maple, ash, and beech.
Soft wood species can include: white pine, spruce, and fir.
Soap finish can be used on any species of wood. However, you lose the whitening effect on darker woods and will likely end up muting or detracting from the innate dark or colored tones of other wood species.
Wood Soap Finish — PROS vs. CONS
Soap finish floors are not for everyone. They don’t exactly fit into the modern mold maintenance-free, quick, or convenient. These floors seem to meld best with a more old-fashioned, slow-paced way of life.
That said, there are good reasons to consider soap finished floors, and good reasons to avoid soap finished floors. Let’s look at the pros and cons.
PROS
Safe
While the construction industry is beginning to wake up to the health risks of VOC’s, off-gassing, and harsh chemicals from materials, many finishes and sealers still remain highly toxic. Flooring covers an enormous surface area in your home and you are constantly in contact with it. You want something safe, and soap finish is as safe, pure, and natural as it comes. Zero VOC’s or toxic materials. Applying it is literally the same as washing your hands!
Stunning!
The Nordic look is popular for a reason. The white, soft tones of soap finished floors give both an aura of warm and inviting along with minimalistic and simple. Whatever species of white wood you have or plan to use, the raw and organic tones and grains of the wood will really stand out. And they’ll get better with age!
Easy To Apply
We’ll talk more about application methods below, but using soap finish is not rocket science. In fact, we did it without buying any special equipment by just using old bath towels. You don’t need to be a professional woodworker to nail this one. The process is simple and forgiving no matter your skill level.
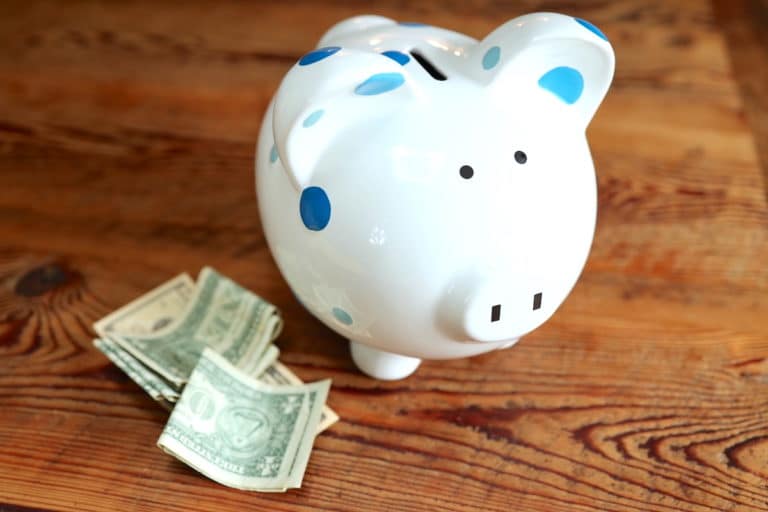
Budget Friendly
We bought a 5 gallon bucket of soap flakes for around $150 and we might just be set for life! Other oil based floor finishes can get pricey when you consider the per sq. ft. cost and multiple coats being needed. You’ll see below that the long term cost comes in maintenance time requirements, but the up-front cost is friendly to any budget!
Feels Great
The build-up or layering of soap finish is minimal, so what you feel underfoot is the raw wood of your floors. They feel soft and warm to the touch. If you’re accustomed to more high-sheen or glossy wood floors with a layer of sealer on top, soap finished floors will feel as pure as can be.
Easy To Repair
There’s a beauty to the fact that a soap finish is not a permanent finish. With many floor finishes, if an area gets stained or scratched, you may need to refinish the entire floors to cover it up. When dings or marks appear on soap finished floors, you can simply treat that spot (maybe with a light sanding) and apply more soap finish for easy flooring repairs.
Gets Better With Age
We’re only two years in, but when you look at pictures of woods floors that have been regularly maintained with soap finish for 100 years or more they look fantastic! Where most floor finishes dull, wear down, or get marred over time, you’ll continue to enjoy the natural beauty and patina your floors develop over the years as the layers of soap finish preserves and enhances them.
CONS
High Maintenance
We’re not going to lie—with young kids, a dog, and living on a farm we were a bit on-edge as we broke in our floors and learned what soap finished floors do or don’t like. Oil for instance can be its arch nemesis! Most recommend you reapply soap finish to your floors every three months after they are initially sealed. That’s no small task. Yes, there’s the multi-tasking factor that maintaining your floors and cleaning them are one-and-the-same—reapplying soap finish also cleans them. But, there’s no getting around that this can require a good bit more time than a simple vacuum, sweep, or quick mop.
Shoes Off!
Knowing that a soap finish isn’t waterproof, we started a strict no shoe policy in the house right from the start! We’ve since discovered this is also the norm in many Scandinavian countries. This con isn’t any sort of deal breaker, but it does get old needing to constantly educate every visitor that comes through your door on why shoes stay at the doormat.
Spots And Scratches
If you go with soap finish floors, you need to be ok with embracing imperfection. Like buying a new car off the lot, it’s only a matter of time before the first door-ding shows up. Except in your home, the likelihood of spills, splatters, drops, and any other number of accidents is all the more likely. And because there is no active ware layer on top, scratches happen. These floors aren’t impervious. Part of their charm is the character they’ll develop over time. The berry that smashed into our kitchen floor and then proceeded to sit there, soaking in unnoticed for some time can likely come out with enough elbow grease and sanding, but we’re still living with it. Most spots, however, can be removed or reduced with regular maintenance.
There’s A Learning Curve
If you’re in the US like us, or anywhere outside of northern Europe, it’s likely that floors with a Danish soap finish are a bit of an anomaly. Your local flooring contractor, woodworker, or lumberyard might not even be able to offer help. As we’ve learned, you’ll figure out a process that works for you over time along with some do’s and don’ts. You can’t expect to nail it the first time. For better or for worse, it’s not a one-and-done type method. You get regular opportunities to learn, adapt, and keep your floors looking great!
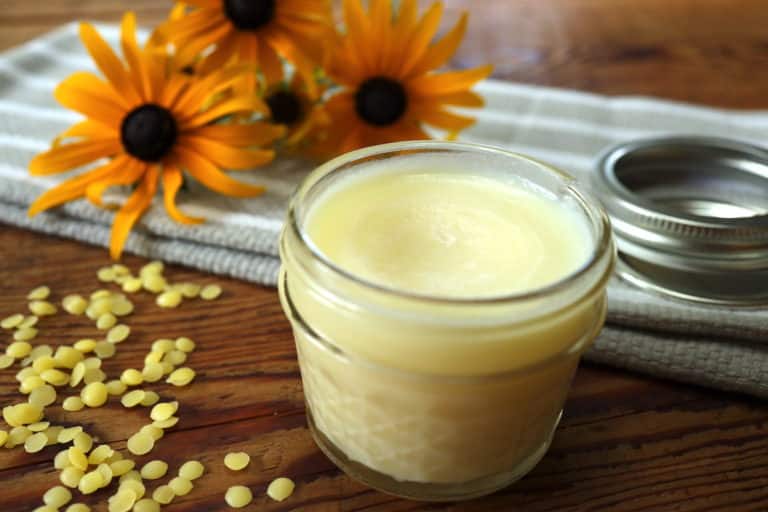
How To Mix Soap Finish for Wood Floors
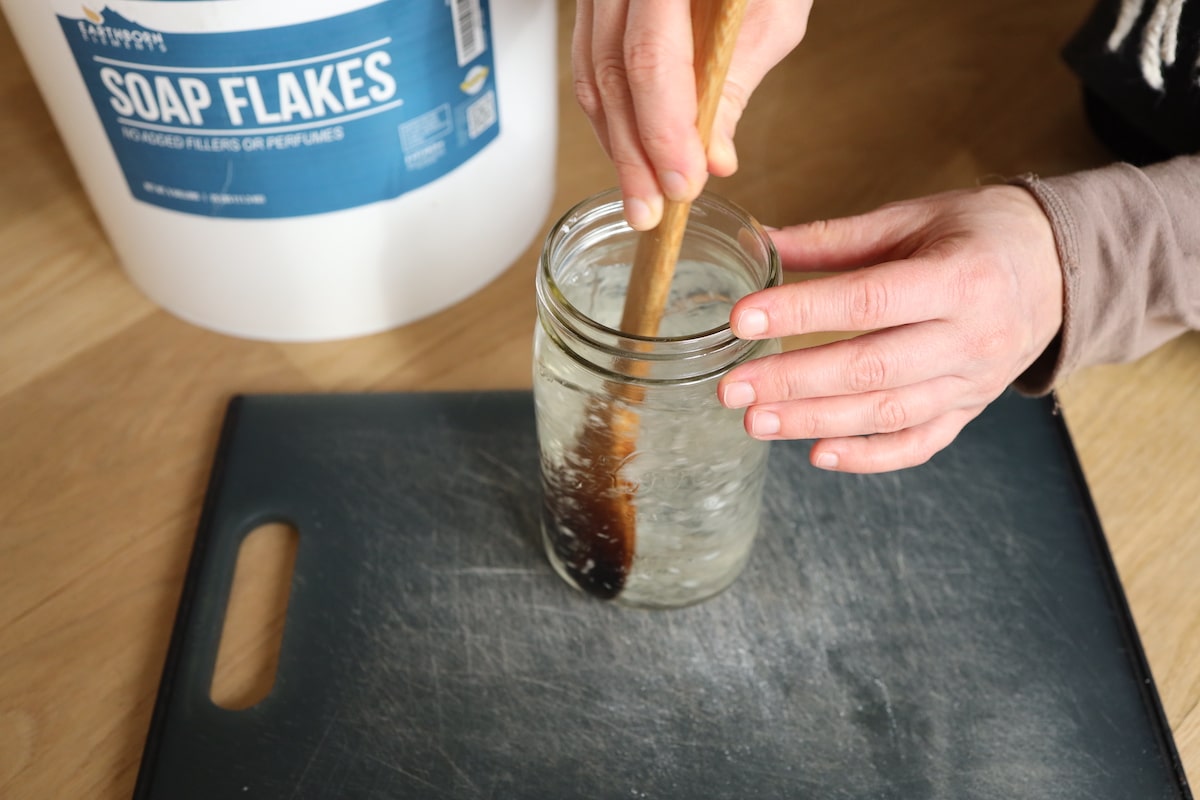
Soap finish is very easy to make! You simply add boiling water to a specific ratio of soap flakes.
But, almost every tutorial on soap finish you find out there will have a different recommendation of soap-to-water ratio.
On the low end we’ve seen 2 tbsp per quart of water. On the high end we’ve seen a one-to-one soap-water ratio recommended.
We started on the low end and now mix somewhere between 1/2 cup to 1 cup of soap flakes per quart of water. You can try different ratios and see what you prefer. It doesn’t need to be exact. If you ask someone from Denmark, you might get a loose answer like—just throw a palm full of soap flakes into a quart of water 🙂
Here are the steps for mixing soap finish:
1. Boil your desired quantity of water.
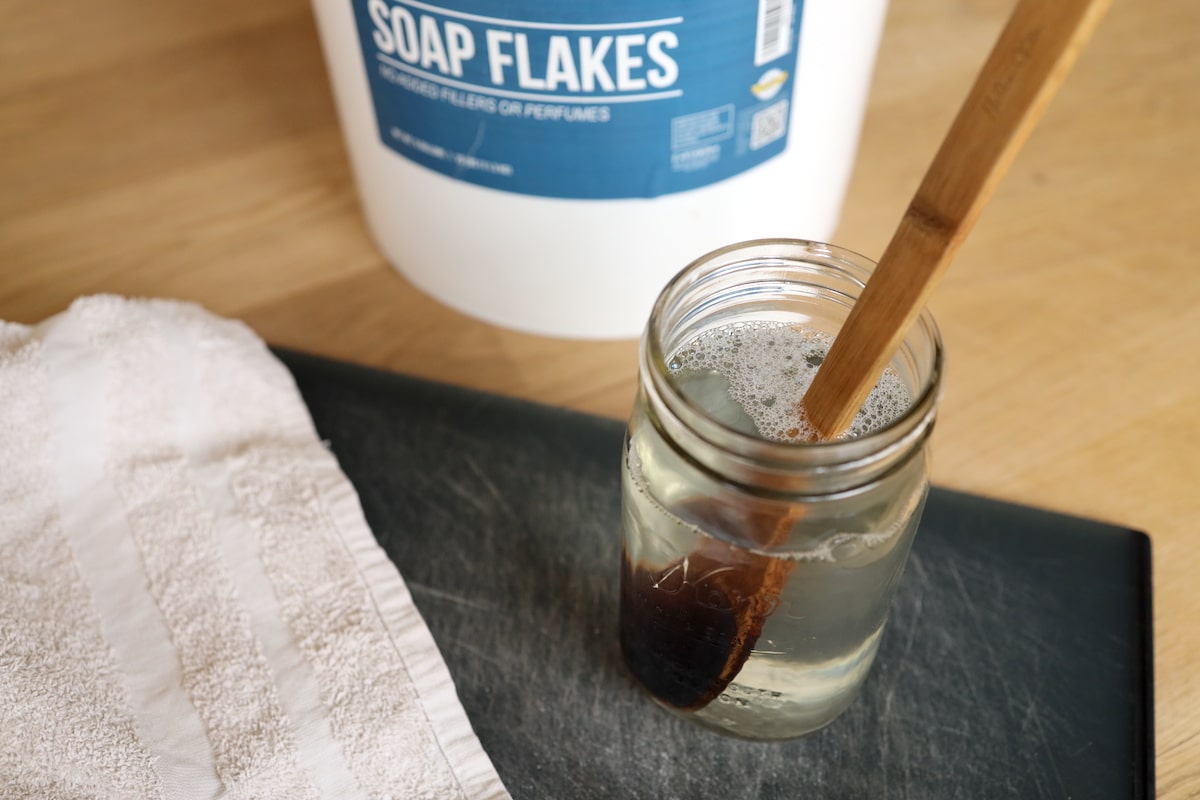
2. Add boiling water to portioned soap flakes in a bowl or bucket and stir. At this point, the water will look like soapy bath water.
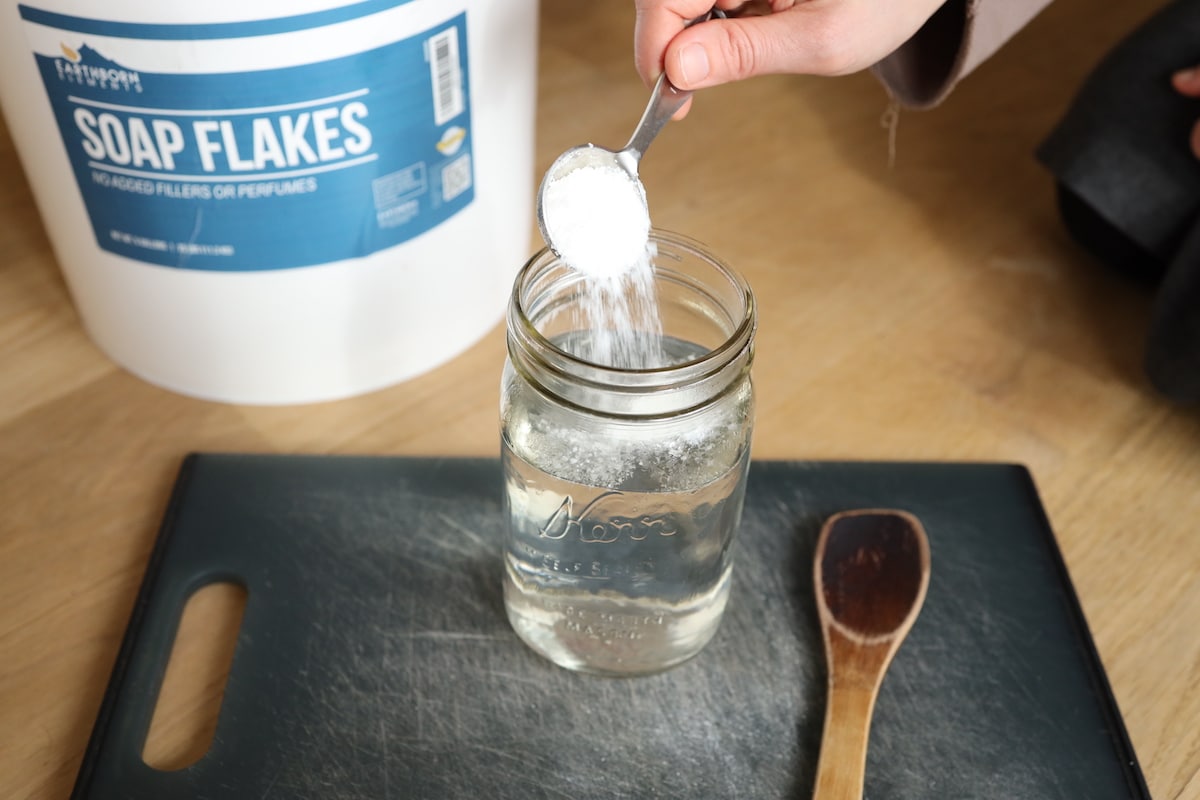
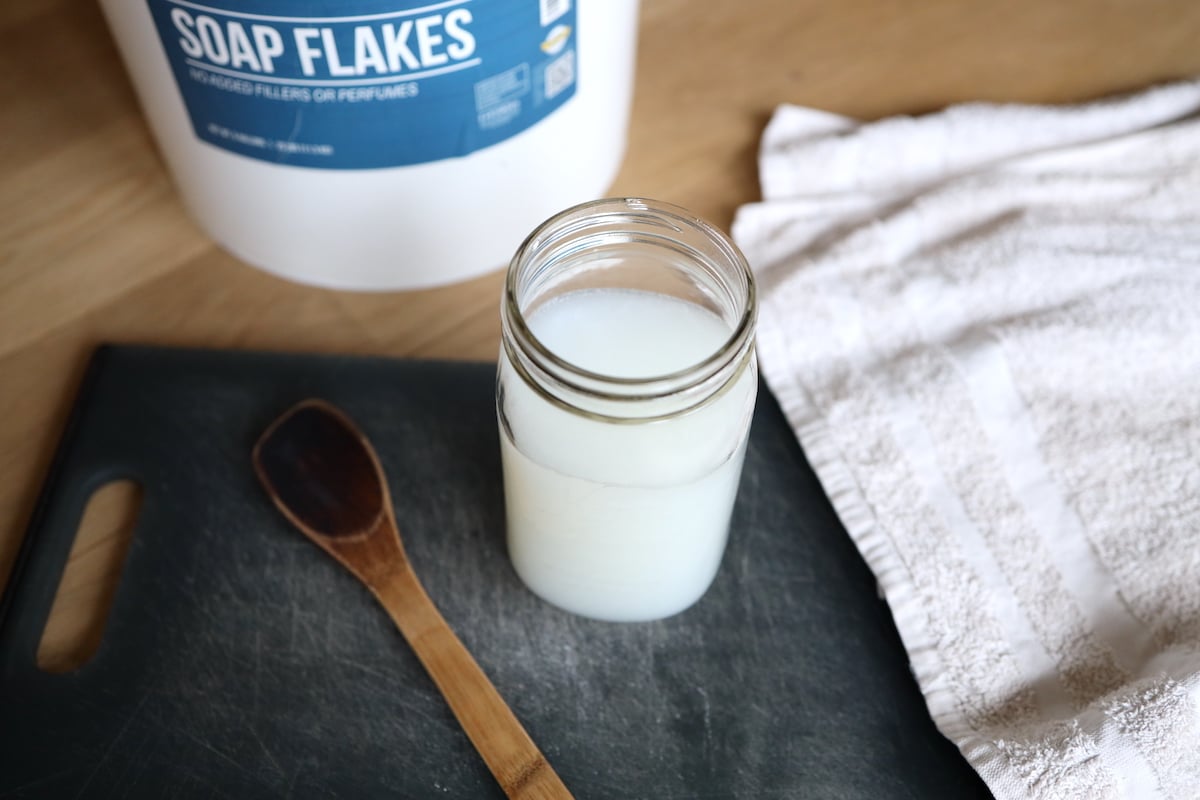
3. Let sit for 24 hours.
4. Your soap will now have formed a white, gel-like solid. Stir the soap mixture until it loosens up and becomes somewhat like a paste or cream.
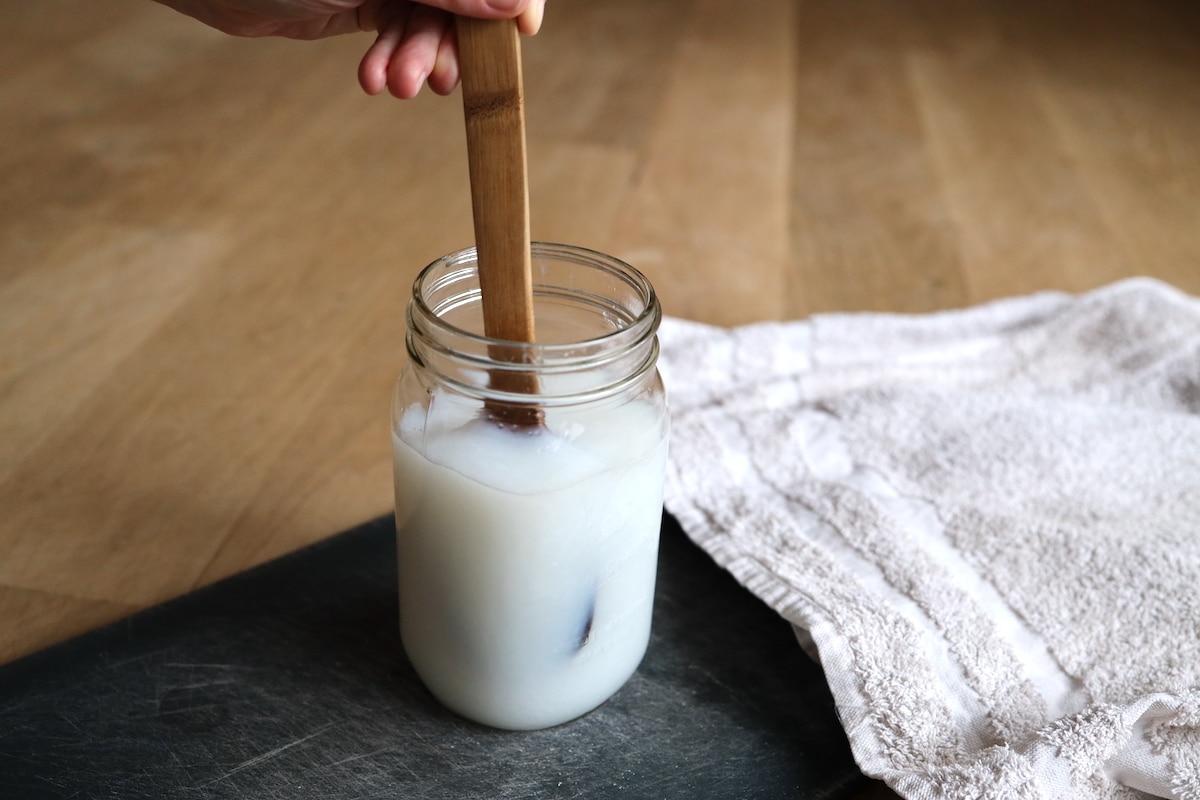
After this, your soap is ready to apply to your floors! We tend to mix a gallon at a time in a 5 gallon bucket and stir with a paint stick. One gallon is about the right quantity for one solid coat in a medium to large sized room. But it depends on the soap ratio you use and how thick or thin you apply it.
How To Apply Soap Finish on Wood Floors
There are many ways soap finish can be applied to floors. One method is to use a mop. Another is use a firm bristled scrub brush on a stick, which might be the most standard traditional way of application. This Swedish site gives helpful images.
We didn’t have a mop or scrub brush, but we did have old bath towels, so that’s what we used and still use! It’s a labor of love requiring you to get down on your hands and knees. But it’s also a slow-paced and meditative process that can be refreshing to engage in.
Here’s how we initially applied our soap finish:
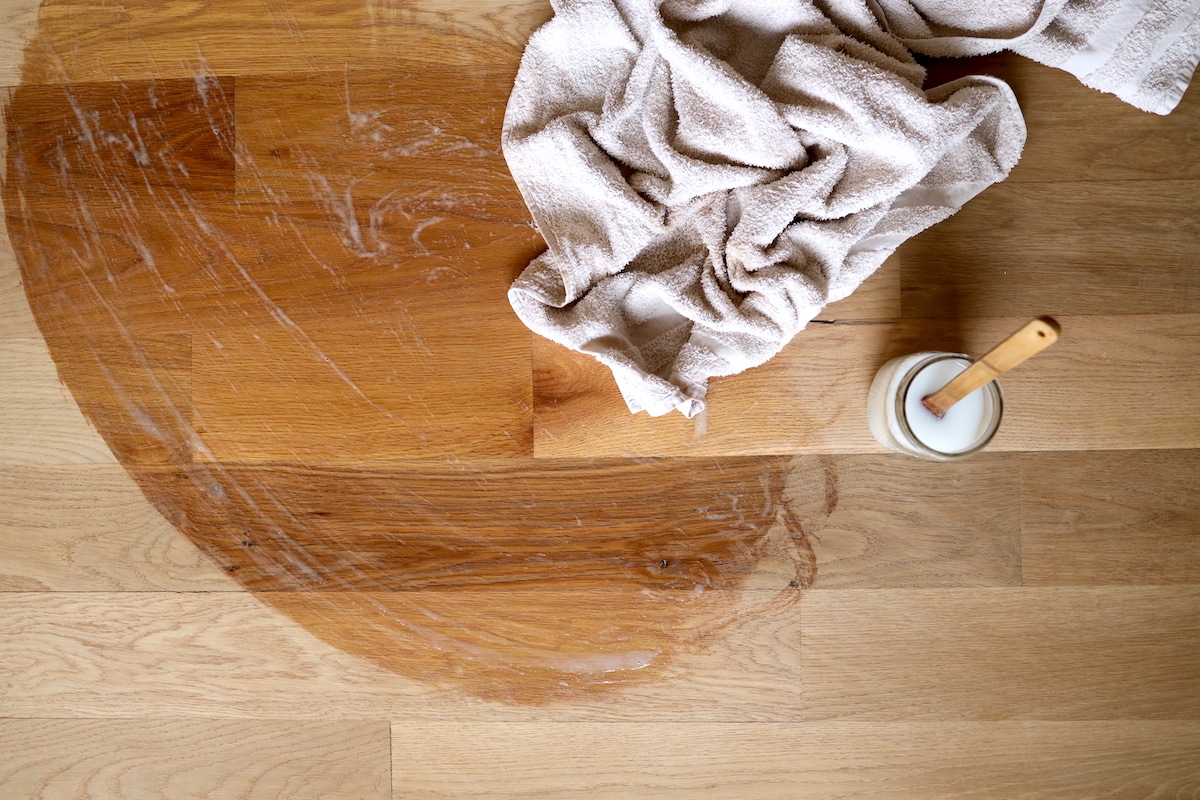
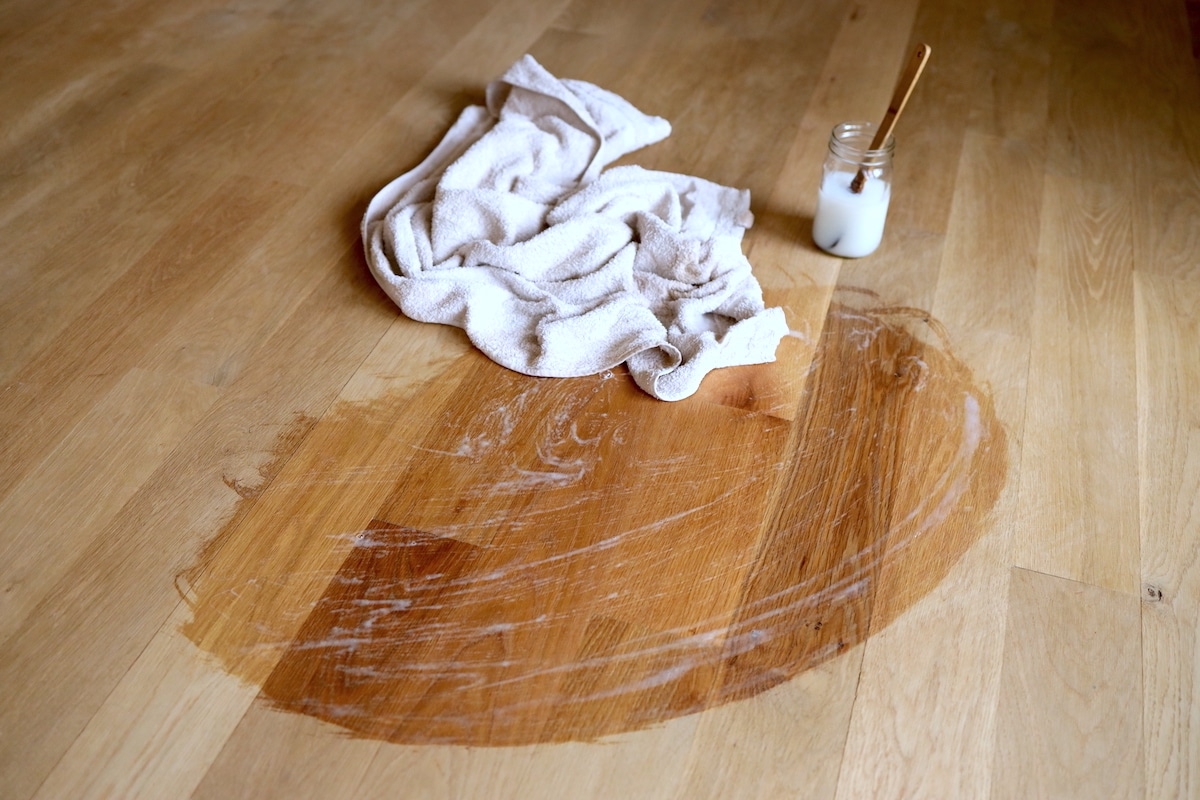
1. Starting in a far corner of the room, pour out a small amount of soap finish onto the floor. Work the soap into your bare flooring with the towel, applying an even coat.
(This initial soaking of the wood will likely cause the grain of the wood to stand up, so wiping up the excess soap and giving your floors a light sanding a this point is optional before moving on to additional coats.)
2. Continue applying soap row by row working your way toward the entrance to the room as an ending point.
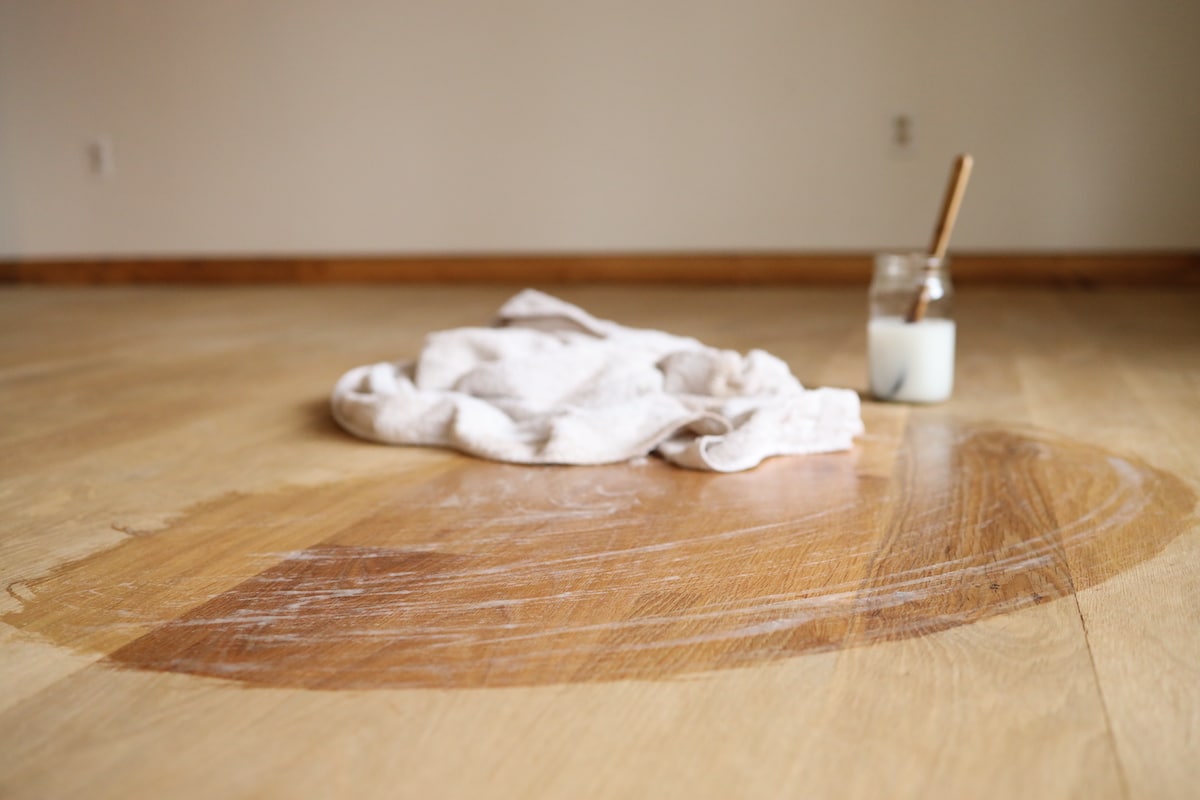
3. Repeat steps 1 & 2 until the wood seems to no longer be absorbing the soap. We did somewhere between 3-5 coats initially, but more may be needed.
4. Leave the final coat to soak in for a period, but before it begins to dry, come back through with a dry towel and wipe up any excess soap finish on the surface.
And that’s how you apply an initial soap finish to your floors!
What We’ve Learned Applying Soap Finish to Floors
One thing to note, and we learned this the hard way—don’t let your soap dry on your floors before going back through with a dry towel and wiping it up. You either need to come back through with another fresh coat of soap right away, or wipe it down. It’s very difficult to apply a fully even layer of soap across your floors. So if it dries unevenly, it will leave a streaky finish on your floors. The streaks reduce over time. But we’ve also had the headache of needing to give the floors a light sanding and starting over.
Also, we only sanded our floors down to 80 grit, which is common for wood floors. Many soap finish tutorials call for a much finer grit sanding. We’ve found the 80 grit to work well for our floors.
When it comes to what is recommended from here, there is again variation. What seems to be recommended is to reapply your Danish soap finish weekly for the first 3 months to fully condition the wood and provide a protective layer.

To be completely honest, we didn’t do that. We did a solid initial application. But then life hit; we had to move in our furniture, had a baby, and then scarcely applied additional soap finish in our first two years living in our home.
I can see where a three month period of weekly soap finish applications would really give you the full protection that soap finish offers—especially in high-traffic and accident-prone areas like the kitchen. But even with not doing this step, or even regularly maintaining our floors as we should have, our floors still look pretty darn good two years in.
Is Anything Needed in Addition to Soap?
If you research other Danish soap finish tutorials, you may come across an extra step of an initial application of materials like oxalic acid, or even lye itself, to your bare wood before applying your layers of soap finish. This is to provide a further whitening or bleaching effect on the wood.
We did not do this. My assumption is that if using lye based soap, the soap itself should provide the whitening effect. And, so far, this has been our experience after the initial application and reapplication—the floors come out lighter after each coat of soap, not darker.
You might be able to achieve an even whiter floor finish with an additional layer of something. But we have found this unnecessary. If anyone has differing information or ideas on this, please let us know!
Maintaining Wood Soap Finish Floors
After the initial application of soap finish, your floors will benefit from regular maintenance and reapplication of soap on a scheduled basis.
Reapplying soap finish to wood floors every 3 months is most commonly recommended. You can also do it on an as-needed basis depending on the use a room receives. For instance, we’ve found our kitchen requires higher maintenance than bedrooms do.
First, you’ll want to address any marks or spots that have shown up on the floors. The first thing to try is pouring hot or boiling water on the spot and trying to remove it manually with a towel.

If that is unsuccessful, you may need to give the spot a light sanding for removal. We picked up a sander on a stick from our local hardware store and have plenty of replacement sand paper sheets on hand.
Next, to reapply soap finish, simply follow the same steps and process used for initial application. We’ve typically just done one coat of soap finish, but multiple layers can be applied if needed.
You’ll likely want to remove furniture, not just work around it, so a consistent finish is achieved. This process lends itself very well to keeping on top of regular seasonal home cleaning!
Natural Alternatives to Wood Soap Finish
If you’ve gotten this far, you’re probably either feeling excited or uneasy about trying a wood soap finish on your floors. Either is ok! We were pretty unsure ourselves when weighing the options.
If soap finishing floors isn’t for you, we thought we’d mention some of the other non-toxic floor finish options we came across in our research that can also be a safe flooring option for your family.
Tung Oil
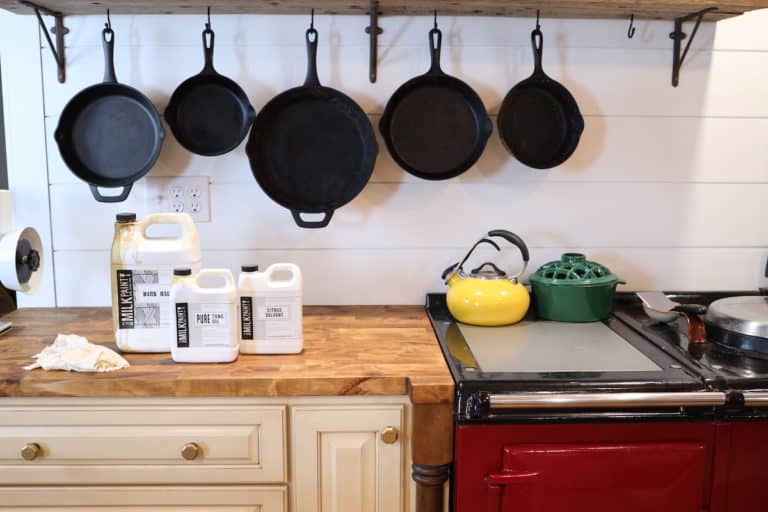
100% Pure Tung Oil from RMP Finishes is as natural and solid of a wood sealer as you can find. It will require multiple coats, and does take some time to cure. But, once cured, tung oil provides a nearly waterproof coverage. You will get yellowing over time that is typical of any oil. In addition to standard tung oil, there is a Dark Tung Oil option that gives a natural dark pigment to your wood that is beautiful!
We have used their Dark Half blend (half Dark Tung Oil, half Citrus Solvent) to finish our butcher block countertops. Tung oil is the other option we seriously considered to finish our white oak floors with and many product reviews speak very highly of Tung Oil as a wood floor finish.
If you use promo code FROMSCRATCH you can get 10% off your order! We have been using Tung Oil from RMP Finishes for years now and are happy to partner with them earning a small commission on sales at no additional cost to you!

Rubio Monocoat
Another natural floor finish I’ve come across in my research is from Denmark based Rubio Monocoat. Their Oil Plus 2C product is a promising floor finish option. To quote their website, “Oil Plus 2C is a revolutionary wood finish that colors and protects wood in one single layer. It is plant-based and contains 0% VOC. Each color can be mixed to create custom colors, allowing for endless color possibilities.”
Their color chart offers an extensive selection of colors and can show how the colors looks on different wood species. They even have colors that come close to mimicking that authentic Nordick look!
So What is it Going to Be?
Soap finished floors are truly an old world finish method that can connect us back to the simple and thoughtful life of our ancestors. But as you’ve seen, that can mean a lot of work!
So what’s it going to be for you?
We’d love for this to be a space where knowledge and expertise are shared along with questions and troubleshooting.
Drop a comment below. We so look forward to hearing from you!
Some of the above links are affiliate links. This means we earn a small commission on qualifying purchases at no cost to you. We are so appreciative of your support!
Check out more of our favorite home projects:
- Simple Farmhouse Shelf for Cast Iron Storage
- How To Install DIY Library Ladder Hardware
- Homemade Dish Soap Bar Recipe – Zero Waste & Works!
Pin it for later!

Thanks so much for taking the time to write and post this! We chose soap finish for our cabin floors in remote Alaska, and this will be our second summer with them. I’m having trouble deciding which type of mop to use for weekly cleaning, since the soap finish says not to use microfiber!
How do you mop/clean regularly? Do you do a weak soap mix and then rinse with a clean mop? No rinsing?
Some of our floors came out slippery. Is this just due to too much excess soap during initial application?
So excited to learn the floors as we spend more time with them.
Yes! It sure is an intimate relationship with your floors isn’t it! Those are good questions and I can share what we do but if anyone else out there has better options, let us know. So we’ve just stuck to our method from the post of using towels for our routine cleaning. I could see where a mop or brush of some sort would be a lot easier than getting down on our hands and knees, but we haven’t pulled the trigger on anything yet. I use one towel for application that gets pretty saturated, let the soap soak in for 10 or so minutes, and then use a second dry towel to wipe it up. I don’t to any other rinsing then. I noticed one of the links I had in the post wasn’t working, so I found it again and it may be helpful for you: https://www.gysinge.com/article/1061/skurgolv. If I were to purchase something for applying, either a mop or a firm bristled scrub brush like in the link would probably be the route I’d go. And as far as being slippery, I know what you mean. It can almost have a wax-like coating when it builds up. I don’t know that we experienced this too much, but some areas were soaped more than others. I imagine it will just ware away over time. But I’d be curious to know if it persists for your over time or not. Hope that helps! Thanks for stopping by and all the best to you and your floors!
Living in Denmark with soap finished floors, I say you did well. I especially enjoy the feeling of the wood.
We would never apply lye to an oak floor, as it will react and darken the oak in strange greenish tones. But with our traditional softwood floors, we ususally start with a lye of slaked lime. The calcium bleach the softwood, but also bind with the soap, deep in the wood, to a almost unsoluable calciumsoap, that make the floor more resistant. This way a softwood floor can easily last centuries. I expect to go soap the floor 5-8 times, before it starts to be resistant. The I vacuum the floor weekly, and only wash when I visually find it needs a wash.
The ratio of soap to water don’t need to be perfect. With less soap, you just need to wash more times in the beginning, bu you probably get a higher penetration into the wood, and thus a better result. A rough scrub is used traditionally, but rags works fine too. Microfiber probably just takes some of the soap away, meaning a little more work, but I don’t se why not to use them, if they are what you have.
A soap finished floor will easily last several centuries, and attain more beauty as they mature.
Wow, so much great information here! Thanks for sharing. And it’s great to hear from someone in Denmark where soap finished floors are common. It’s so tricky to find solid info on them in the US. Thanks again and take care!
Thanks for your great info. I am using soap finish in a barn renovation. I hope I discovered a useful factoid: instead of wiping the excess off with a towel, I got a small hand held squeegee which I think helped push the soap mixture into the wood a bit better. I say this as yesterday I used rags and think I lost a lot of the soap in the rags whereas the soap mixture went much farther with the squeegee. My perception it might have speeded up the application process but not sure. Being this is only my second coat, I’m looking for relief. LOL
That sounds like a fun project! And thanks for sharing that tip! I’ve wondered about a squeegee but never tried it. I could see where that could work really well though… and quick as you mention! All the best and definitely drop in with any other tips you pick up along the way!
great article. But could we use this on walnut flooring ? Especially flooring that has already had some kind of finish applied 15 years years ago…I anticipate the floor will need a sanding down first to get rid of the top coat.
Has anyone tried it on walnut flooring 😕 Any tips would be much appreciated.
Hi! Walnut floors sound beautiful! I believe it could be used with walnut. And yes, I think your best best would be to sand them down first so you’re applying to raw wood for best penetration/finish. The thing you’ll want to consider is the whitening/bleaching affect of the soap. Typically soap is paired with lighter colored woods to enhance their light coloring. But I don’t see why it wouldn’t work if that’s the route you want to go. Another good natural finish option for flooring is Tung Oil. There’s a natural or dark color option with it. We use that for our butcher block countertops and it holds up great. I’ve heard of people using it for flooring with great results too. Here’s a post we did: http://fromscratchfarmstead.com/tung-oil-for-butcher-block/. Good luck to you!
Good morning,
Thank you for all the helpful information. I have done a test patched on my newly sanded pine floors in using the mixture of soap and water you suggest. The floors are old pine from 1900 but were painted when I purchased the house. I was a bit shocked how new and reddish they look. With subsequent applications and time will they whiten a bit more and develop a nice patina with the soap finish? Thank you!
Sounds like a fun project! I can offer some thoughts but not having used it on softwoods myself I’m certainly no expert there. First of all, are the floors still painted, or did they get sanded down? Soap is best on raw wood. Another commenter mentioned that they typically see softwoods first treated with a whitening agent like lye or slaked lime for more of a whitening affect. I also wonder if the wood is red pine versus white pine, which might lend toward a reddish hue. So I can’t say for sure if it will whiten up for you but hopefully that gives some tracks to run on! Good luck and thanks for stopping by!
We’re building a backyard garden studio to work from. We got nice 5” wide Douglas fir planks we’ll use for the floors, walls, and ceiling. I think we’ll be following your advice here and doing a soap finish on the floors. I wonder if we should also do at least one coat on the walls and ceiling? Or if we should apply the lye wash and then soap coating to the boards before mounting them to the wall and ceiling? I’d appreciate any insights. Thank you. Great article!
Hi there! Sounds like an exciting and beautiful project! As far as applying soap before or after install, I think it depends if you’ll be sanding them after you install. If you won’t be sanding, then I think you’d be fine to soap finish them before install. In fact, this may help in the long run as you can coat the sides and back better for more even sealing. But with our floors, we only applied soap after install and that turned out fine too. It would probably be good to coat the walls and ceiling too to not leave any raw wood. And the lye would definitely whiten things up, so I think that’s optional for the look you want to achieve. You can always do a test piece and see how it turns out with or without it. Hope that helps! Just keep in mind, if this is an outside building, soap finished floors are not the most waterproof but regularly reapplying the soap will definitely help them resist water better. Thanks for stopping by and good luck with the project!
Hi, I followed your method exactly,, with the same type of soap and used a ratio of 1/2 cup of soap to 1 quart. I applied 4 layers. The 4th layer, applied 3 days ago is slightly sticky and dirt sticks to it, footprints etc. Is this how your floors are upon finishing? If not, I would welcome any suggestions!! Thanks! Licia
Hi Licia! Hmm, the only places it might have been sticky for us is if I missed wiping down an area enough and then there’s a bit of soap build up that could be sticky. Otherwise, the soap absorbed in nicely and just left a smooth, soft feel once dried. I wonder if it didn’t get wiped down enough or if the rag or mop you used to apply and wipe was over saturated? I did need to regularly wring out my towels, or swap them for fresh ones, as I was wiping. I wonder if one more coat with a less concentrated soap mixture and a good wipe down could help remedy that? Hope that helps!
I want to thank you for your insightful post on Soap Finished flooring. I’ve cherished our soap-finished soft fir flooring for 12 years here in California, but it’s proven to be quite high-maintenance. I could use some advice:
1) Water and oil stains are causing an amber hue after mopping. Any tips for spot sanding or refinishing?
2) Can you do localized treatment, or is full-floor sanding and re-soaping necessary?
3) For spot treatment, how long to sand before reapplying soap, and do you recommend machine or hand sanding?
4) Any experiences with pets or handling red wine on soap-finished flooring?
Living with soap-finished soft flooring has been stressful in the US. No hardwood specialist is willing to refinish the floors with a soap finish here. Considering transitioning to Bona Craft Oil or Bona Nordic Seal, but I’m nervous about the ambering effect of going from Soap to an oil-based solution over time.
Your insights would be incredibly valuable—thank you!
Hi there! It’s good to hear from another soap finished flooring user and enthusiast in the US! And I hear you about the high-maintenance aspect. I’ll do my best to weigh in on your questions, but being as I only have experience with our white oak hardwood floors, I imagine the soft fir flooring may call for different practices.
When I reapply soap, I typically only do one room/space at a time. The key for me has been to not let the edge of where the new soap that you’re applying dry on its own before you wipe it down. If it dries, it usually leaves a visible line. But if you wipe it down where there’s no standing water/soap on the floor it usually just blends in. I’ve mostly just spot sanded areas where grease, pet, kid, kitchen, other stains pop up. The best thing you can do is try and take care of the spot right away before things have the chance to set in. I just keep some mixed soap on hand for these occasions and pour some on the spot, let it sit for a bit to pull out what it can from the wood, then wipe down really good. When the spot does not go away, like a heavy grease stain, then I do some light hand spot sanding and reapply soap on top. The unfortunate thing about this is that it almost always leaves the spot looking like fresh raw wood again where it stands out from the rest of the “worn” wood around it. I’ve just learned to live with that and it all blends together again over time. The other spot treatment that I know is recommended but I haven’t played with much is pouring boiling water over the spot to try and lift stains out. This could work, especially for grease. When I sand, I just sand until I can’t see the spot anymore or it’s minimized enough that I can live with it. I don’t have experience with red wine. For pets, we do have a dog, but he’s pretty well trained and we keep his food and water out in the mudroom where this is tile flooring. We’ve also trained him when he comes in from outside, we say “towels” and he patiently waits by the door where we have a towel we wipe down his paws with. He’s the best 🙂
I can understand it being hard to get anyone to do work on the floors with such an uncommon practice here. I don’t have experience with those oils, but you might look into Tung Oil as an option too. We use that on our butcherblock countertops and it has held up really well, been very waterproof, and is also easy to do spot treatment with when you need to reapply. If you do apply a new finish, then you will definitely need to do a full resanding on all the floors before applying. The soap will have blocked the pores and won’t allow the oil to penetrate and seal unless it’s down to raw wood again. Hope that helps! All the best to you!
Hi, I got an apartment with parquet floor that had not been refreshed or refinished for 25-30 years. In all the the places where there had not been a bed or a rug, it is worn down to raw wood (white in color), while under the bed it has original finish and darker orangey color. The place will be occupied by a tenant within a week, so I have a few days to do something (or not) about the floor. There will not be a sanding down and refinishing, there is no time and energy for that. My options are to leave it as is, or to apply some protective coating on the raw wood, or perhaps on the whole surface.
I am reluctant to expose the raw wood to any further deterioration. Applying soap layers seem more doable than other things, but I wonder if I should include or exclude the areas with finish still remaining.
Overall, what is your opinion of the feasibility of this rescue operation? Heck, I may not even get the soap flakes in time!
Thanks much for any advice!
Hi there! First off, sorry to not reply sooner to you. We’ve had some travels along with harvest season and fallen behind. I hope you were able to pull together an option that worked for you! My thoughts are that, while applying soap over the worn down floor areas would probably do something to seal/protect the floors in this instance, I’d probably view it as more of a bandaid than a fix. For the soap (or really most any finish) to be effective you’d need to do a full sanding so you’re applying to raw wood so the pores of the wood can be fully open. Given the timeframe you’re working in and not wanting to sand, I’m really not sure of an option to apply to reseal the floors though other than soap. This is certainly not the cheap (or natural) way to go, but probably your best and quickest fix would be to lay something like vinyl plank flooring down on top of it for a completely new floor that’s also durable. The parquet flooring underneath would make a nice base and be preserved if you ever want to expose it again later. It’s pretty simple to install yourself or you can hire. Just sharing my thoughts. All the best to you!
To add: I am in Canada and neither of the tried and recommended brands ship here. 🙁
Hi there, thank you for sharing your experience. We would like to try out the soap finish. Our floor was covered by carpet for more than 10 years so after removing the carpet, there are small holes on the floor. Can we use the regular wood filler sawdust+wood glue to fill the holes? Or should we use something different so we can apply the soap finish afterwards? Thank you!!
Hi! I would think wood glue/sawdust would be fine for filling holes. The only thing is that the glue wouldn’t absorb the soap the same, but it should still hold up fine over time. I used a standard wood filler to fill small nail holes along the perimeter, which are still doing fine. Hope that helps and good luck to you!